14.2 VPS Initialization and Security Configuration
Goal for this section: Complete your server's first connection, system updates, 1Panel installation, and security hardening—making your server both user-friendly and secure.
Xiao Ming opens his terminal, ready to connect to his server for the first time.
Step 1: Connect to Your Server
After purchasing a server, you'll receive three things: public IP, username (usually root), and password.
What is SSH?
SSH is remote control. Your computer is the remote, the server is the TV—SSH is the invisible infrared beam that lets you operate a distant machine from home. You learned about SSH principles and key configuration in Chapter 10; now let's put it into practice.
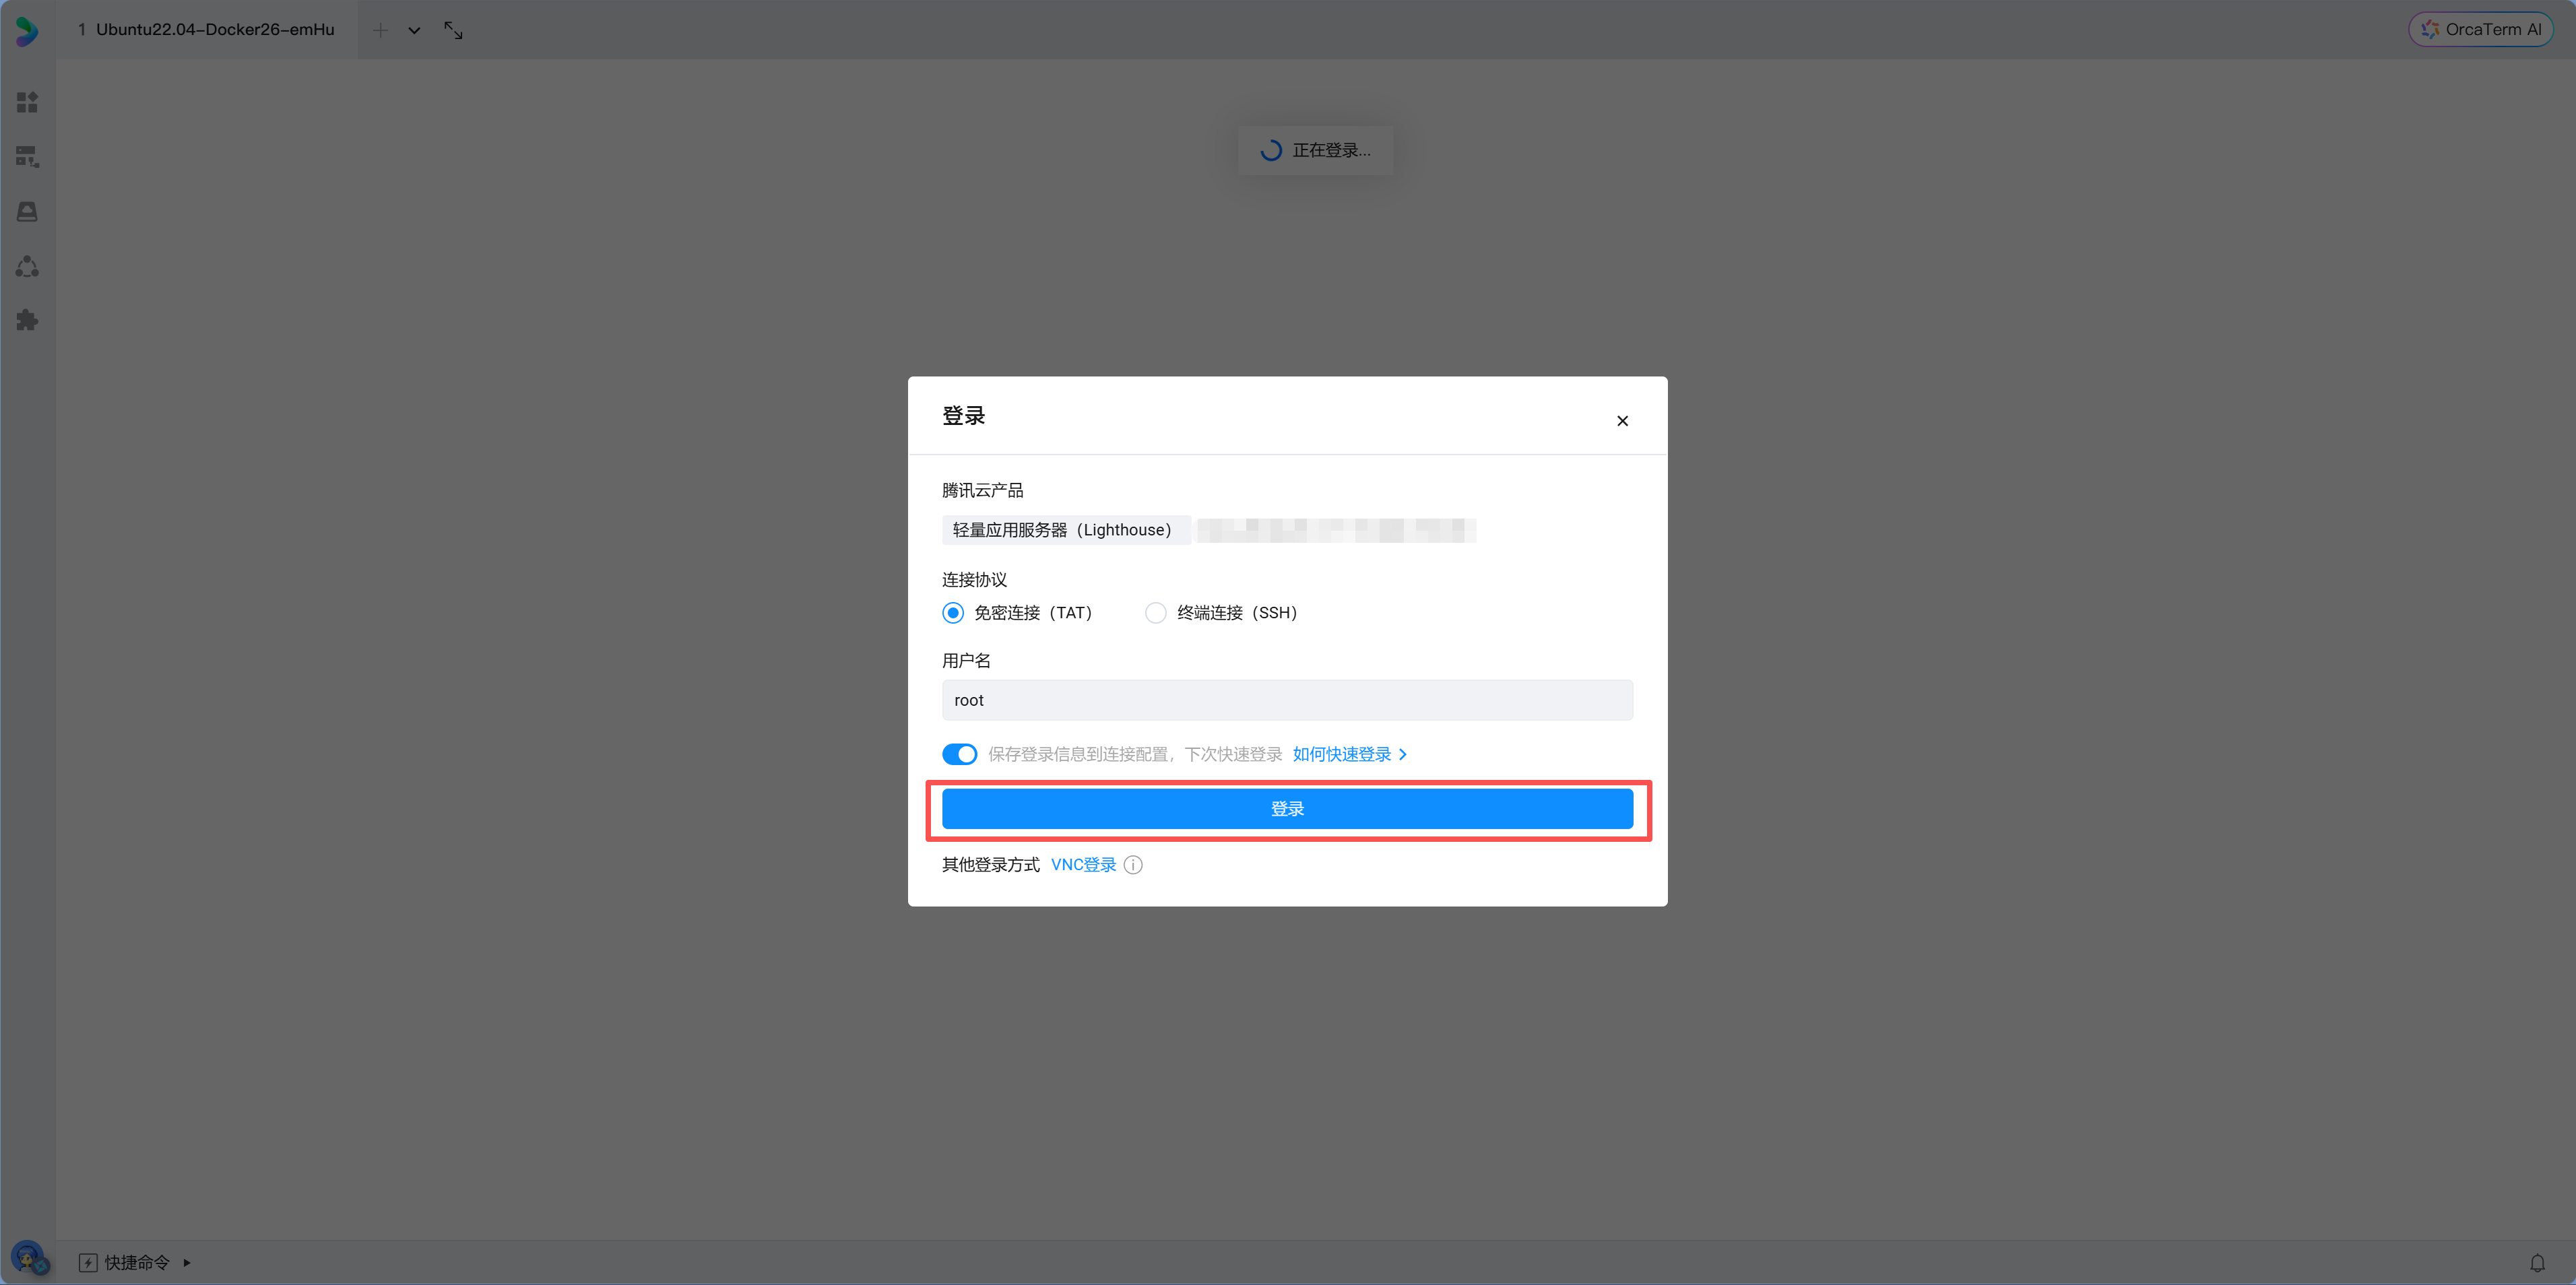
Method 1: Cloud Provider Console Password-Free Login (Recommended for Beginners)
The simplest way is to use the web terminal provided by your cloud vendor:
- Open your server console
- Navigate to the server overview page
- Click "Password-Free Login / Login" in the "Remote Login" section
- The browser will automatically open a web terminal where you can enter commands
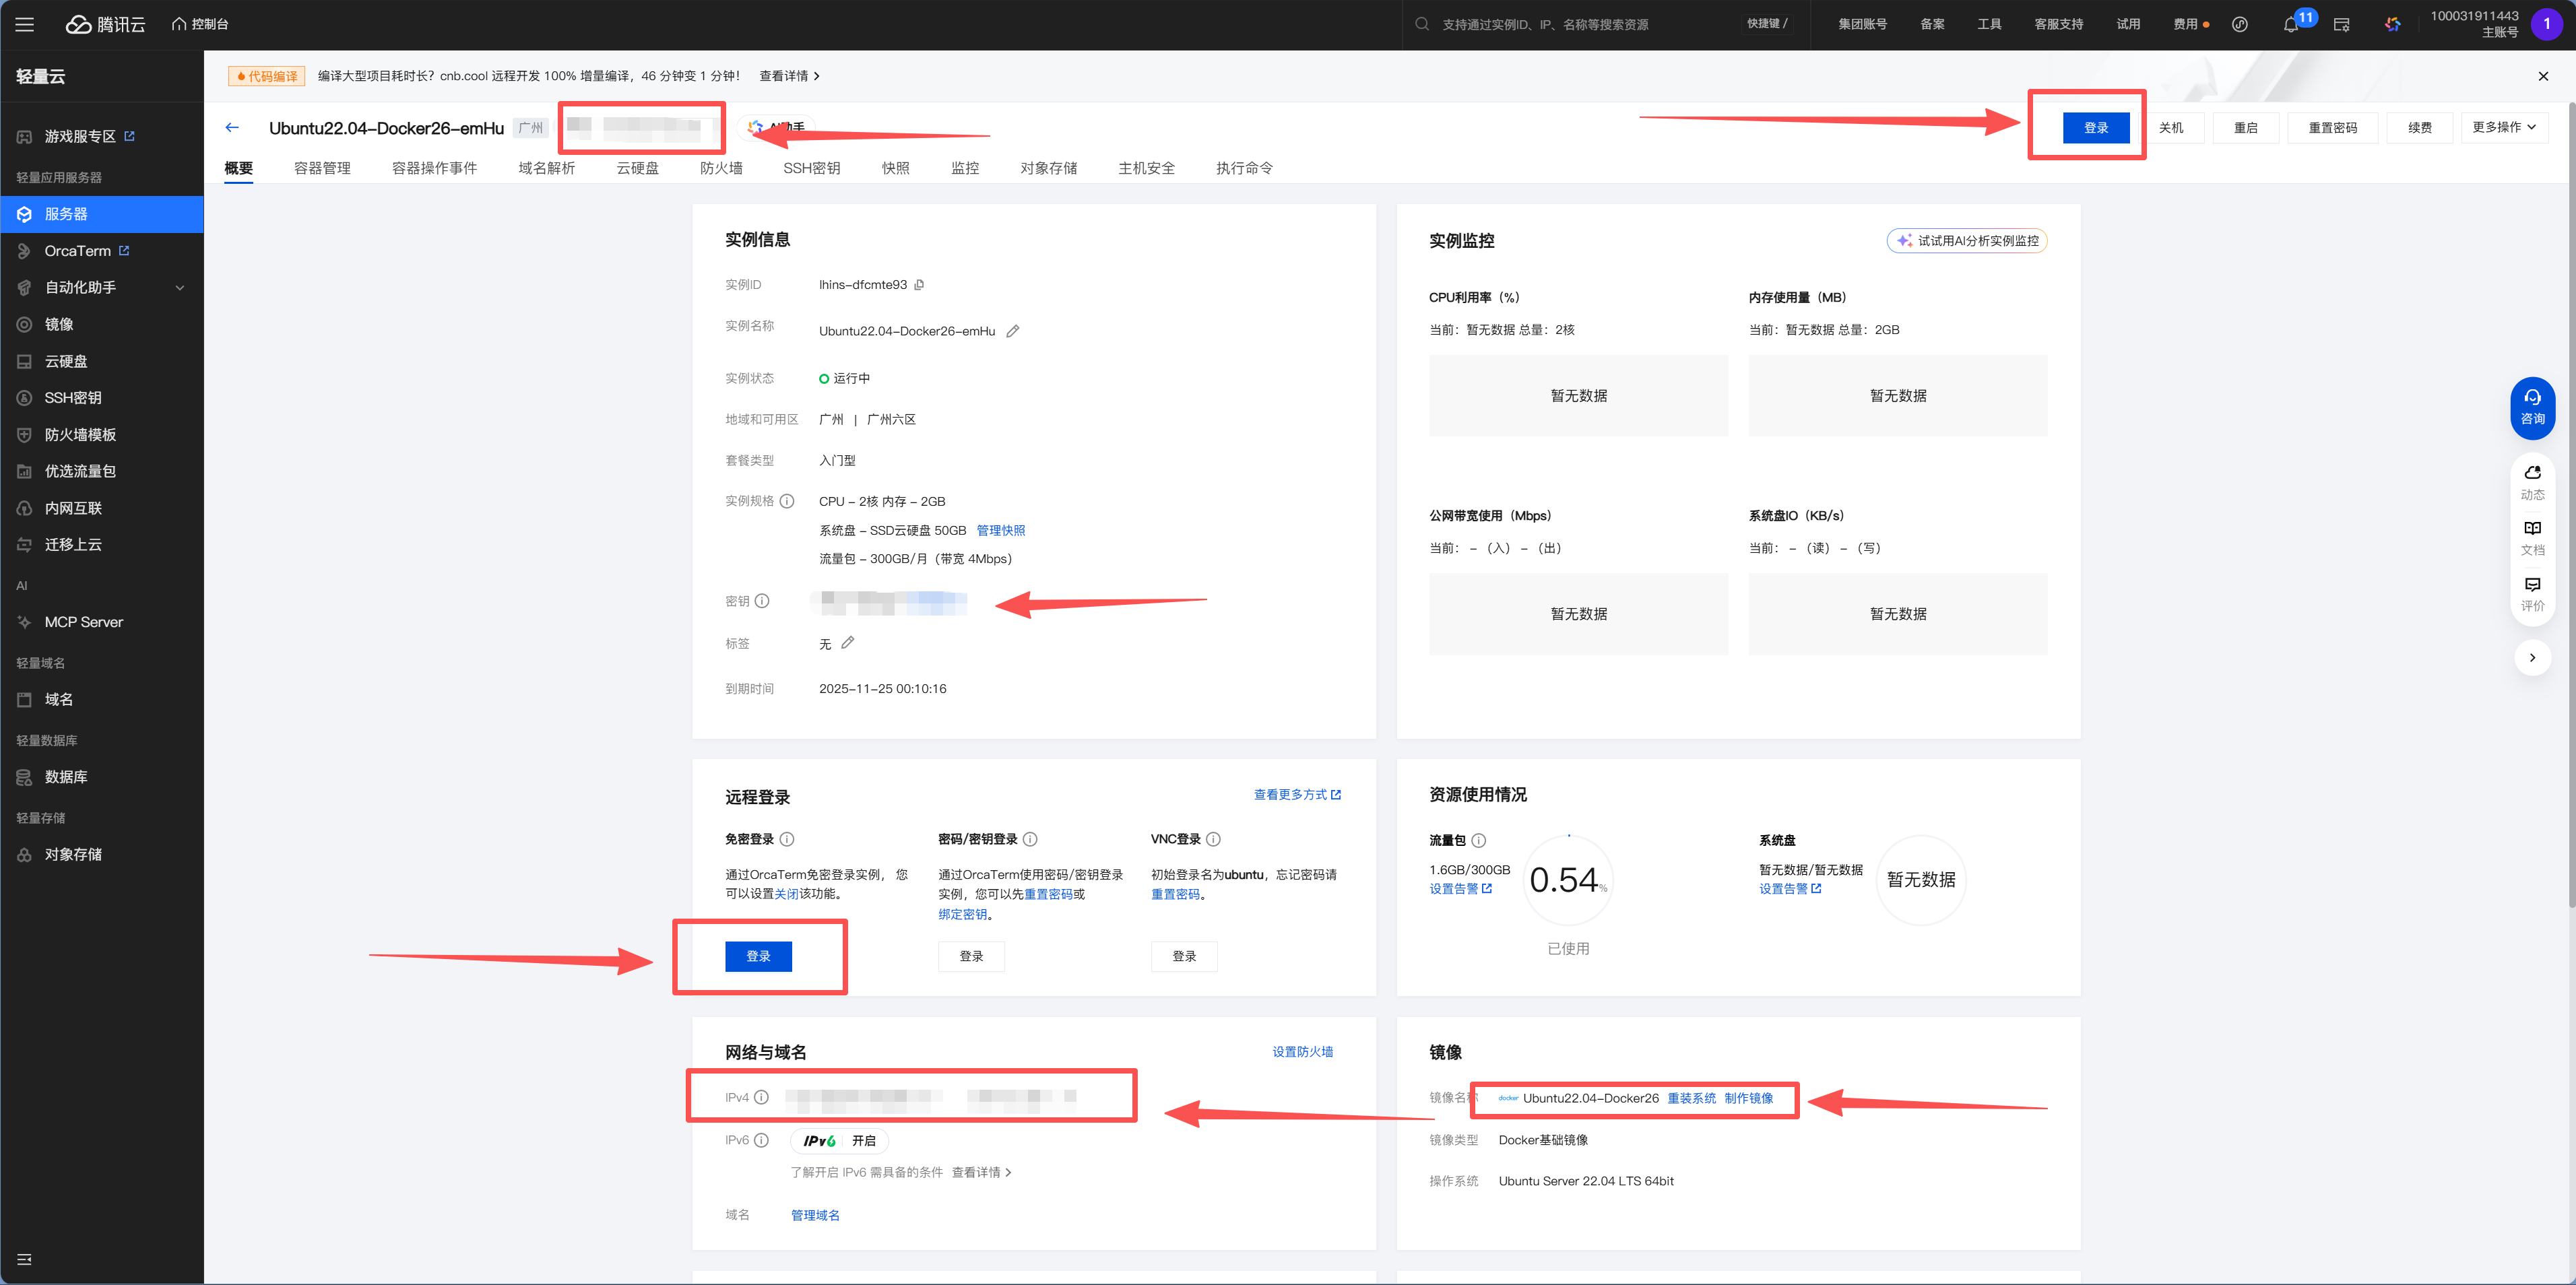
Xiao Ming clicks "Password-Free Login," and a black terminal window pops up in his browser. The prompt shows root@xxx:~#—"I'm in!" He tries typing ls, and nothing appears on screen—empty. Then he types pwd, which shows /root. This is his server, a clean, empty system waiting for him to install things.
Method 2: Local Terminal SSH Login
If you prefer working in your local terminal (more convenient for ongoing work), open your computer's terminal (PowerShell for Windows, Terminal for Mac) and type:
ssh root@your-server-ipOn first connection, you'll see a fingerprint confirmation prompt:
The authenticity of host '1.2.3.4' can't be established.
ED25519 key fingerprint is SHA256:xxxxx...
Are you sure you want to continue connecting (yes/no)?
Type yes and press Enter, then enter your password. Success is indicated when the prompt changes to root@xxx:~#.
It's normal for password input to be invisible
When typing passwords in the terminal, no characters appear on screen (not even asterisks). This is a Linux security feature—just type confidently and press Enter.
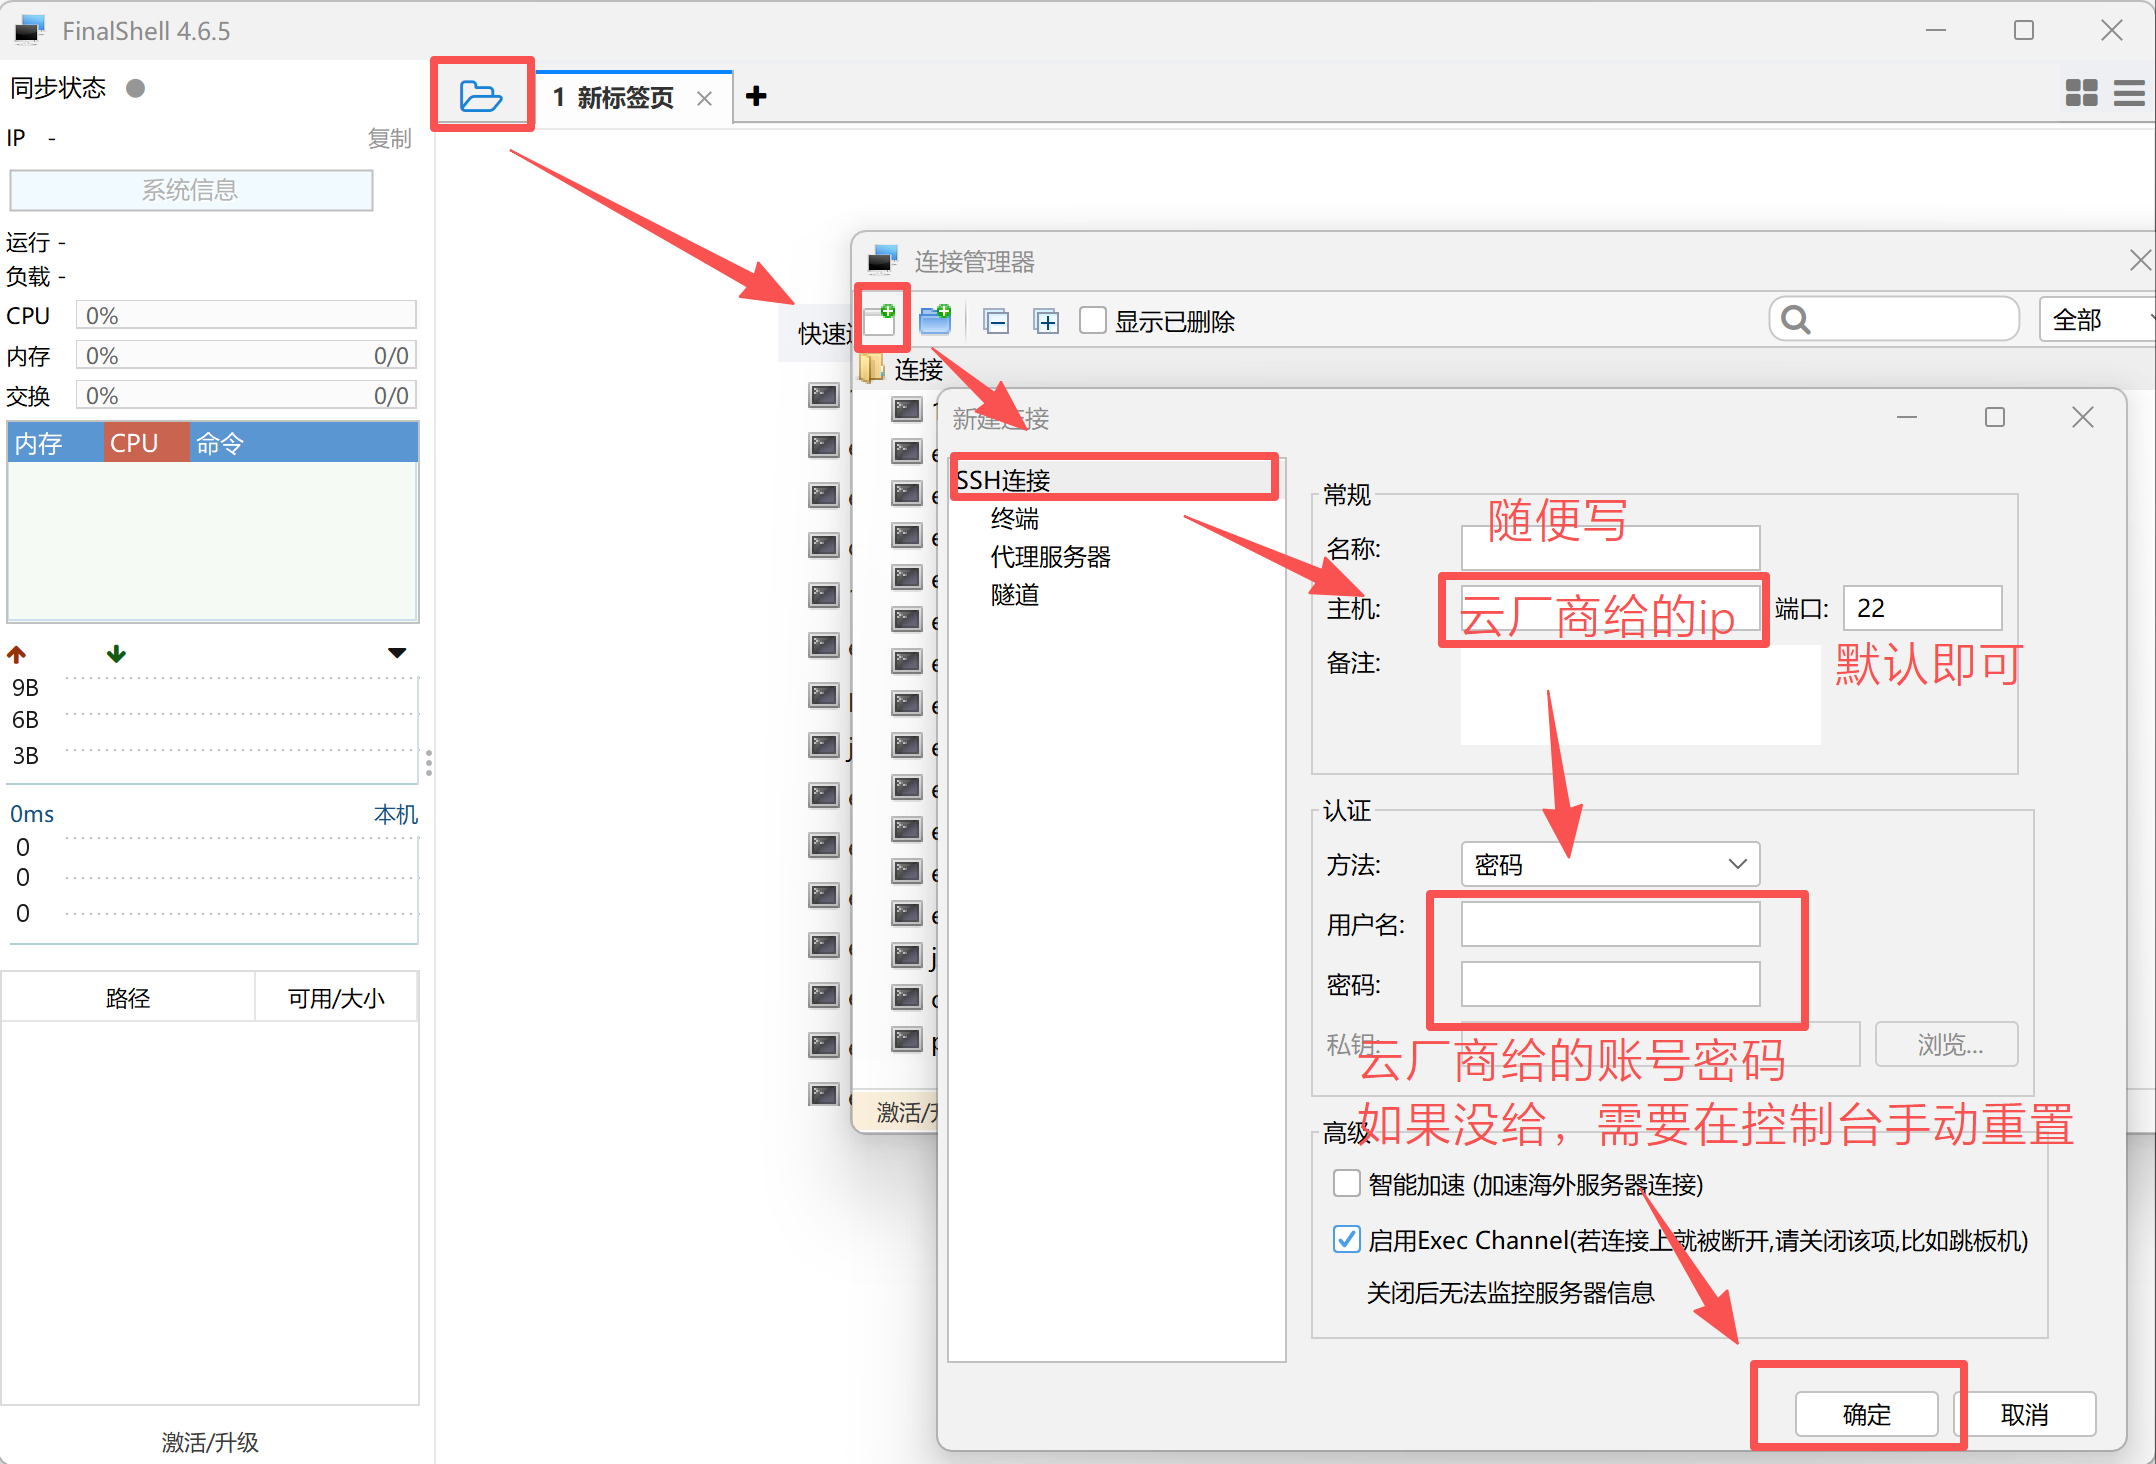
Method 3: FinalShell (More Convenient for Daily Management)
If you want a better terminal interface plus file manager, you can use FinalShell (official site: https://www.hostbuf.com/t/988.html).
- Open FinalShell → New Connection
- Host: Server public IP
- Username:
root - Password: The password you set when purchasing the server
- Click OK, double-click the newly configured server to connect
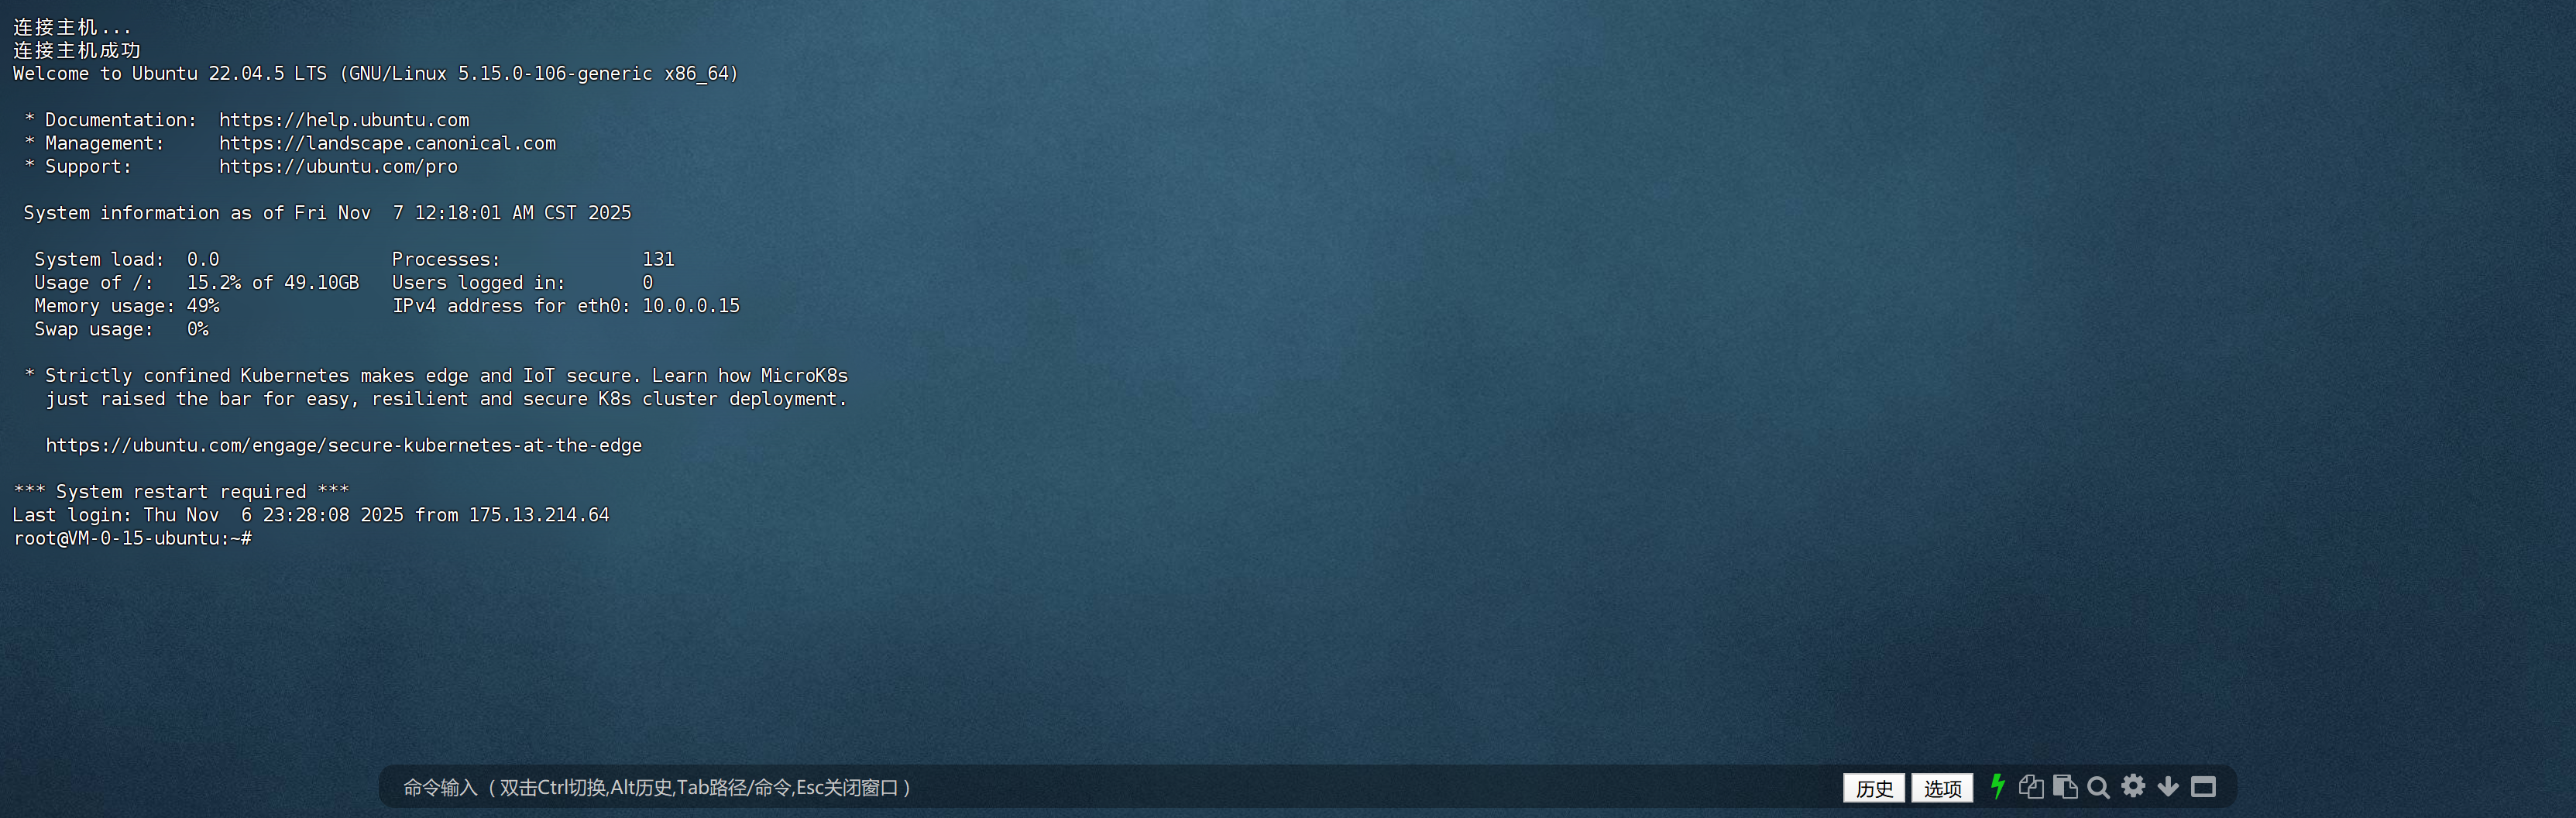
Step 2: System Updates
The old hand says: "Don't get excited yet—lock the doors and windows first. A naked server on the internet gets scanned within minutes on average."
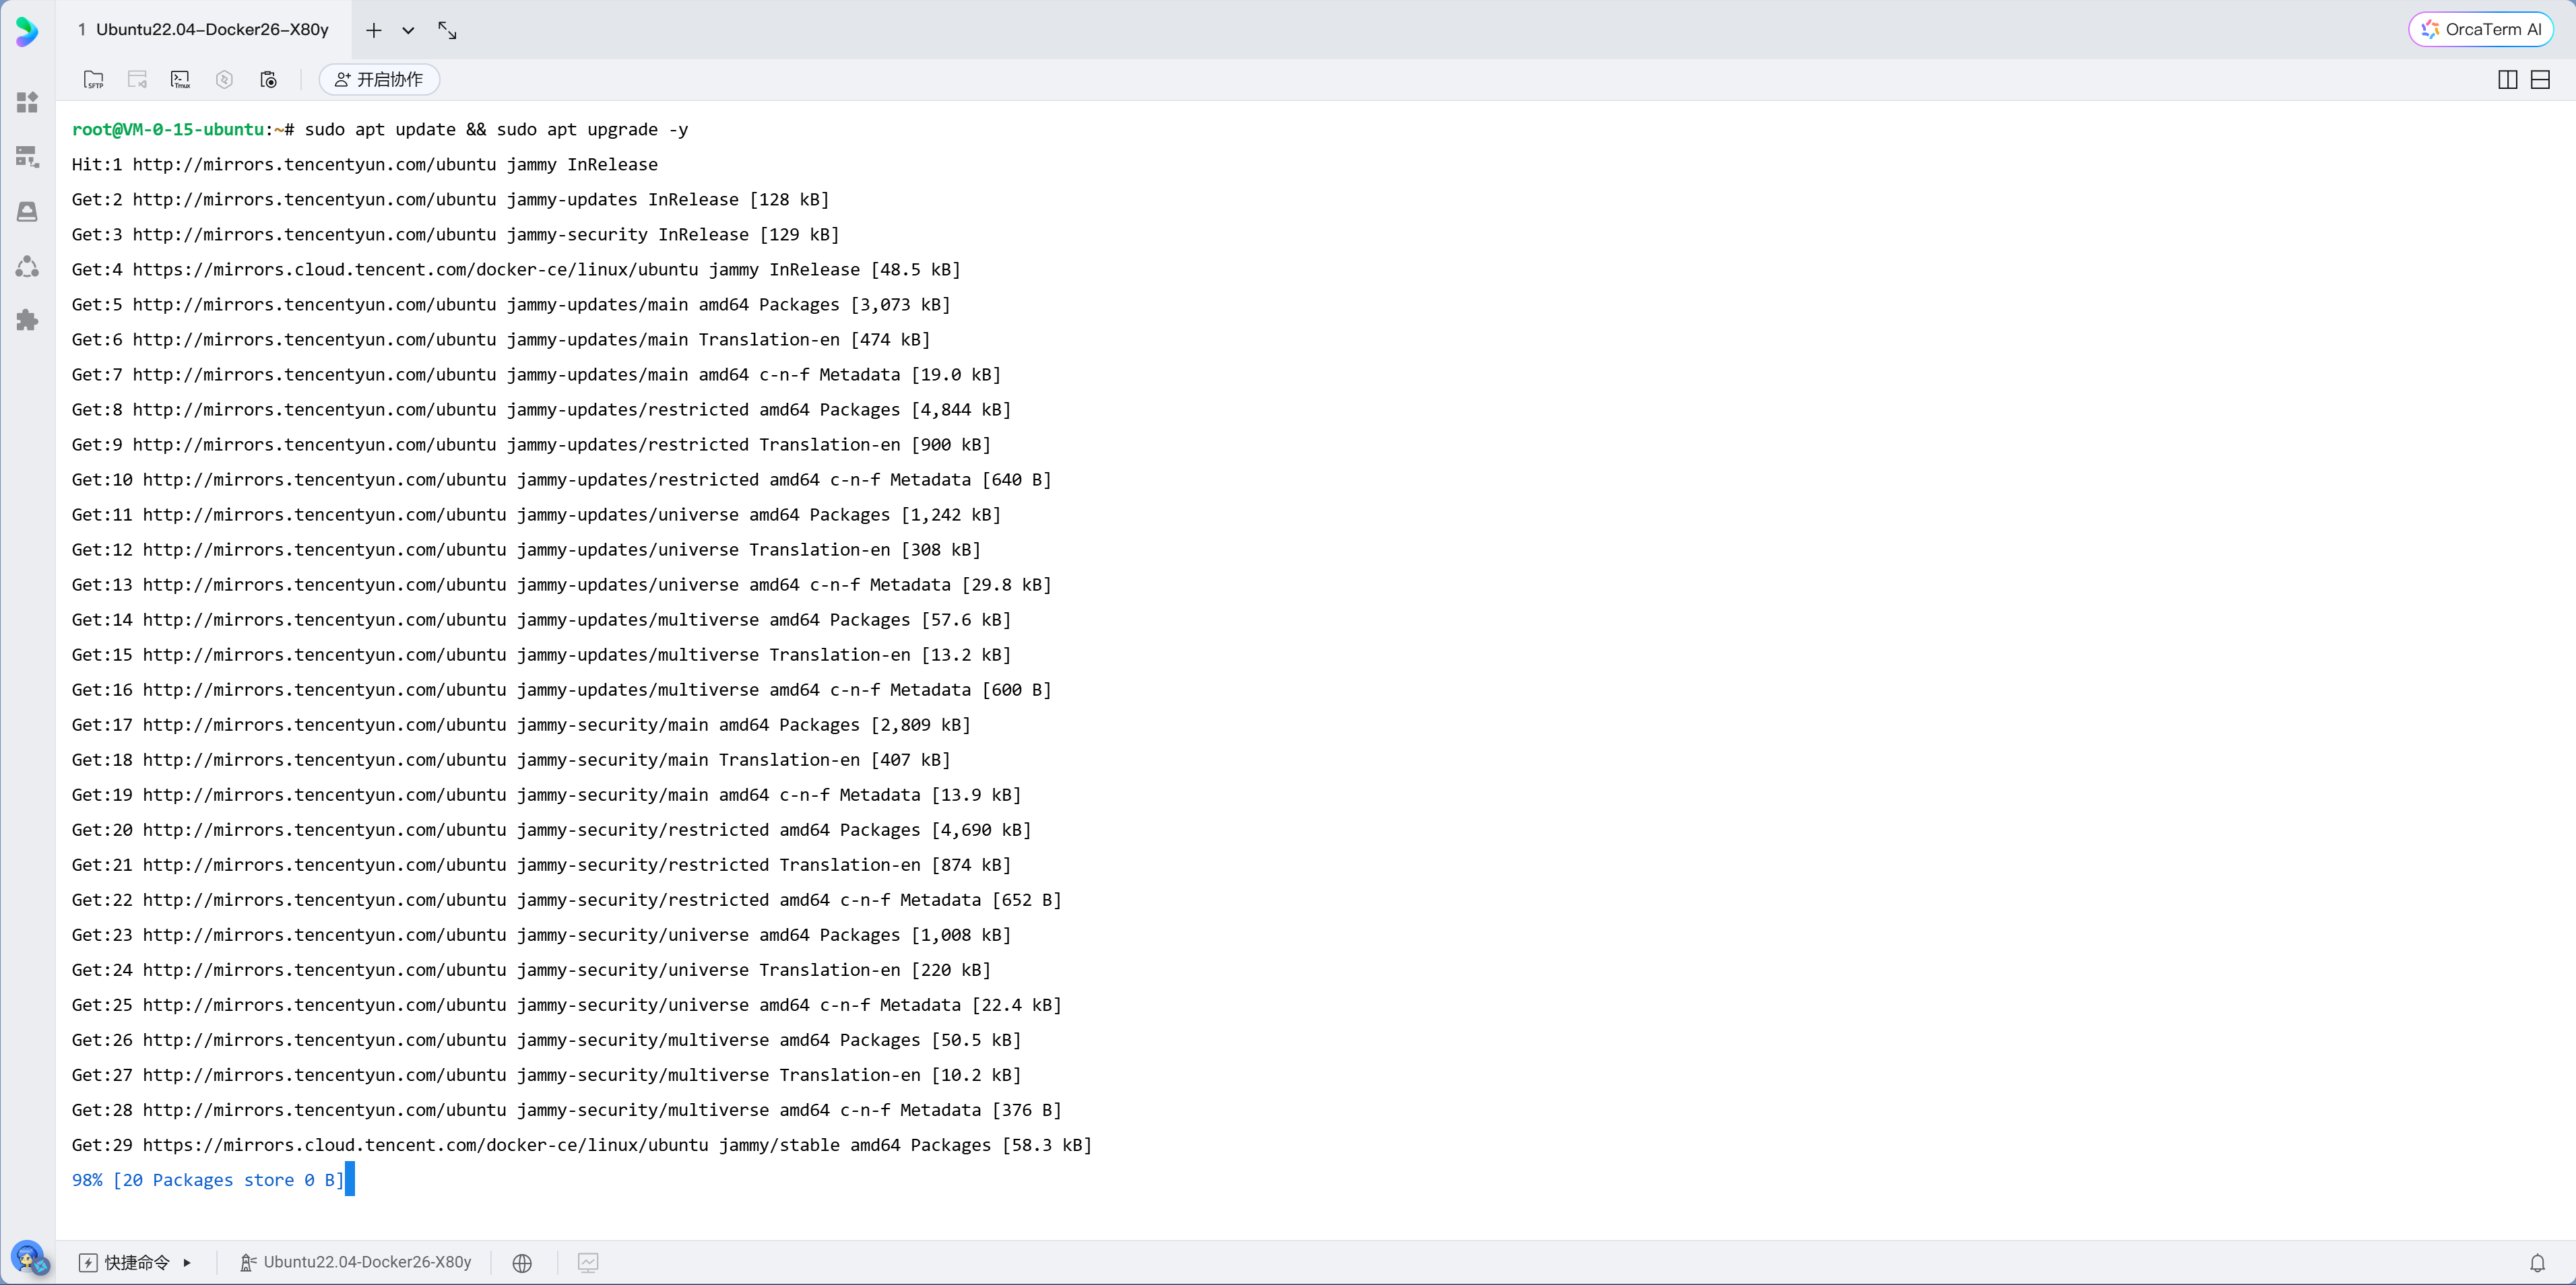
The first thing after logging in: update system packages:
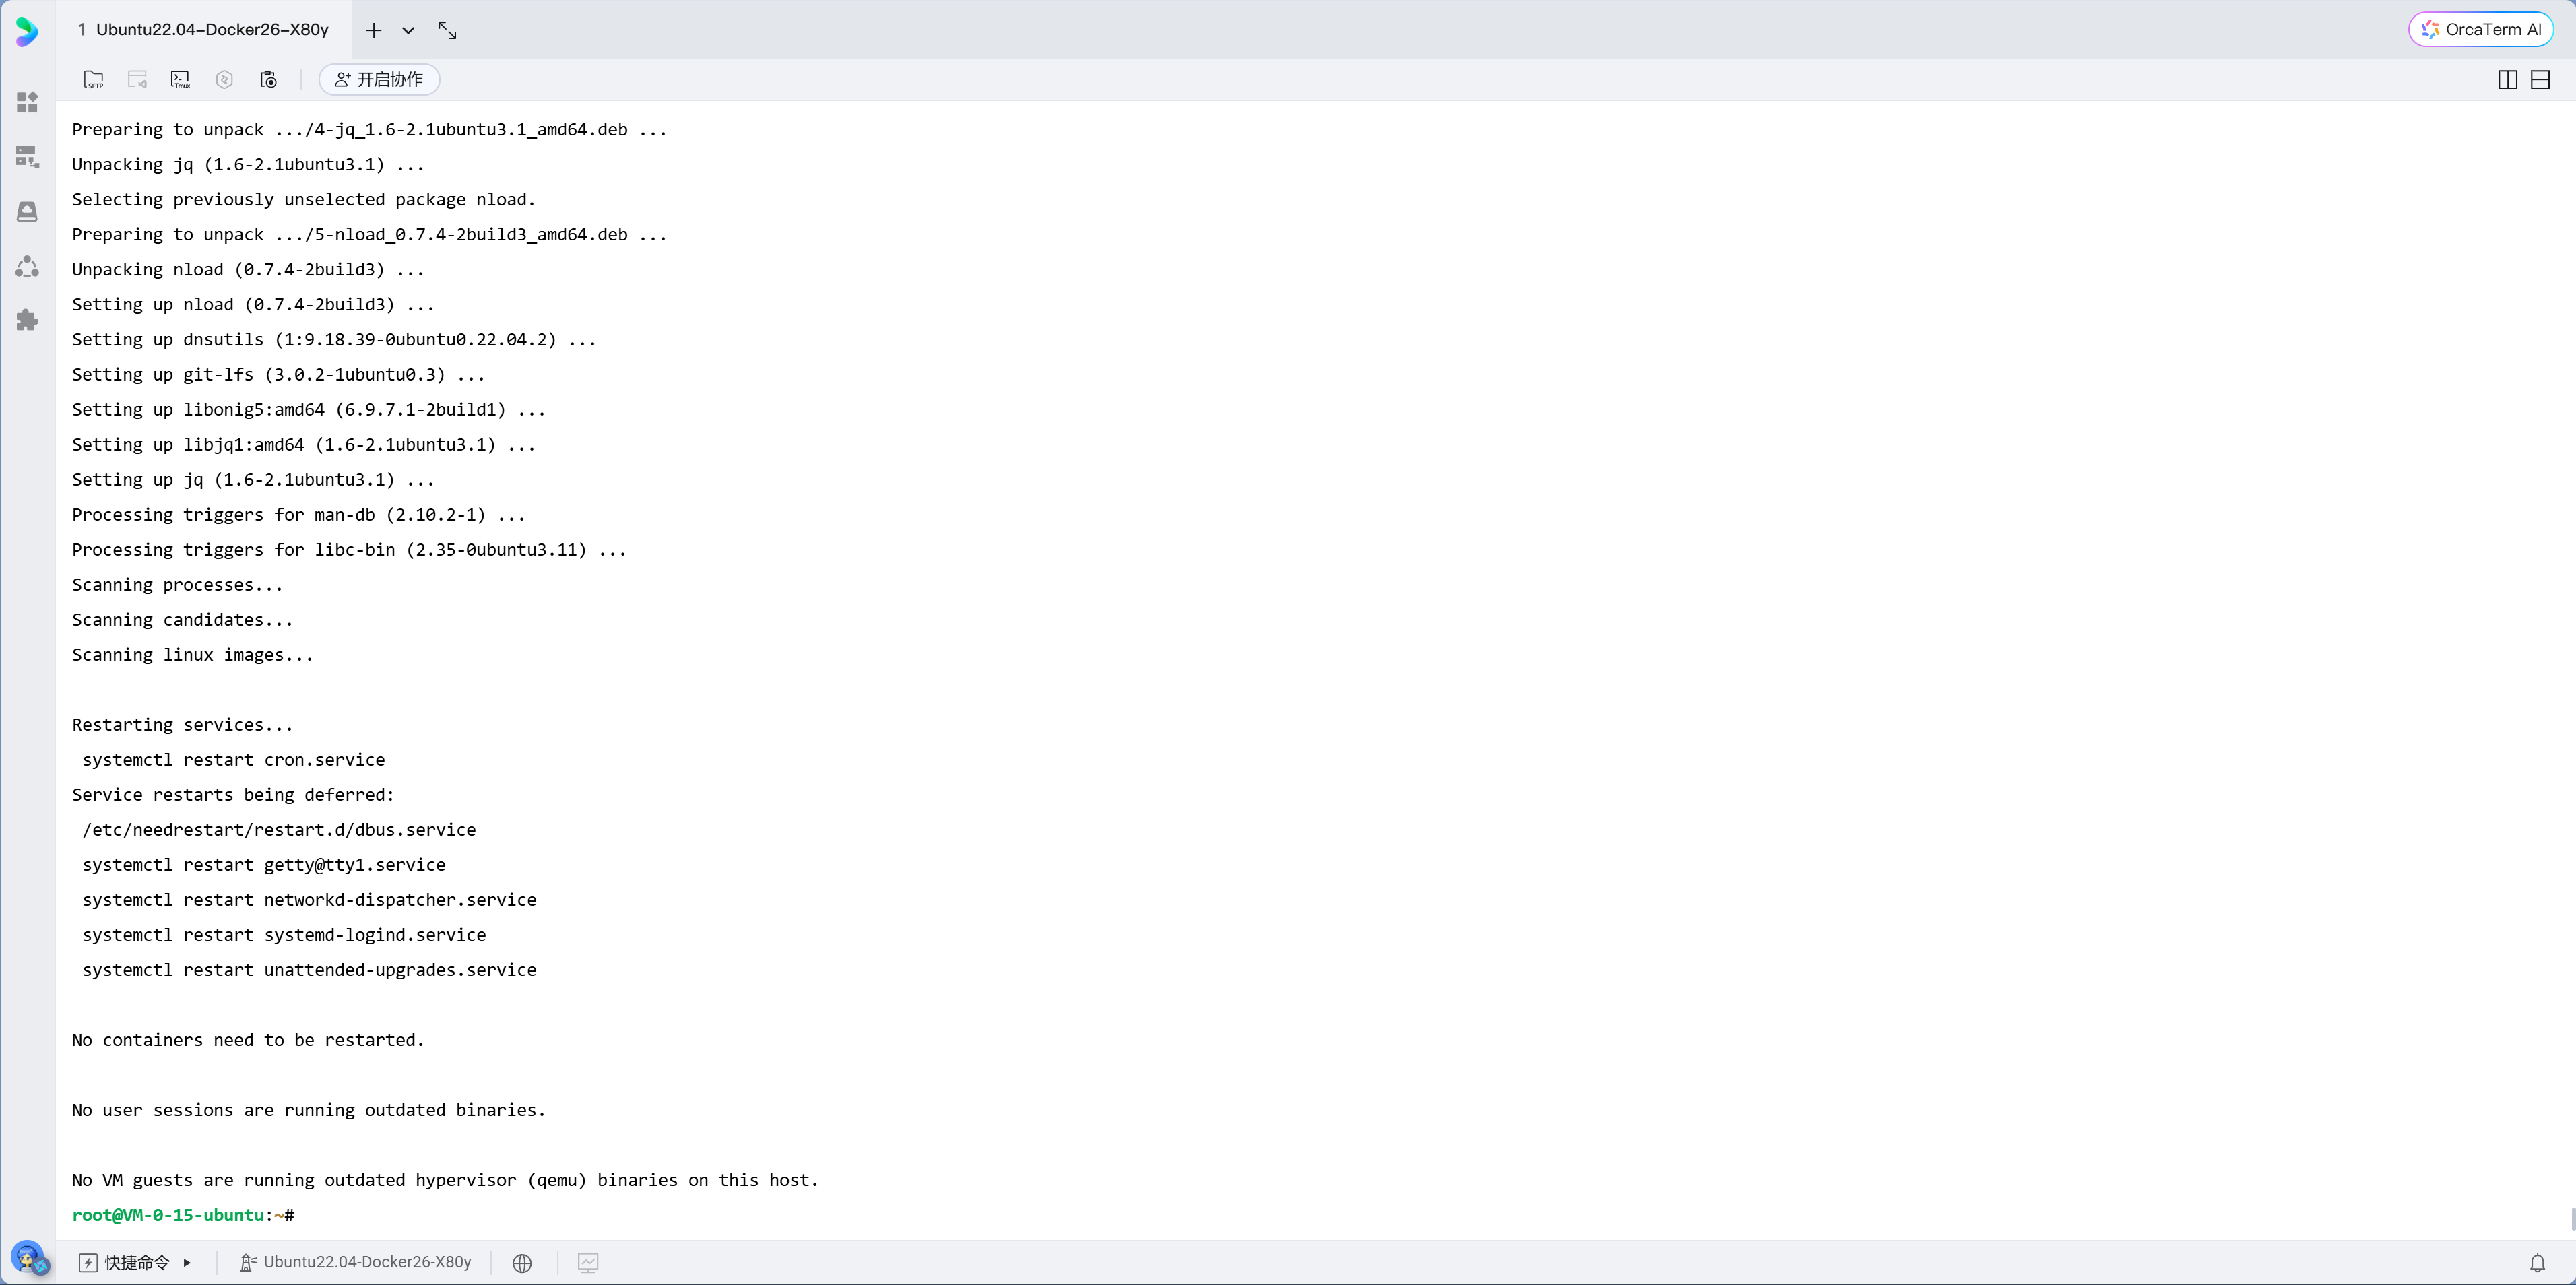
apt update && apt upgrade -yXiao Ming presses Enter, and the screen starts scrolling rapidly—lines of package names flash by. After about two or three minutes, the update completes.
This is like patching a new computer after installing the OS. apt update refreshes the package list, apt upgrade installs all available updates.
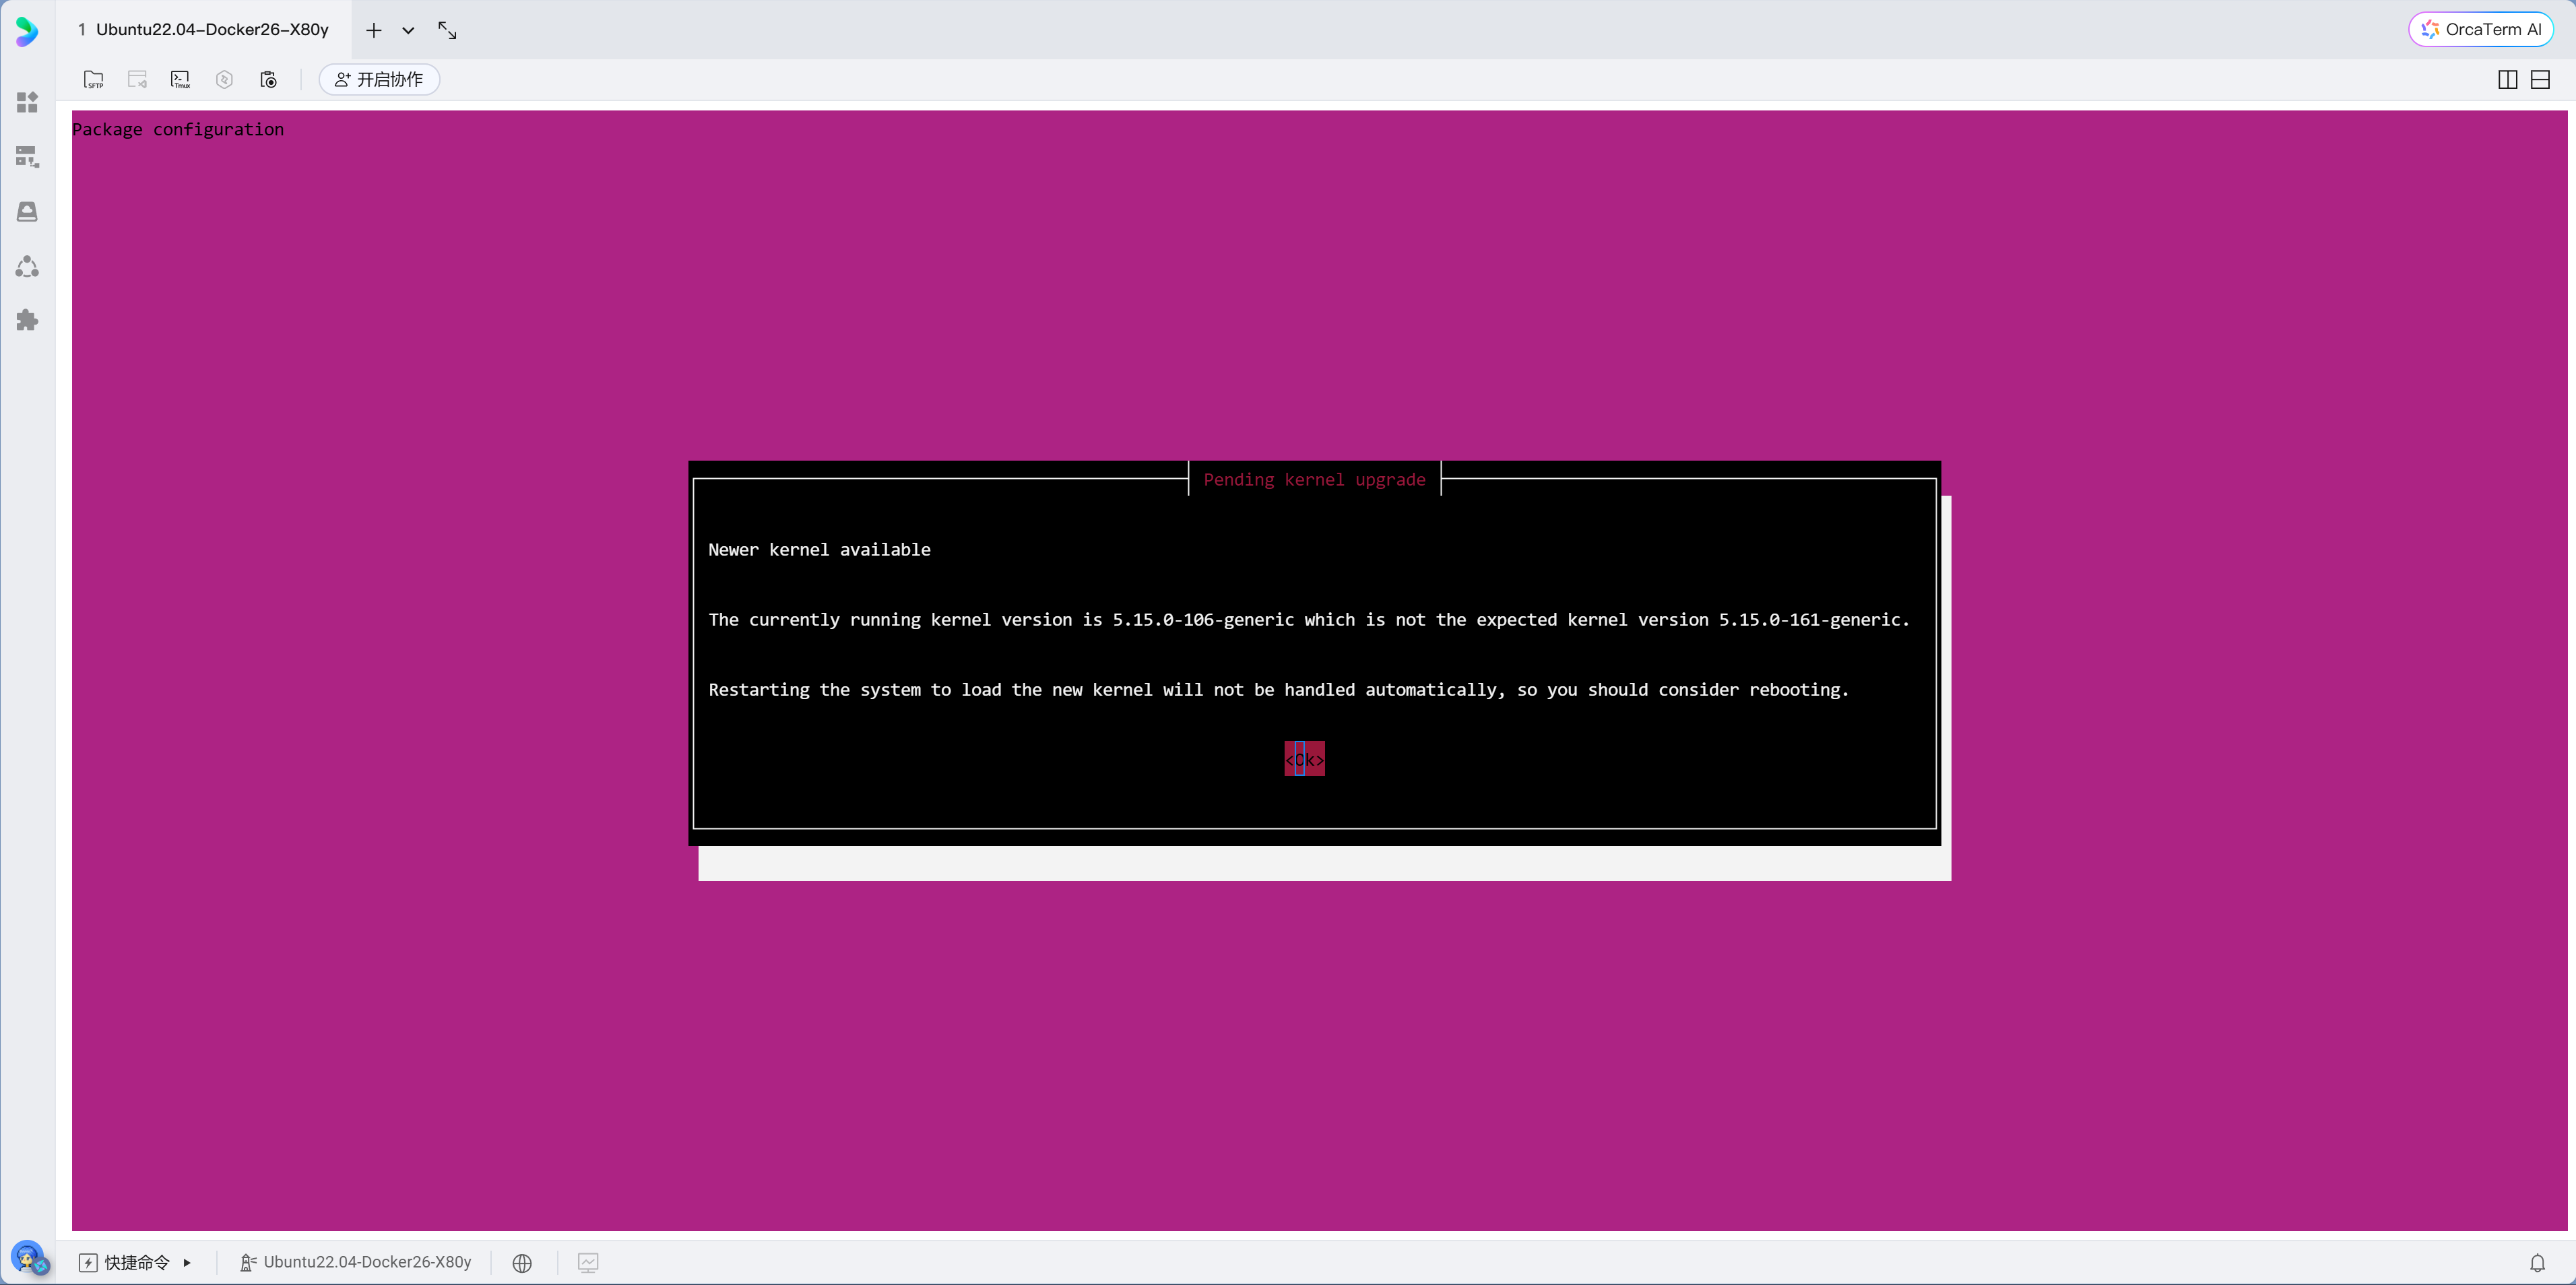
Configuration prompts during updates
If configuration pages pop up, just press Enter to keep defaults. The server may prompt for a restart after updates—this is normal. If the connection drops midway, simply reconnect.
Step 3: Install Common Tools
Copy this command into your terminal to install small tools you'll use repeatedly for server management:
apt install vim git curl wget htop unzip rsync jq git-lfs lsof nload net-tools dnsutils -yWhat these tools do:
| Tool | Purpose | Example Use Cases |
|---|---|---|
| vim | Terminal text editor | Editing configuration files |
| git | Version control tool | Pulling/pushing code |
| curl / wget | File download and API testing | API debugging, network troubleshooting |
| htop | Visual system resource monitor | Checking CPU, memory usage |
| unzip | Extract zip files | Unzipping uploaded archives |
| rsync | Efficient sync and backup | One-click site migration |
| jq | JSON formatting tool | Processing API or log output |
| lsof | Check port usage | Troubleshooting service conflicts |
| nload | Monitor real-time network traffic | Checking if bandwidth is saturated |
| net-tools | ifconfig / netstat toolkit | Network troubleshooting |
| dnsutils | dig / nslookup | DNS resolution checks |
Xiao Ming looks at this long command, thinking "Do I really need all these tools?" The old hand says: "You might not need them now, but when problems arise, these tools can save your life."
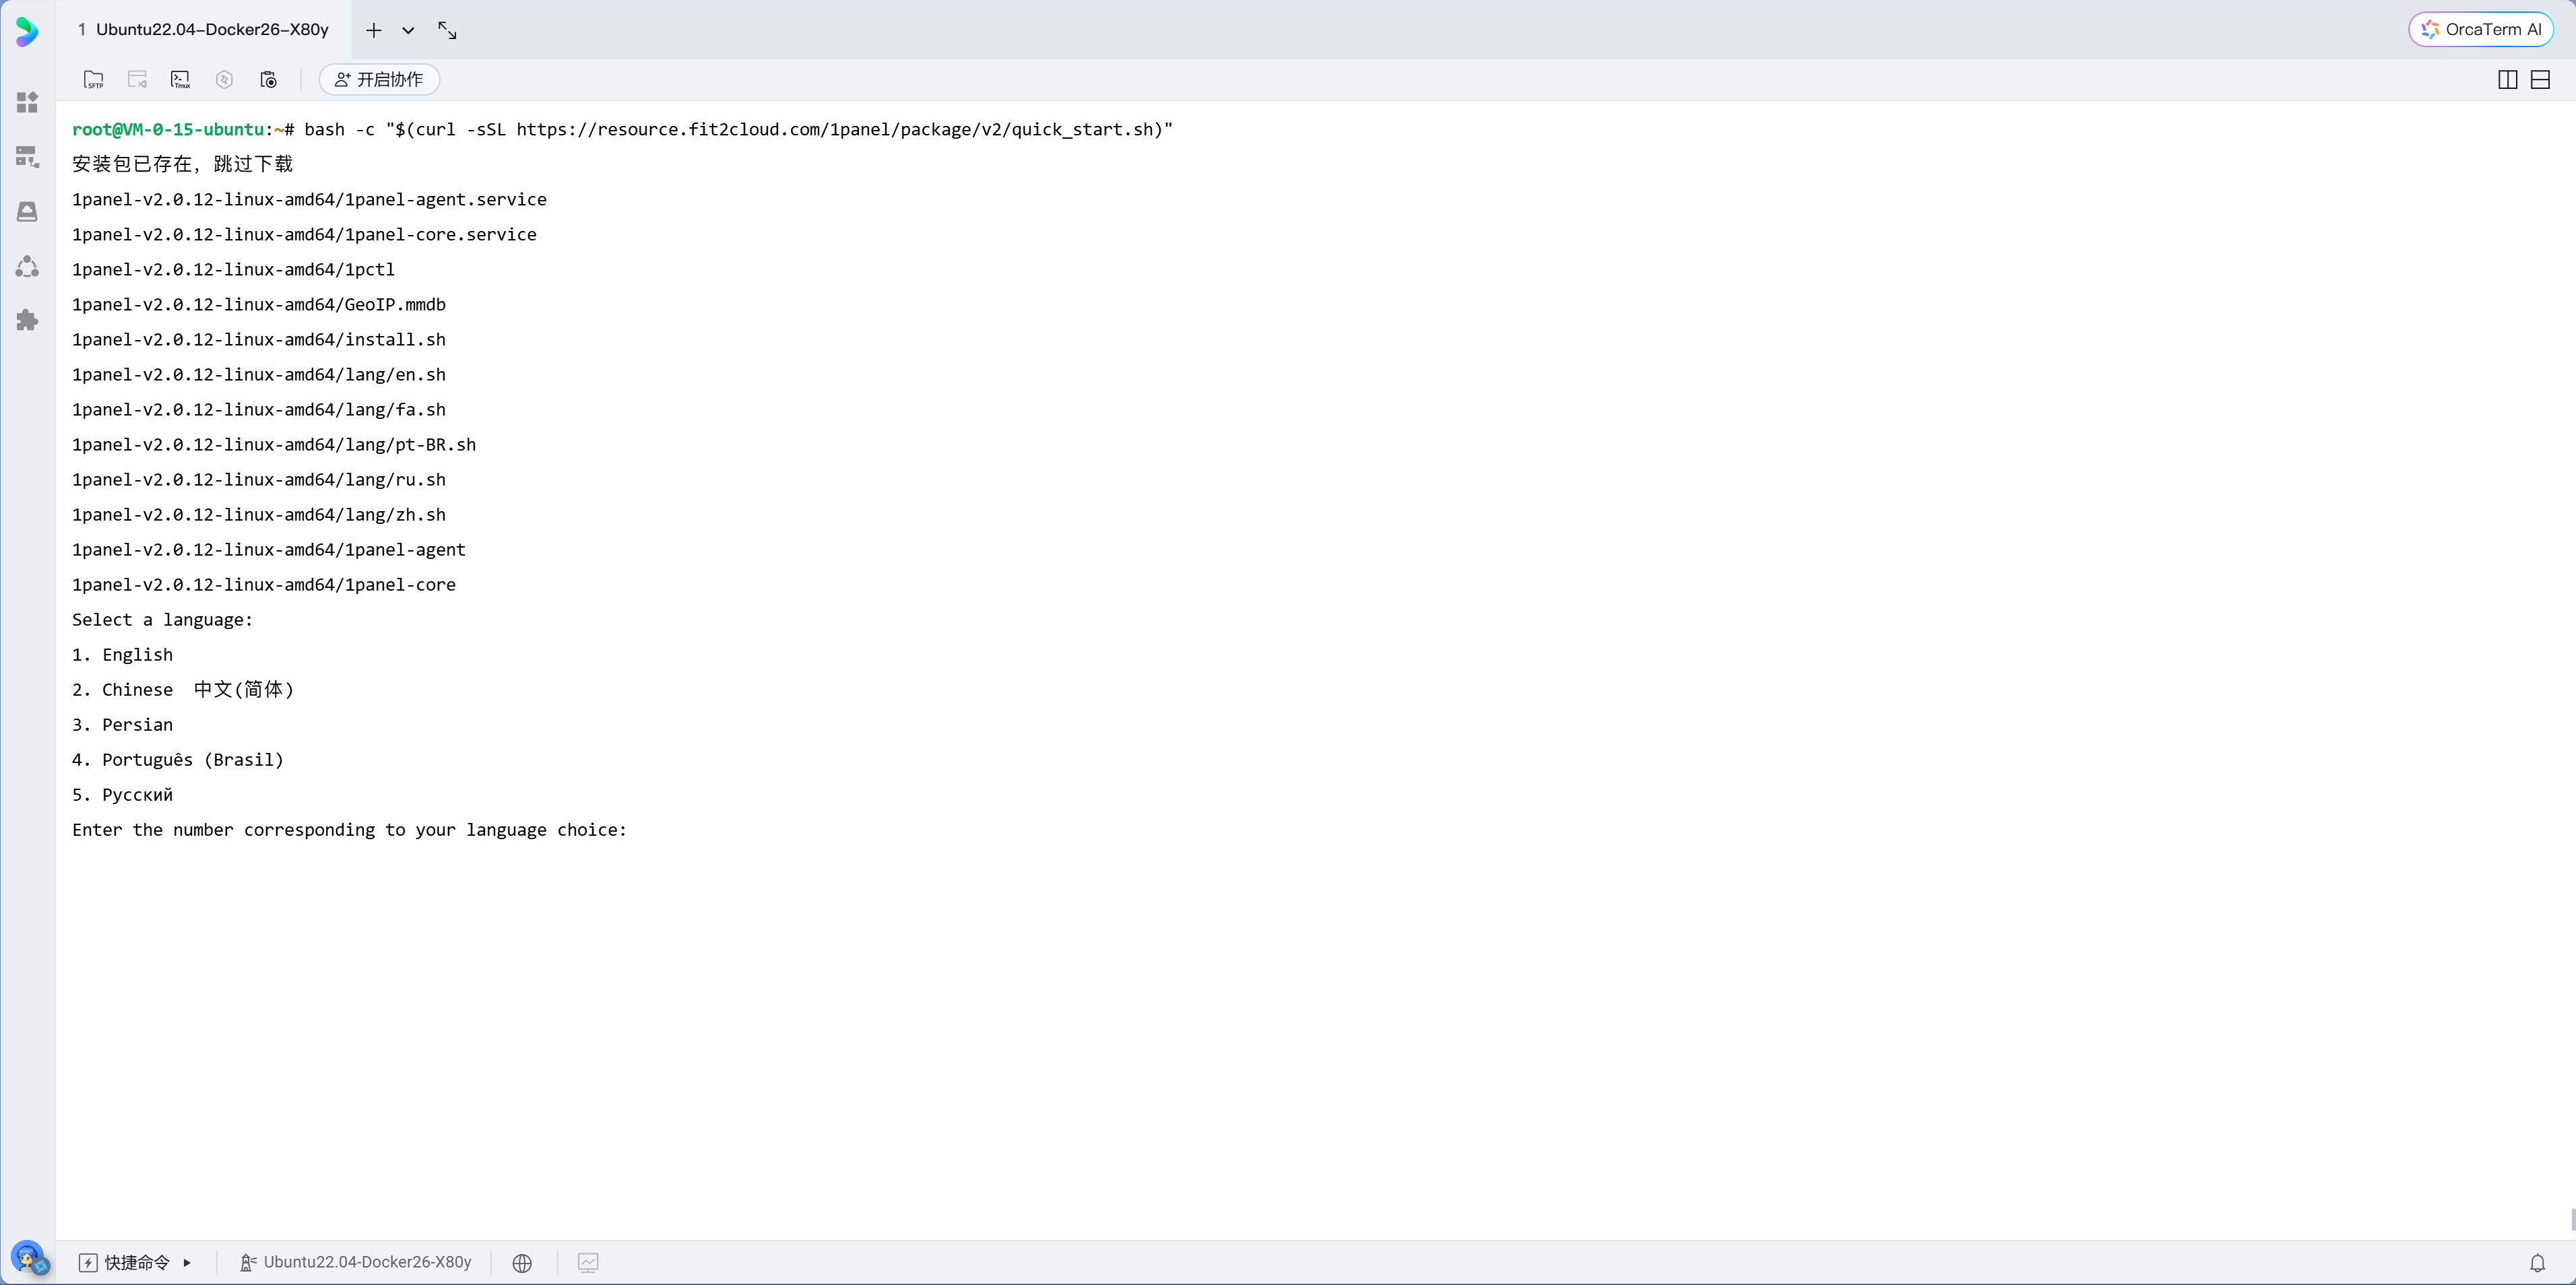
Step 4: Install 1Panel
1Panel is a modern Linux server management panel that lets you manage your server through a web interface without memorizing dozens of commands. You've used cloud vendors' web consoles to buy servers—1Panel brings similar management interface to your own server, letting you manage everything in the browser without typing commands for every task.
One-line installation:
curl -sSL https://resource.fit2cloud.com/1panel/package/quick_start.sh -o quick_start.sh && bash quick_start.shDuring installation, you'll be prompted to set:
- Panel port: Change to an uncommon port (e.g.,
29876), don't use the default - Panel username: Don't use
admin - Panel password: Set a strong password
After installation, the terminal will display the panel access URL: http://your-ip:port/security-entry

Remember the security entry
1Panel's access URL includes a random security entry path (e.g., /abc123). Even if someone knows your IP and port, they can't open the panel without this path. Be sure to write it down.
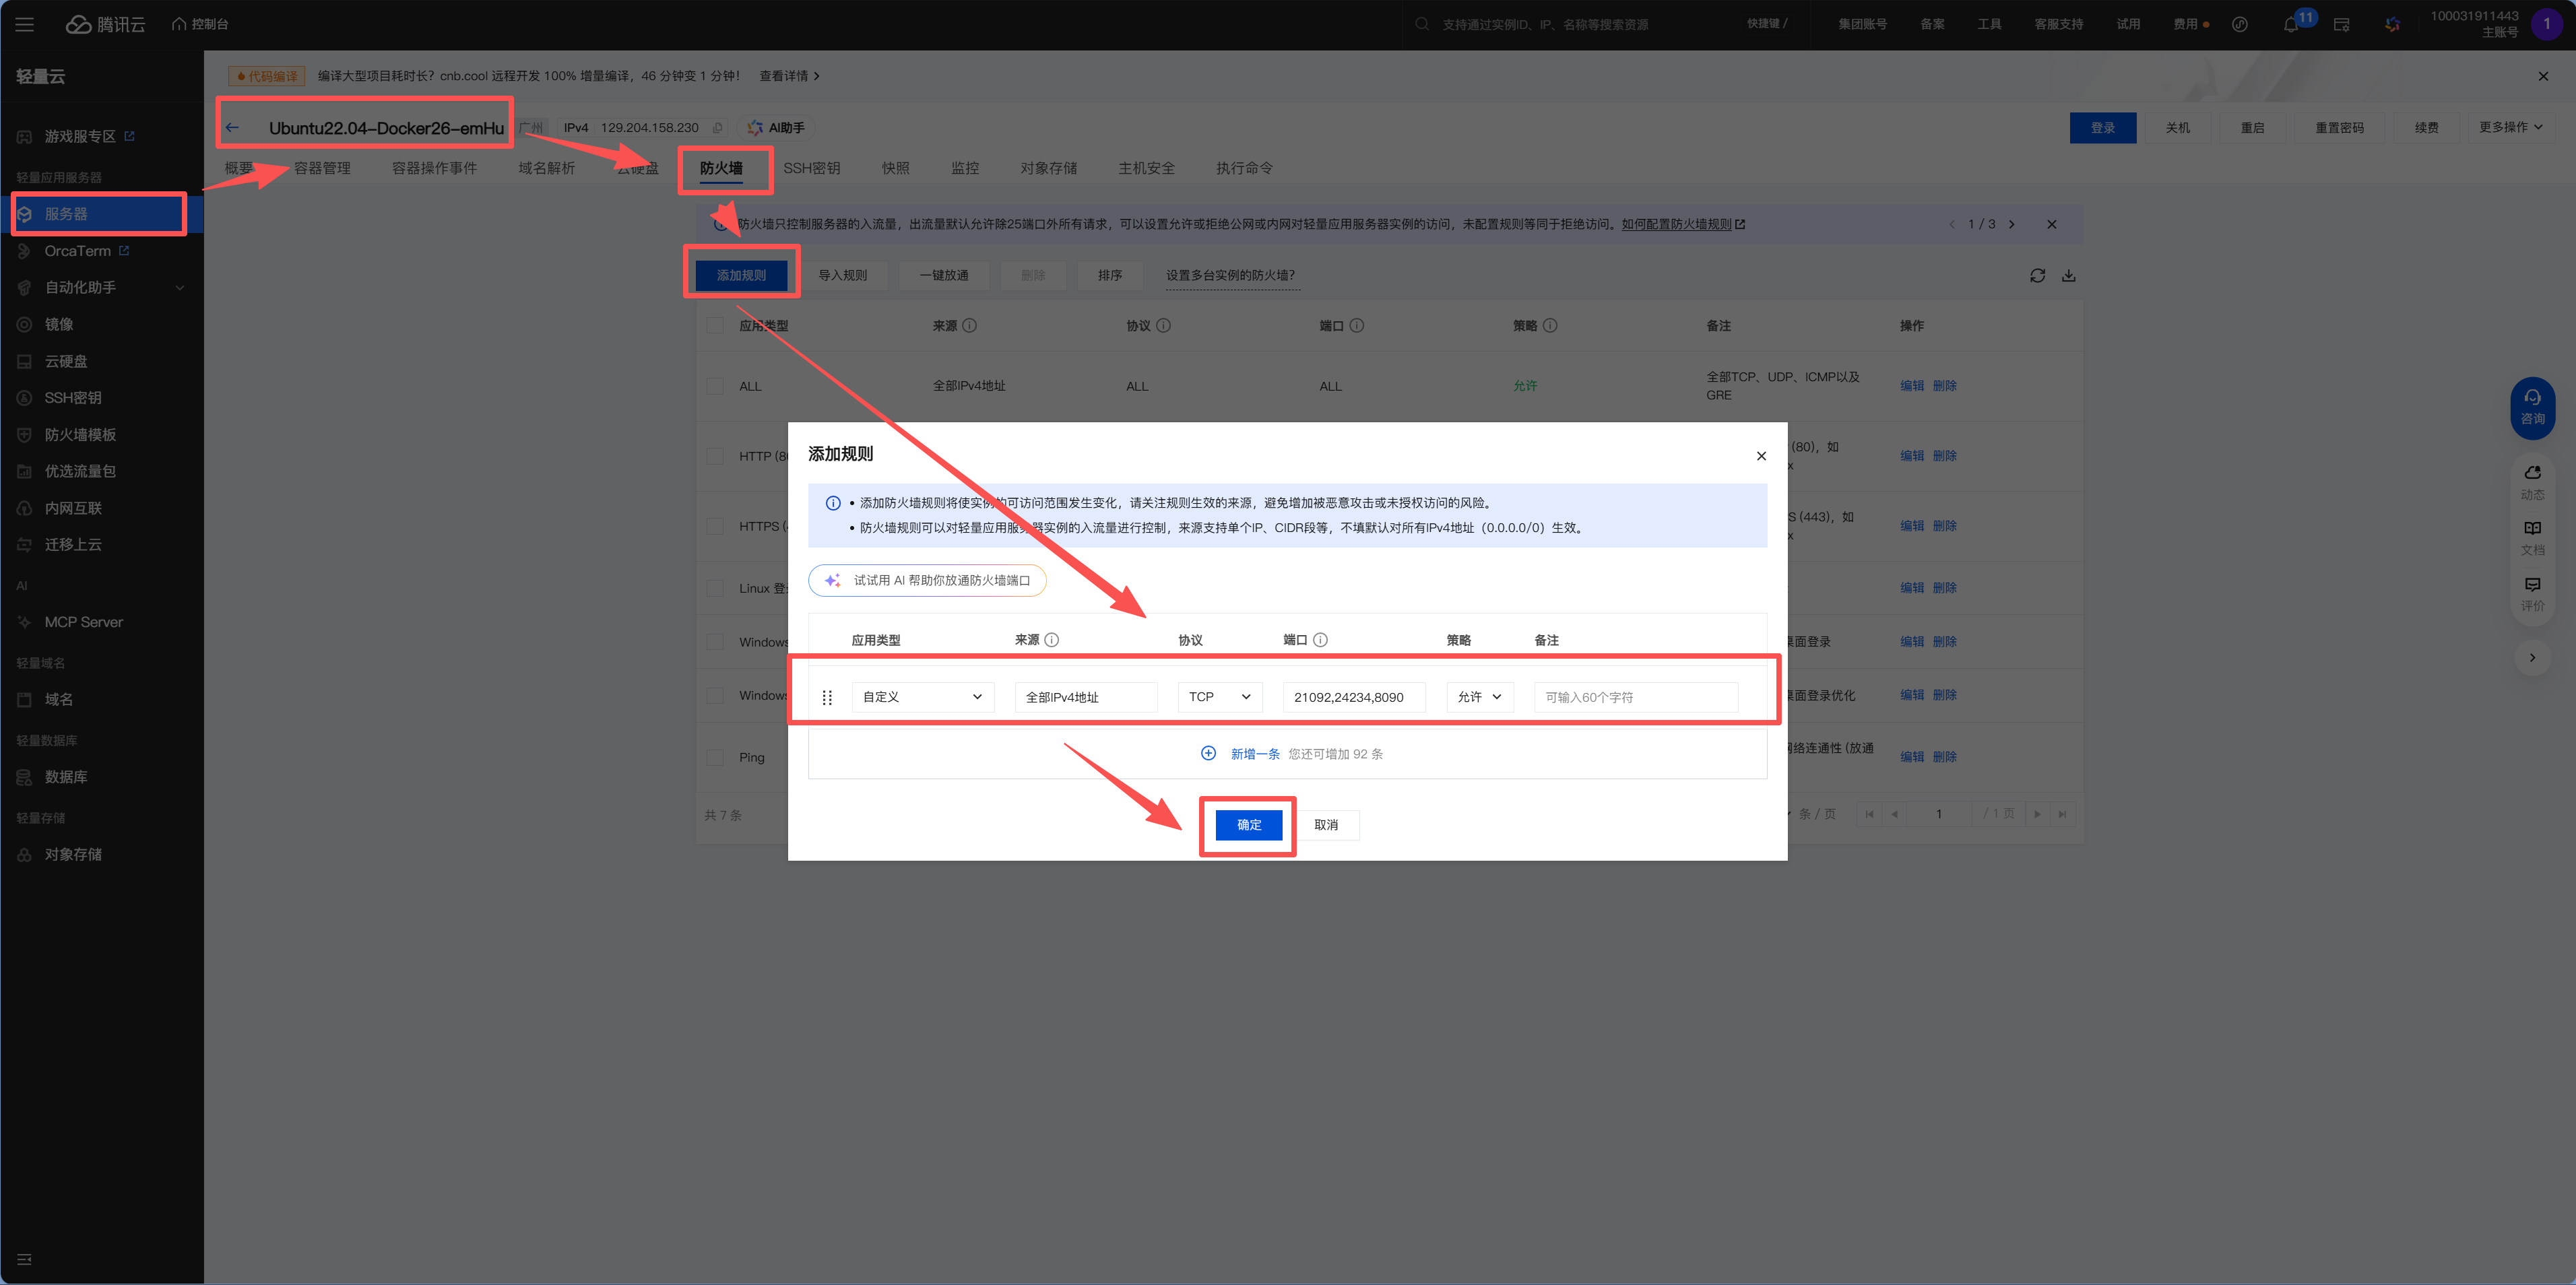
Step 5: Configure Security Groups (Cloud Provider Firewall)
Before accessing 1Panel in your browser, you need to configure security groups in your cloud provider's console.
What are security groups?
Security groups are the guards at the data center door. By default, only SSH (port 22) is allowed—everything else is locked. When you install new applications that need new ports, you must tell the guard "also open port XX."
Ports that must be opened:
| Port | Purpose | Protocol |
|---|---|---|
| 22 | SSH remote connection | TCP |
| 80 | HTTP website access | TCP |
| 443 | HTTPS website access | TCP |
| Panel port | 1Panel access (port set during installation) | TCP |
Xiao Ming opens the Tencent Cloud console and finds the "Firewall" page (different vendors use different names: Alibaba Cloud calls it "Security Groups," Tencent Cloud Lighthouse calls it "Firewall"). He adds rules one by one according to the table, selecting protocol, entering port numbers, and choosing "Allow" for each. It's not difficult, but feels a bit tedious the first time—you'll get used to it.
Security groups vs. system firewall
Cloud provider security groups and server system firewalls (like ufw) are two separate doors. Both must be open for traffic to flow. Many beginners only open one, then can't figure out why they can't access their server.
After configuring security groups, open 1Panel's access URL in your browser and log in with your username and password.
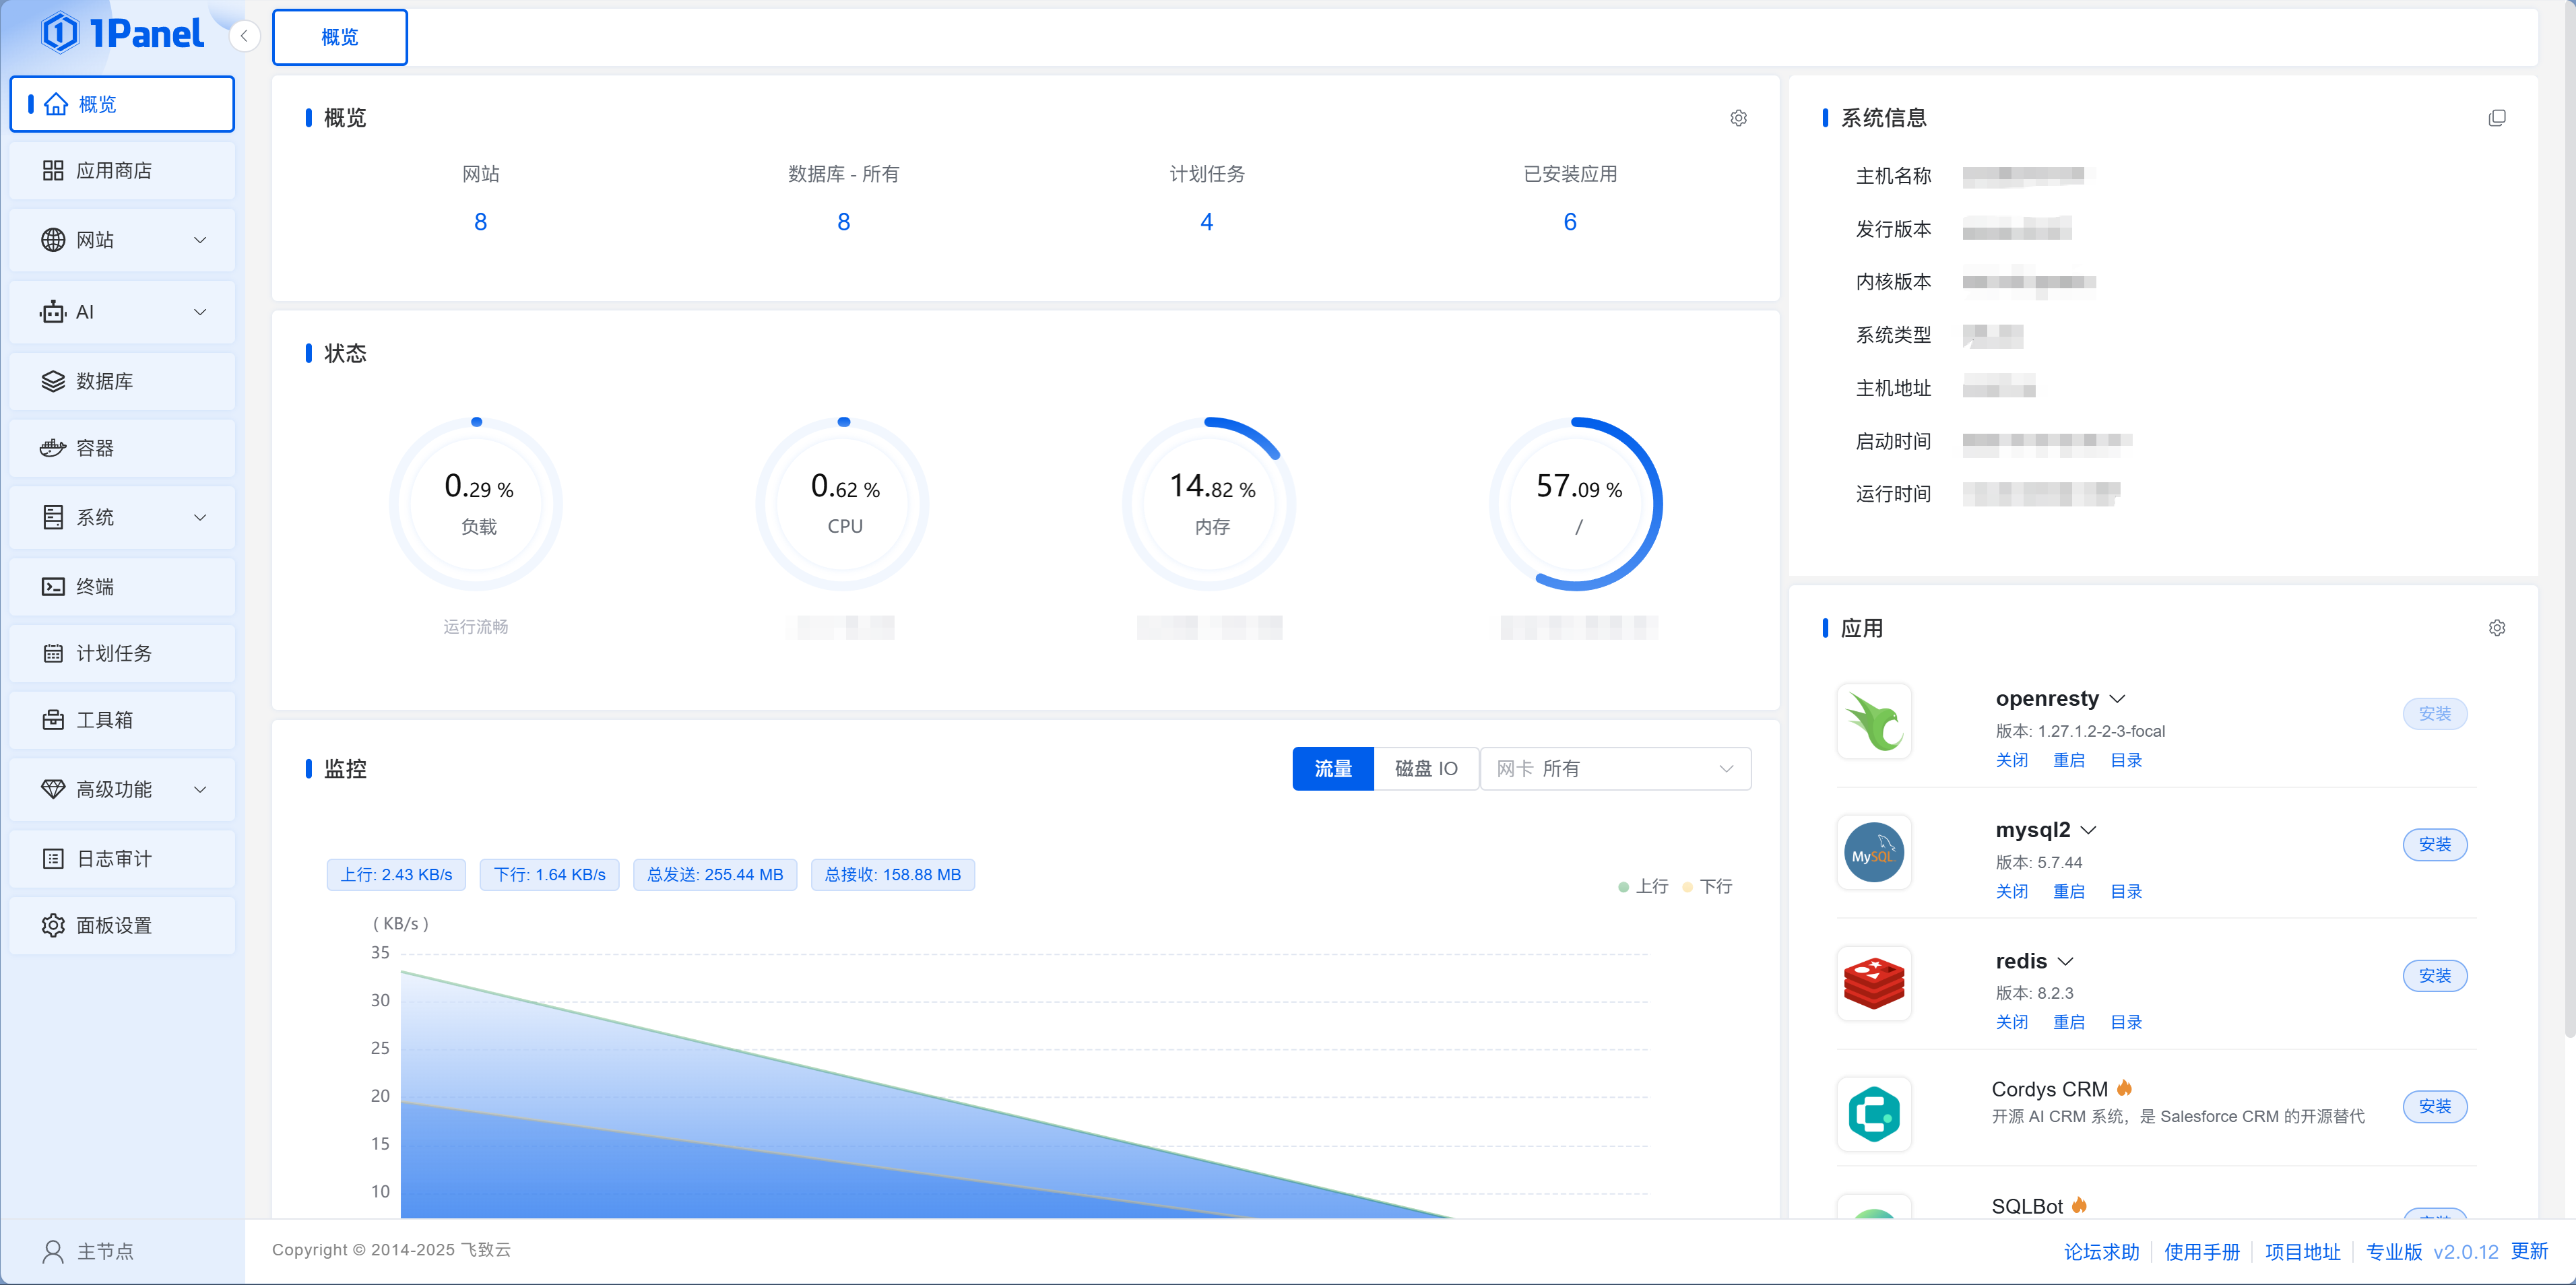
Xiao Ming sees a web-based console—"This is much friendlier than the command line." The panel homepage displays real-time server status—CPU usage, memory consumption, disk space, network traffic—all at a glance. The left menu has App Store, Container Management, Database, Website, Scheduled Tasks... Xiao Ming clicks around, feeling like he's installed a desktop OS for his server.
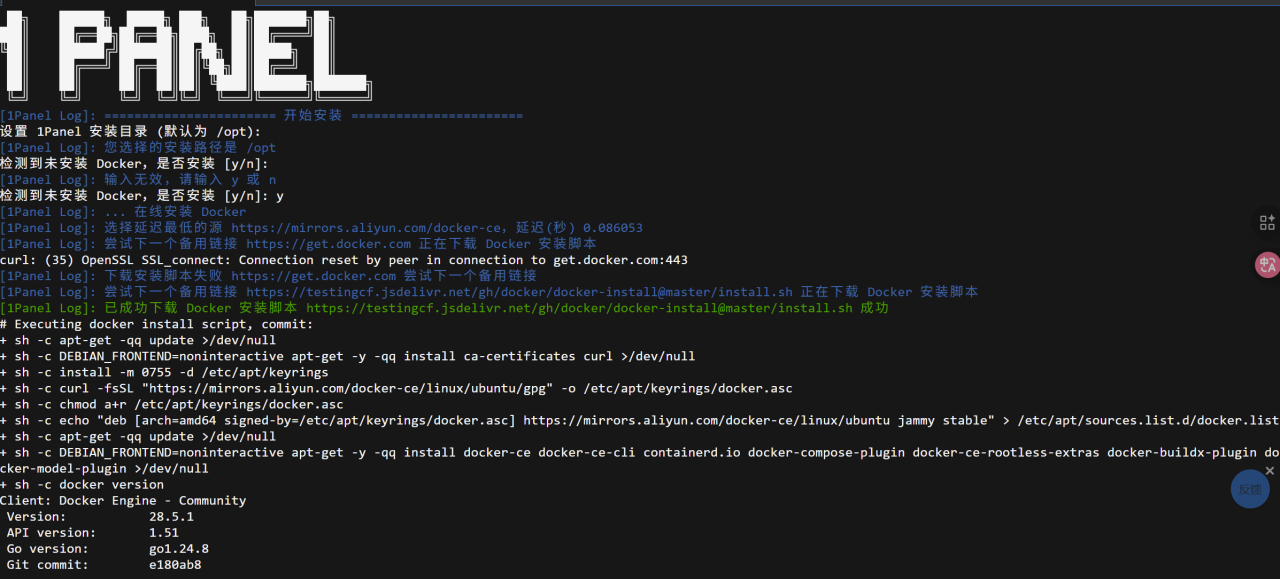
Step 6: Install Docker and Configure Mirror Acceleration
After logging into 1Panel, the system will guide you to install Docker. Just click one-click install.
After installing Docker, configuring mirror acceleration is crucial. It's the same as configuring Taobao mirrors for npm—Docker Hub is an overseas registry, and without acceleration sources, download speeds are painful. 1Panel will prompt whether to automatically configure mirror acceleration during Docker installation (press y), or you can manually modify it later in "Containers > Configuration."
After configuring acceleration, Xiao Ming tries installing an application—it finishes in seconds. Previously without acceleration, he waited ten minutes with no progress.
Mirror acceleration is mandatory for China
Without mirror acceleration, you'll likely get stuck at "pulling image" during application installation, waiting forever before timing out. With proper acceleration, images download in seconds.
Step 7: Server Security Hardening
The old hand says: "The following steps are not optional—they're mandatory."
Xiao Ming doesn't quite understand: "My server doesn't have any important data yet, who would attack me?" The old hand opens 1Panel's logs page, pointing at hundreds of failed SSH login attempts from around the world: "See this? Your server has been online less than an hour, and already has hundreds of brute force attempts. These are automated scanning scripts—they don't care who you are, they'll try any open port."
Xiao Ming glances at those IP addresses—Russia, Brazil, Vietnam... "Okay, locking the doors and windows is indeed necessary."
服务器安全加固流程
ssh root@your-server-ipapt update && apt upgrade -yapt install vim git curl...ufw enable禁用密码登录adduser username服务器安全加固清单
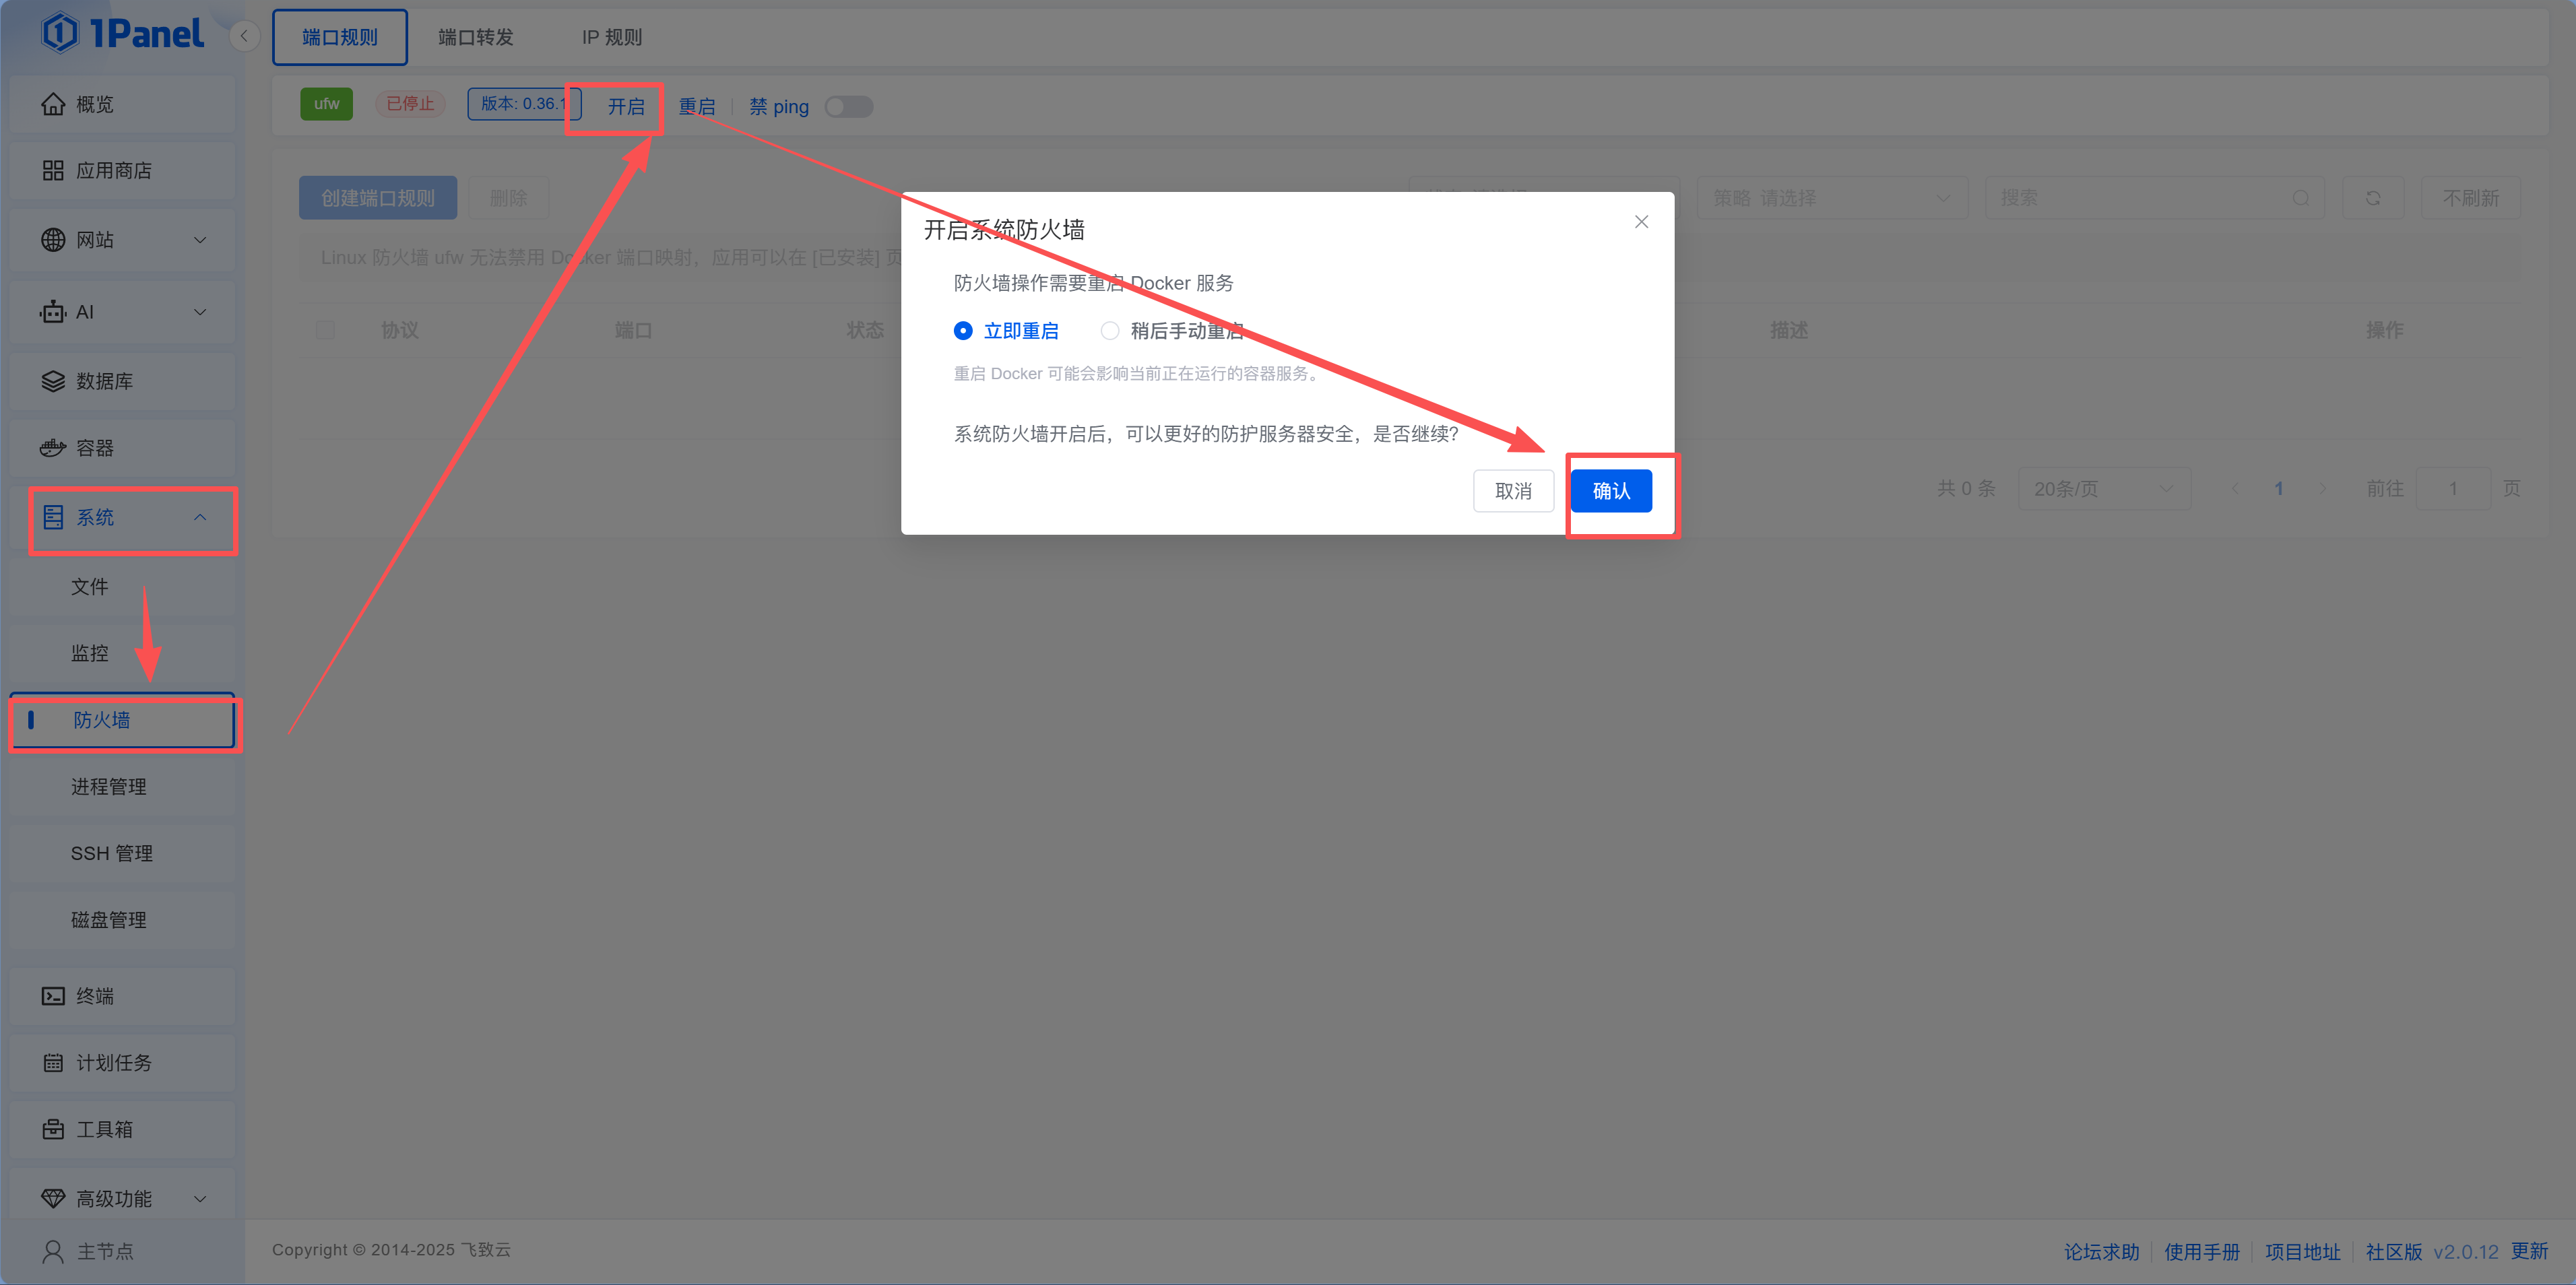
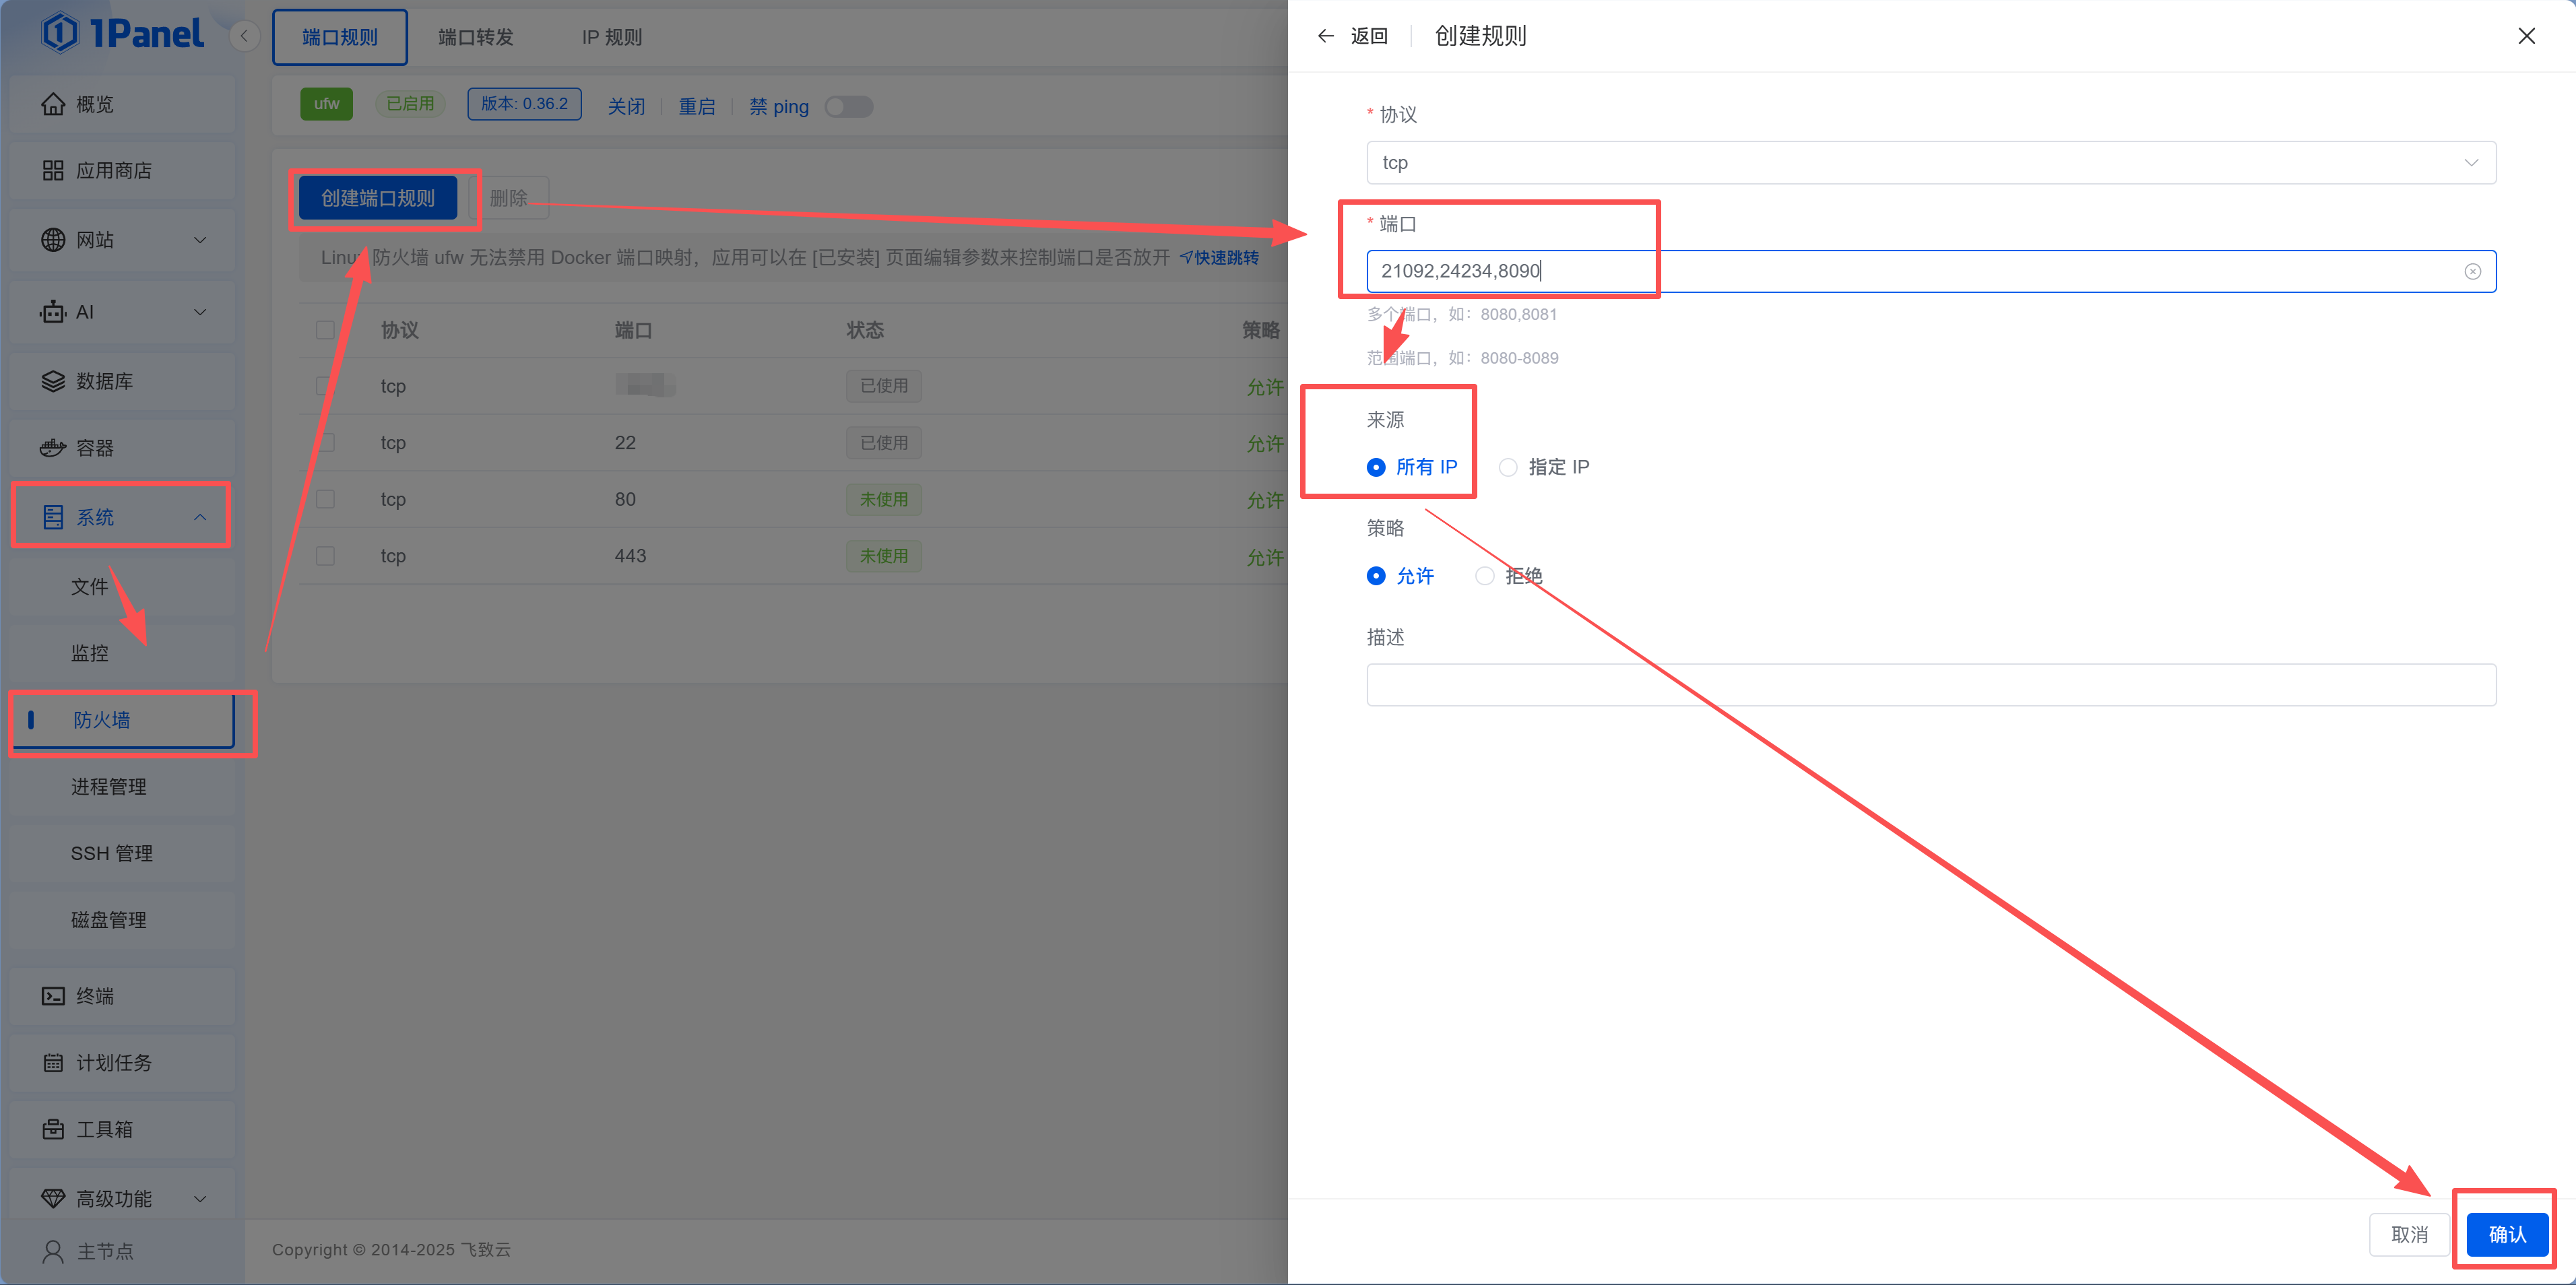
7.1 Enable 1Panel Firewall
In 1Panel, navigate to: System → Firewall
- Enable the firewall and add rules to allow the ports you opened at the cloud provider (80, 443, panel port, etc.)
防火墙规则构建器
7.2 Change SSH Default Port
The default port 22 is a prime target for hackers. You can change it directly in 1Panel:
- Go to "System > SSH Management"
- Find "Connection Port," click the "Settings" button next to it, and change to an uncommon port (e.g.,
24324) in the popup
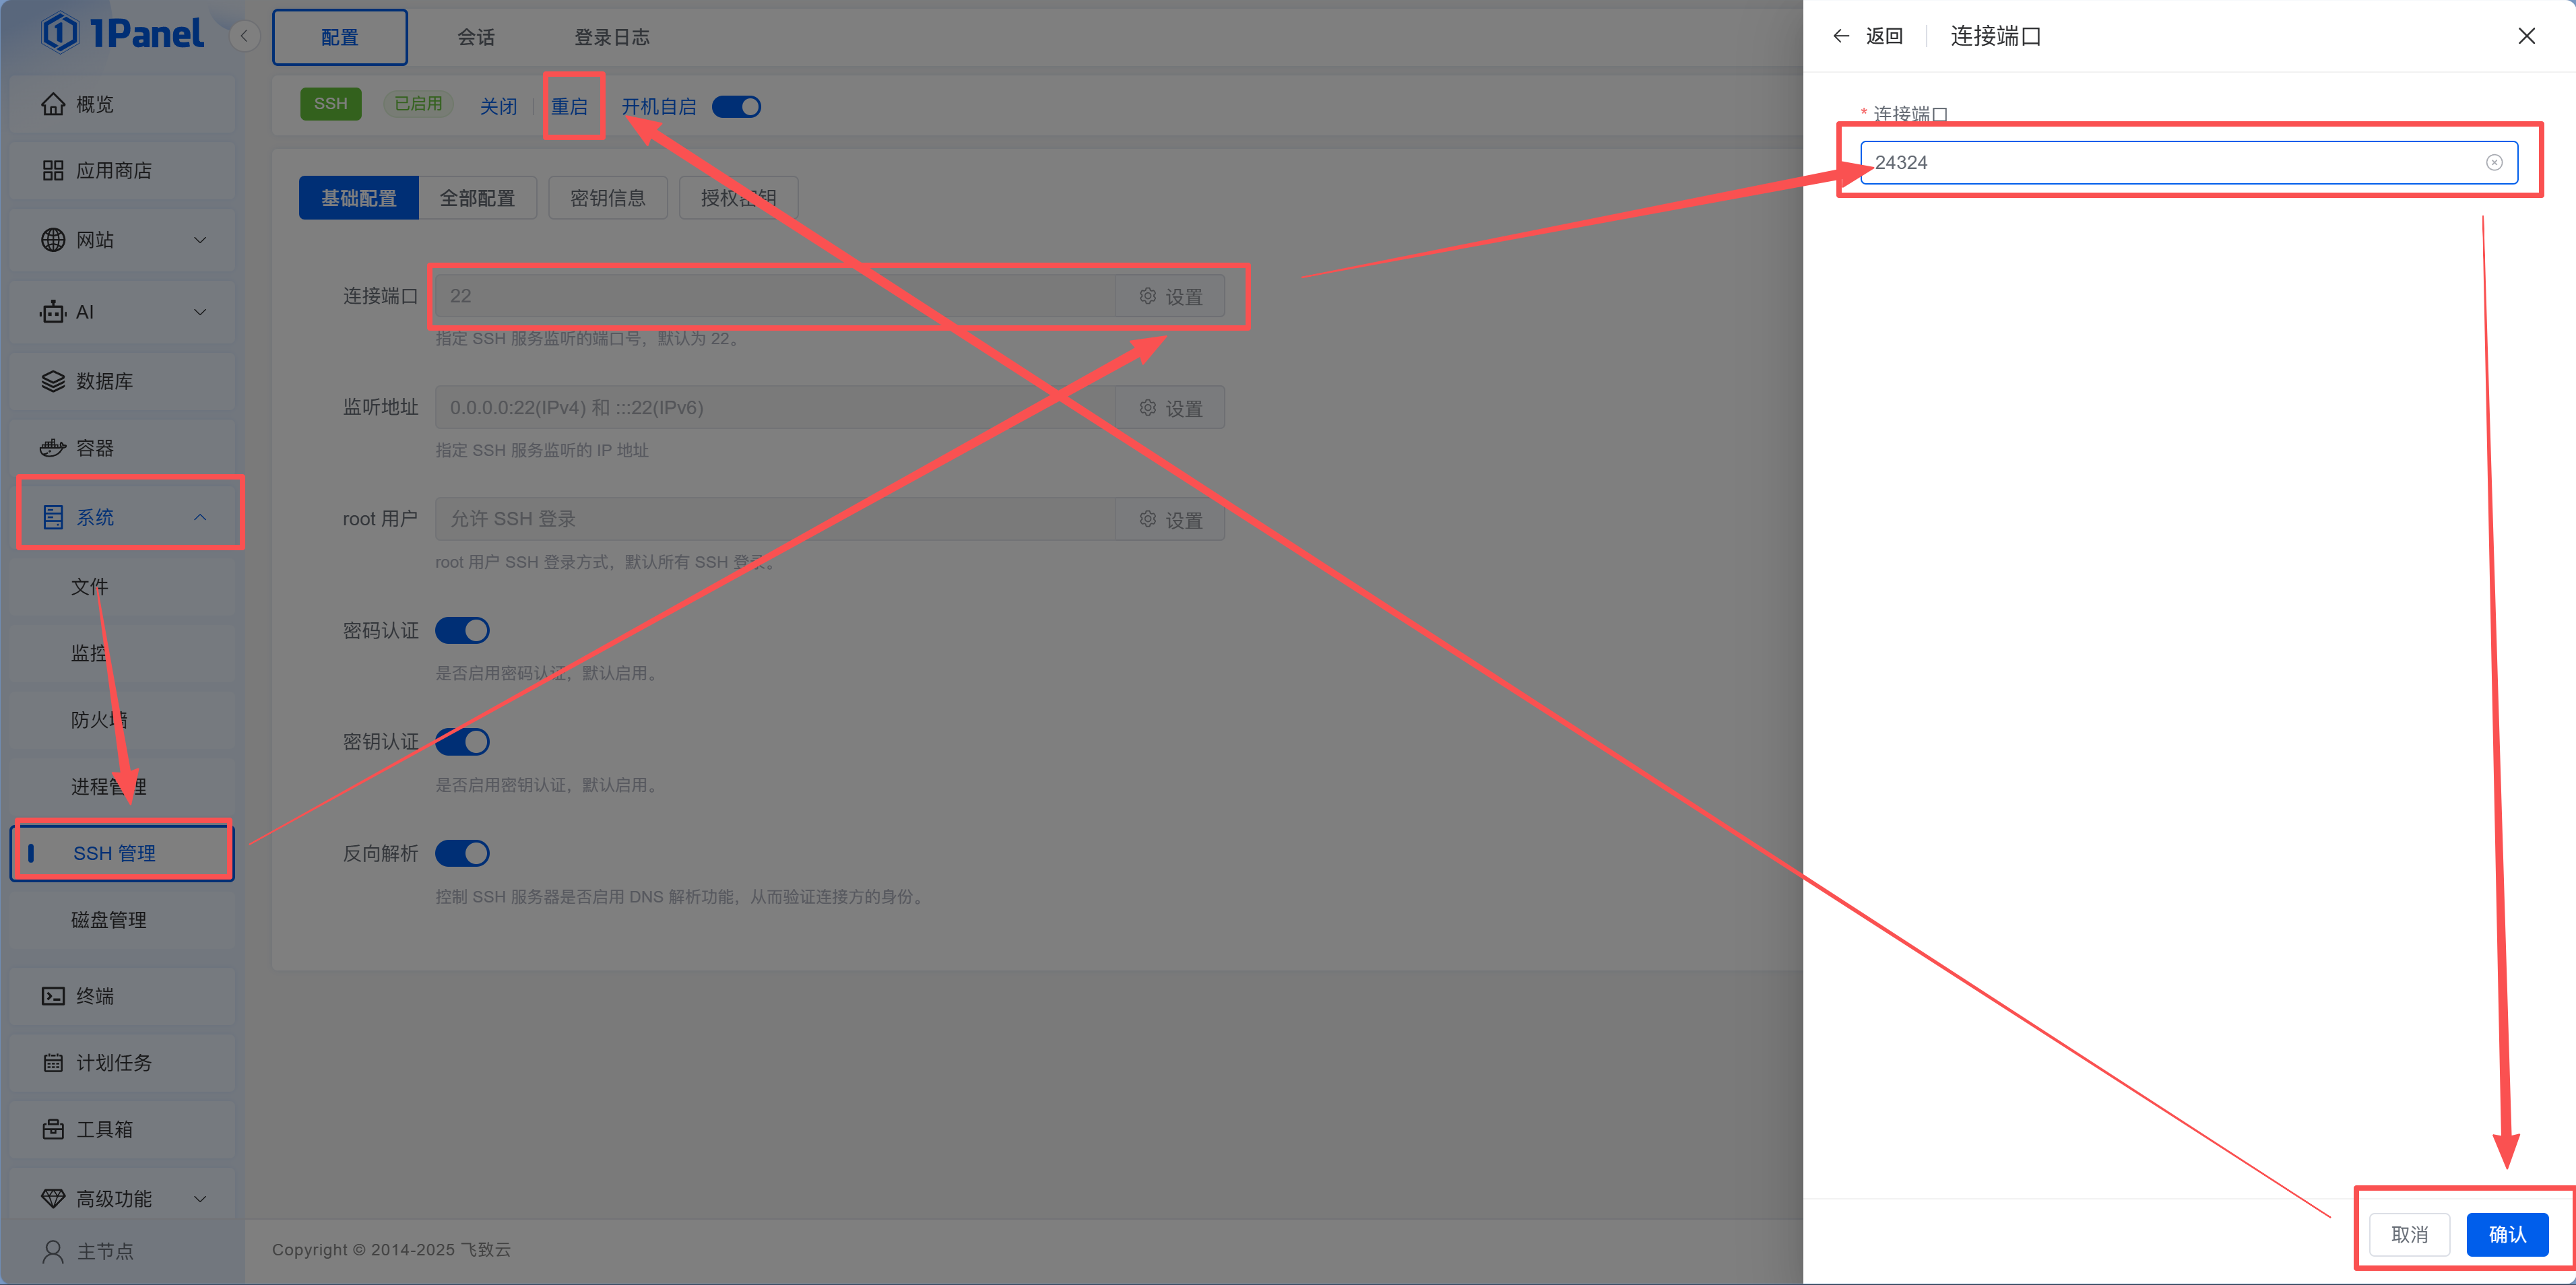
After changing, remember to open the new port in both your cloud provider's security group and 1Panel's "System > Firewall," then test with the new port:
ssh -p 24324 root@your-server-ipXiao Ming opens a new terminal window and connects with the new port—success. He breathes a sigh of relief, then returns to the cloud provider console to delete the old port 22 rule.
Test before closing the old port
After changing the SSH port, don't rush to close port 22. Only close it after successfully connecting with the new port. Otherwise, if the new port configuration is wrong, you've locked yourself out.
7.3 Enable Fail2Ban
What is Fail2Ban?
Fail2Ban is automatic blacklisting. Someone enters the wrong password 5 times in a row? Block their IP immediately—just like a bank card getting locked after too many failed PIN attempts.
In 1Panel, go to "Toolbox > Fail2Ban." If it shows red "Not Installed," click the "Install Now" button and 1Panel will automatically install it. After installation, you can visually manage ban rules in the panel. The default configuration is sufficient—SSH gets 5 failed attempts before an IP is banned.
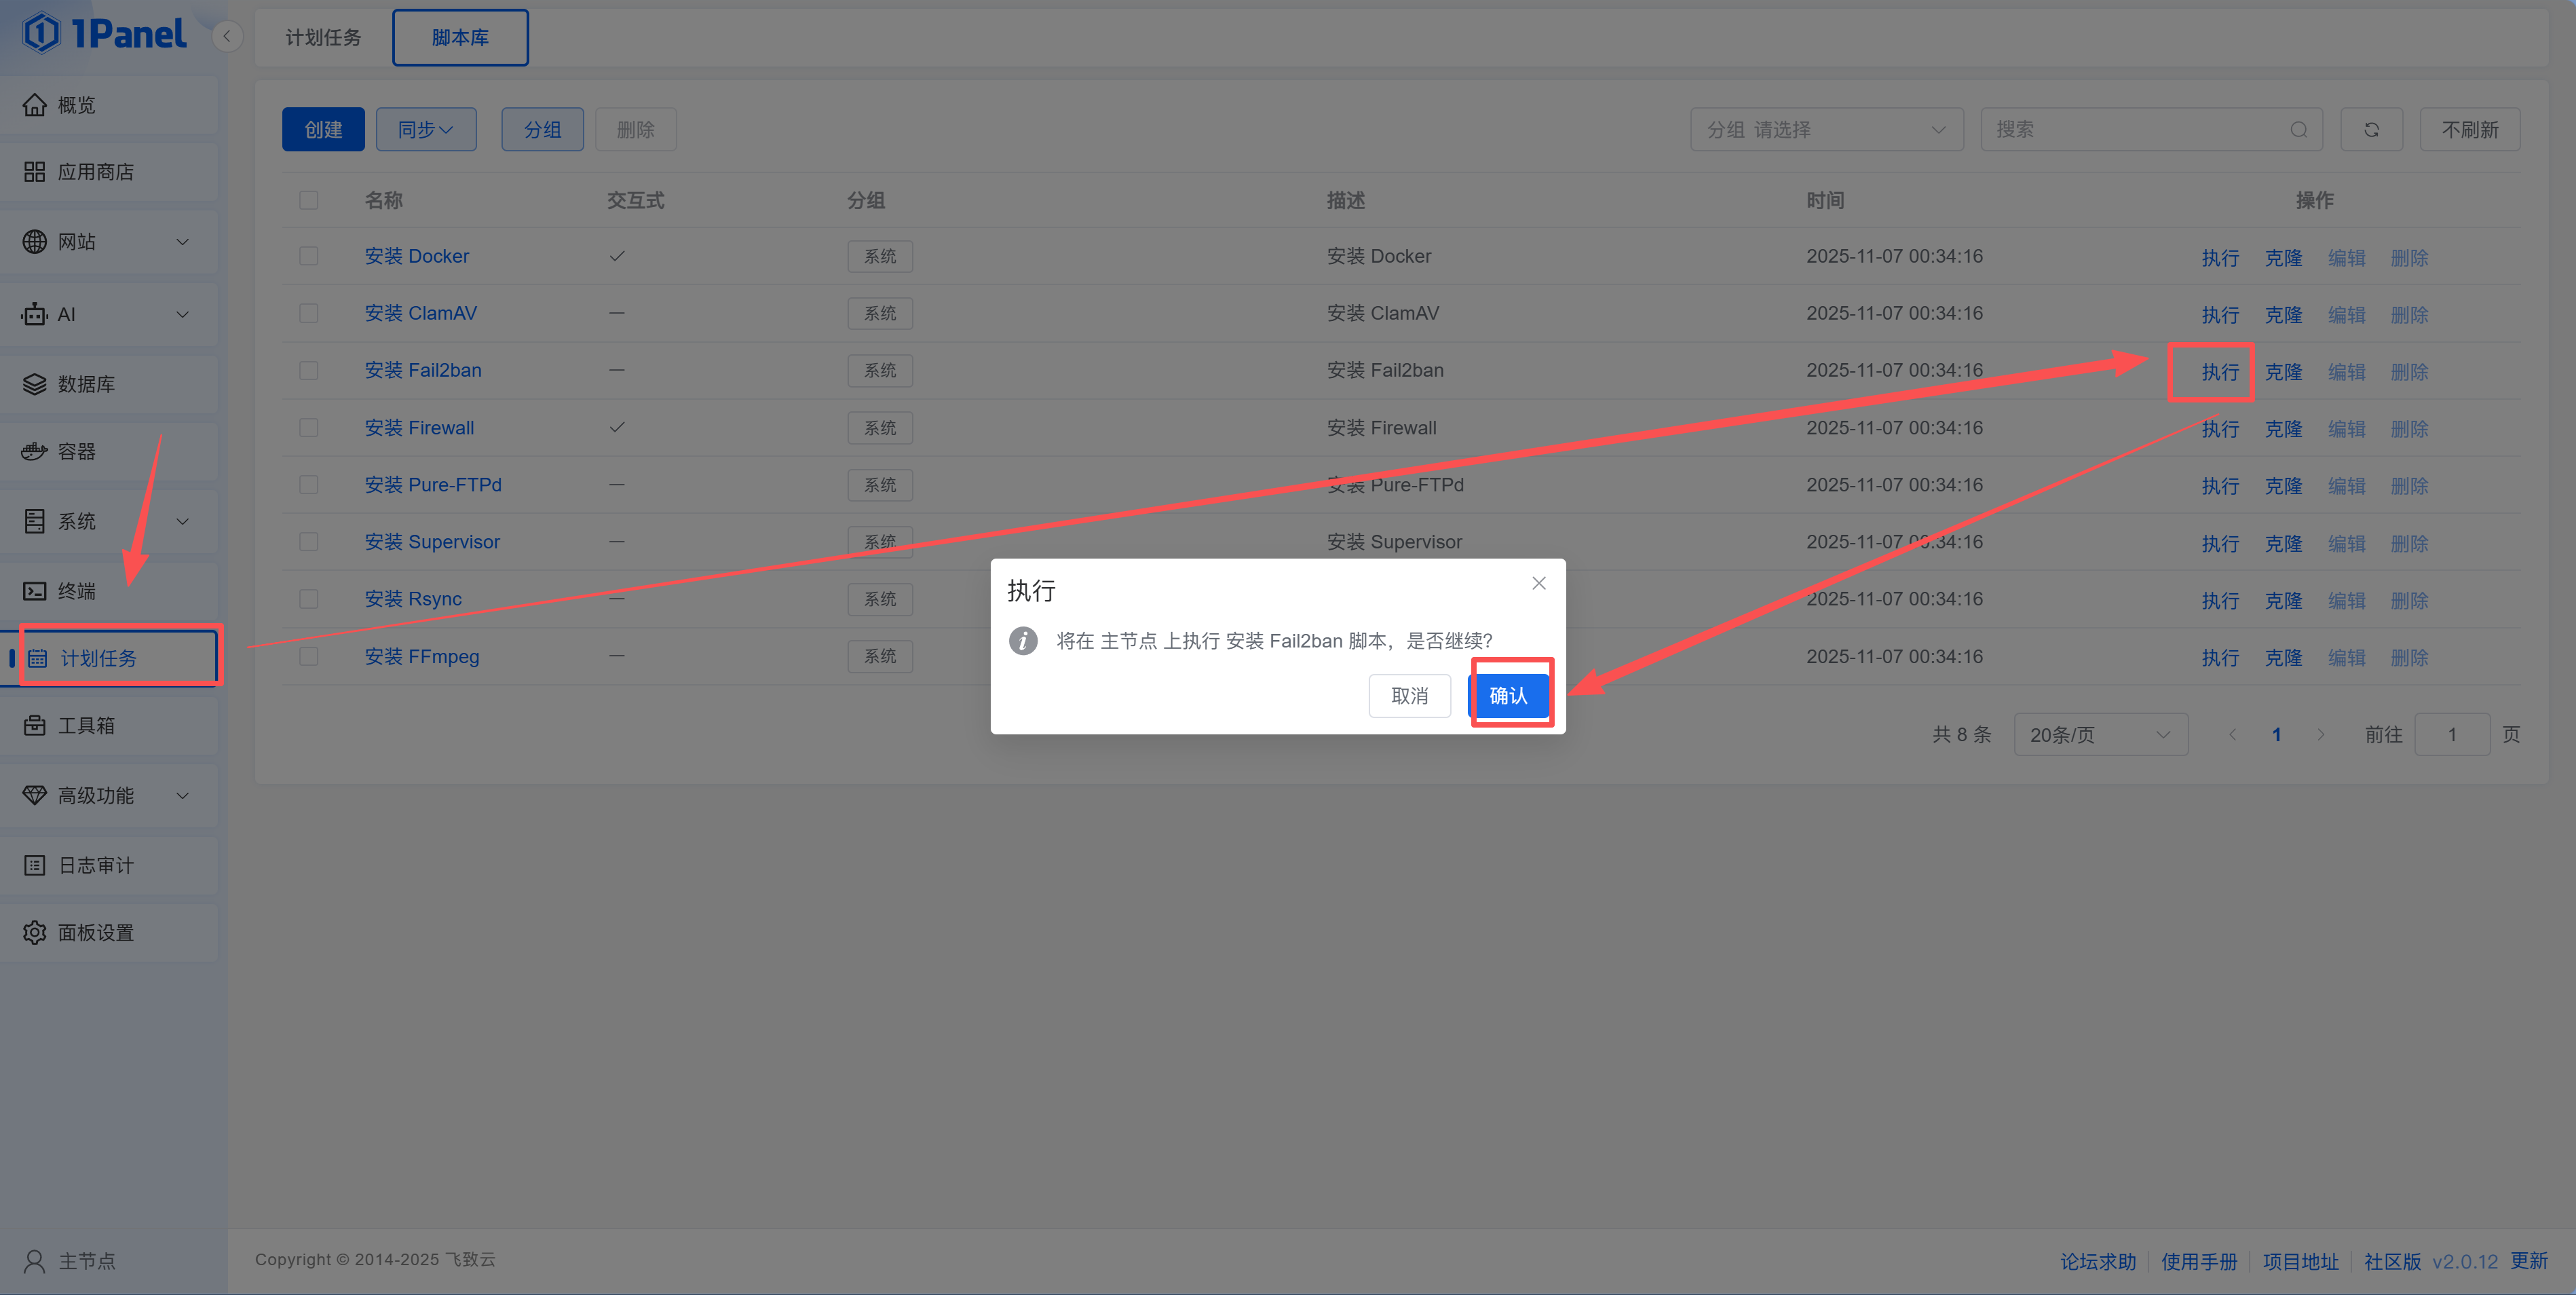
Remember to change the monitoring port to the one you set earlier.
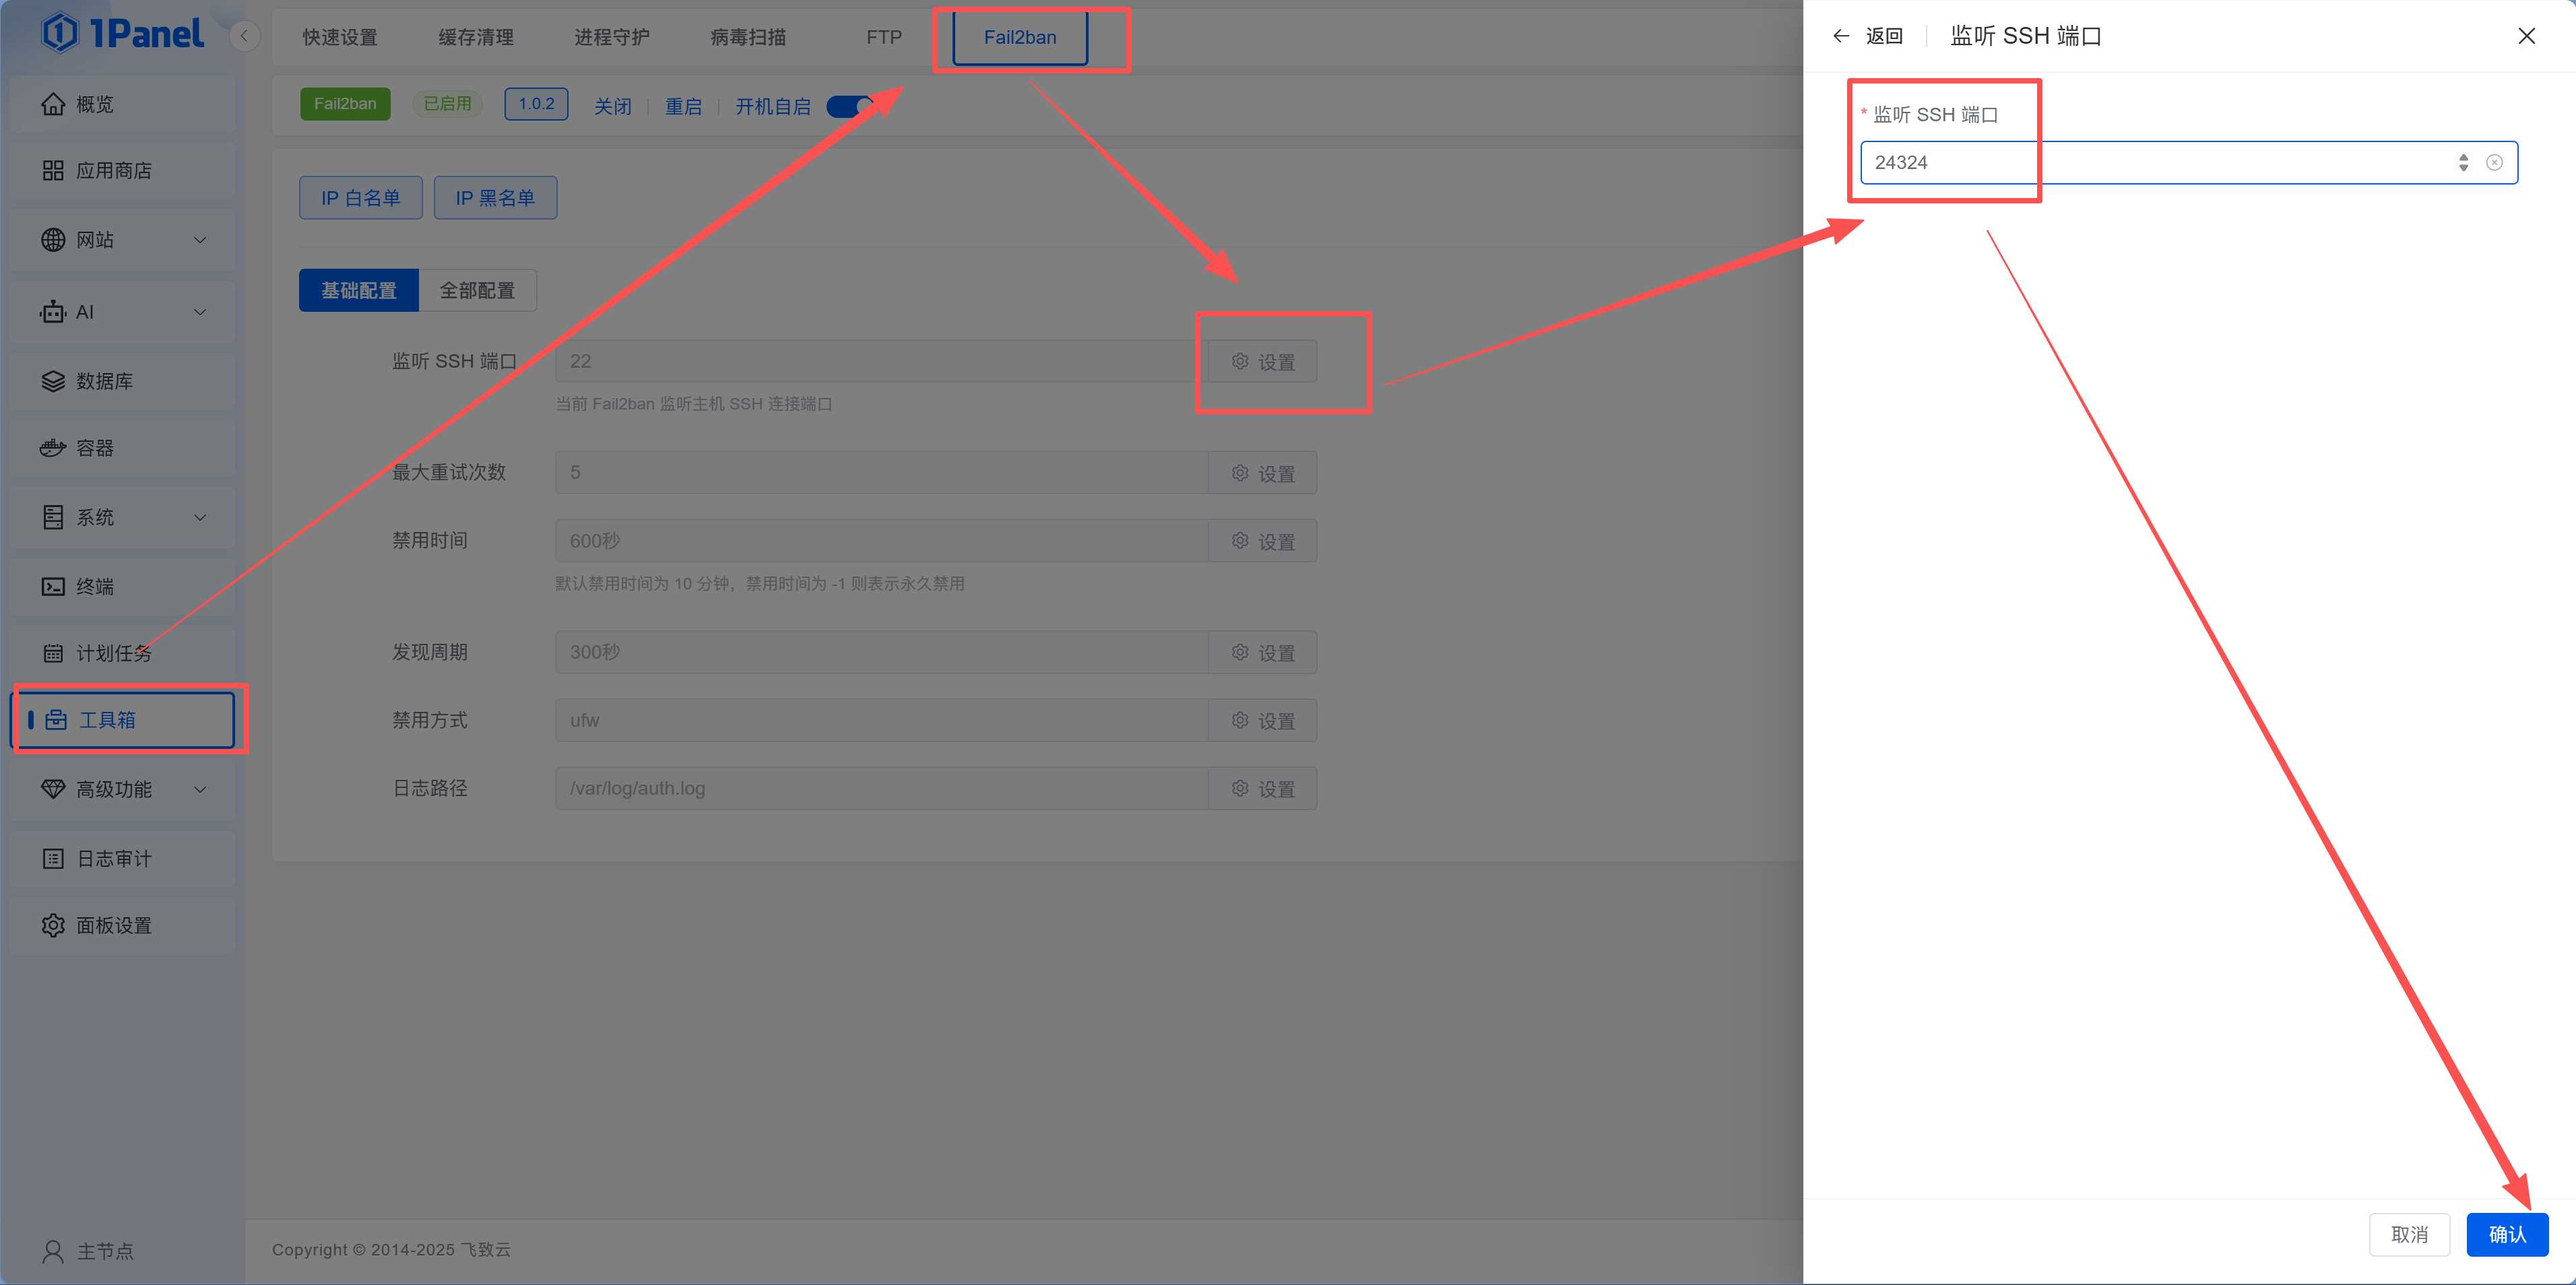
After installing Fail2Ban, Xiao Ming checks the logs again and finds those brute force IPs have been automatically banned. "Like installing an automatic lock at the door—too many wrong attempts, and you're not getting in."
7.4 Configure SSH Key Login (Replace Password)
No matter how complex, passwords can still be brute forced. SSH key login is more secure—only devices with the private key can log in, making password brute forcing completely ineffective.
Generate SSH Key on Your Local Computer
Windows users open PowerShell, Mac/Linux users open Terminal, and execute:
ssh-keygen -t rsa -b 4096Press Enter several times to accept defaults (default path and empty passphrase).
After successful generation, view the public key content:
cat ~/.ssh/id_rsa.pubYou'll see something like this (this is the "public key"):
ssh-rsa AAAAB3NzaC1yc2EAAAADAQABAAABAQC...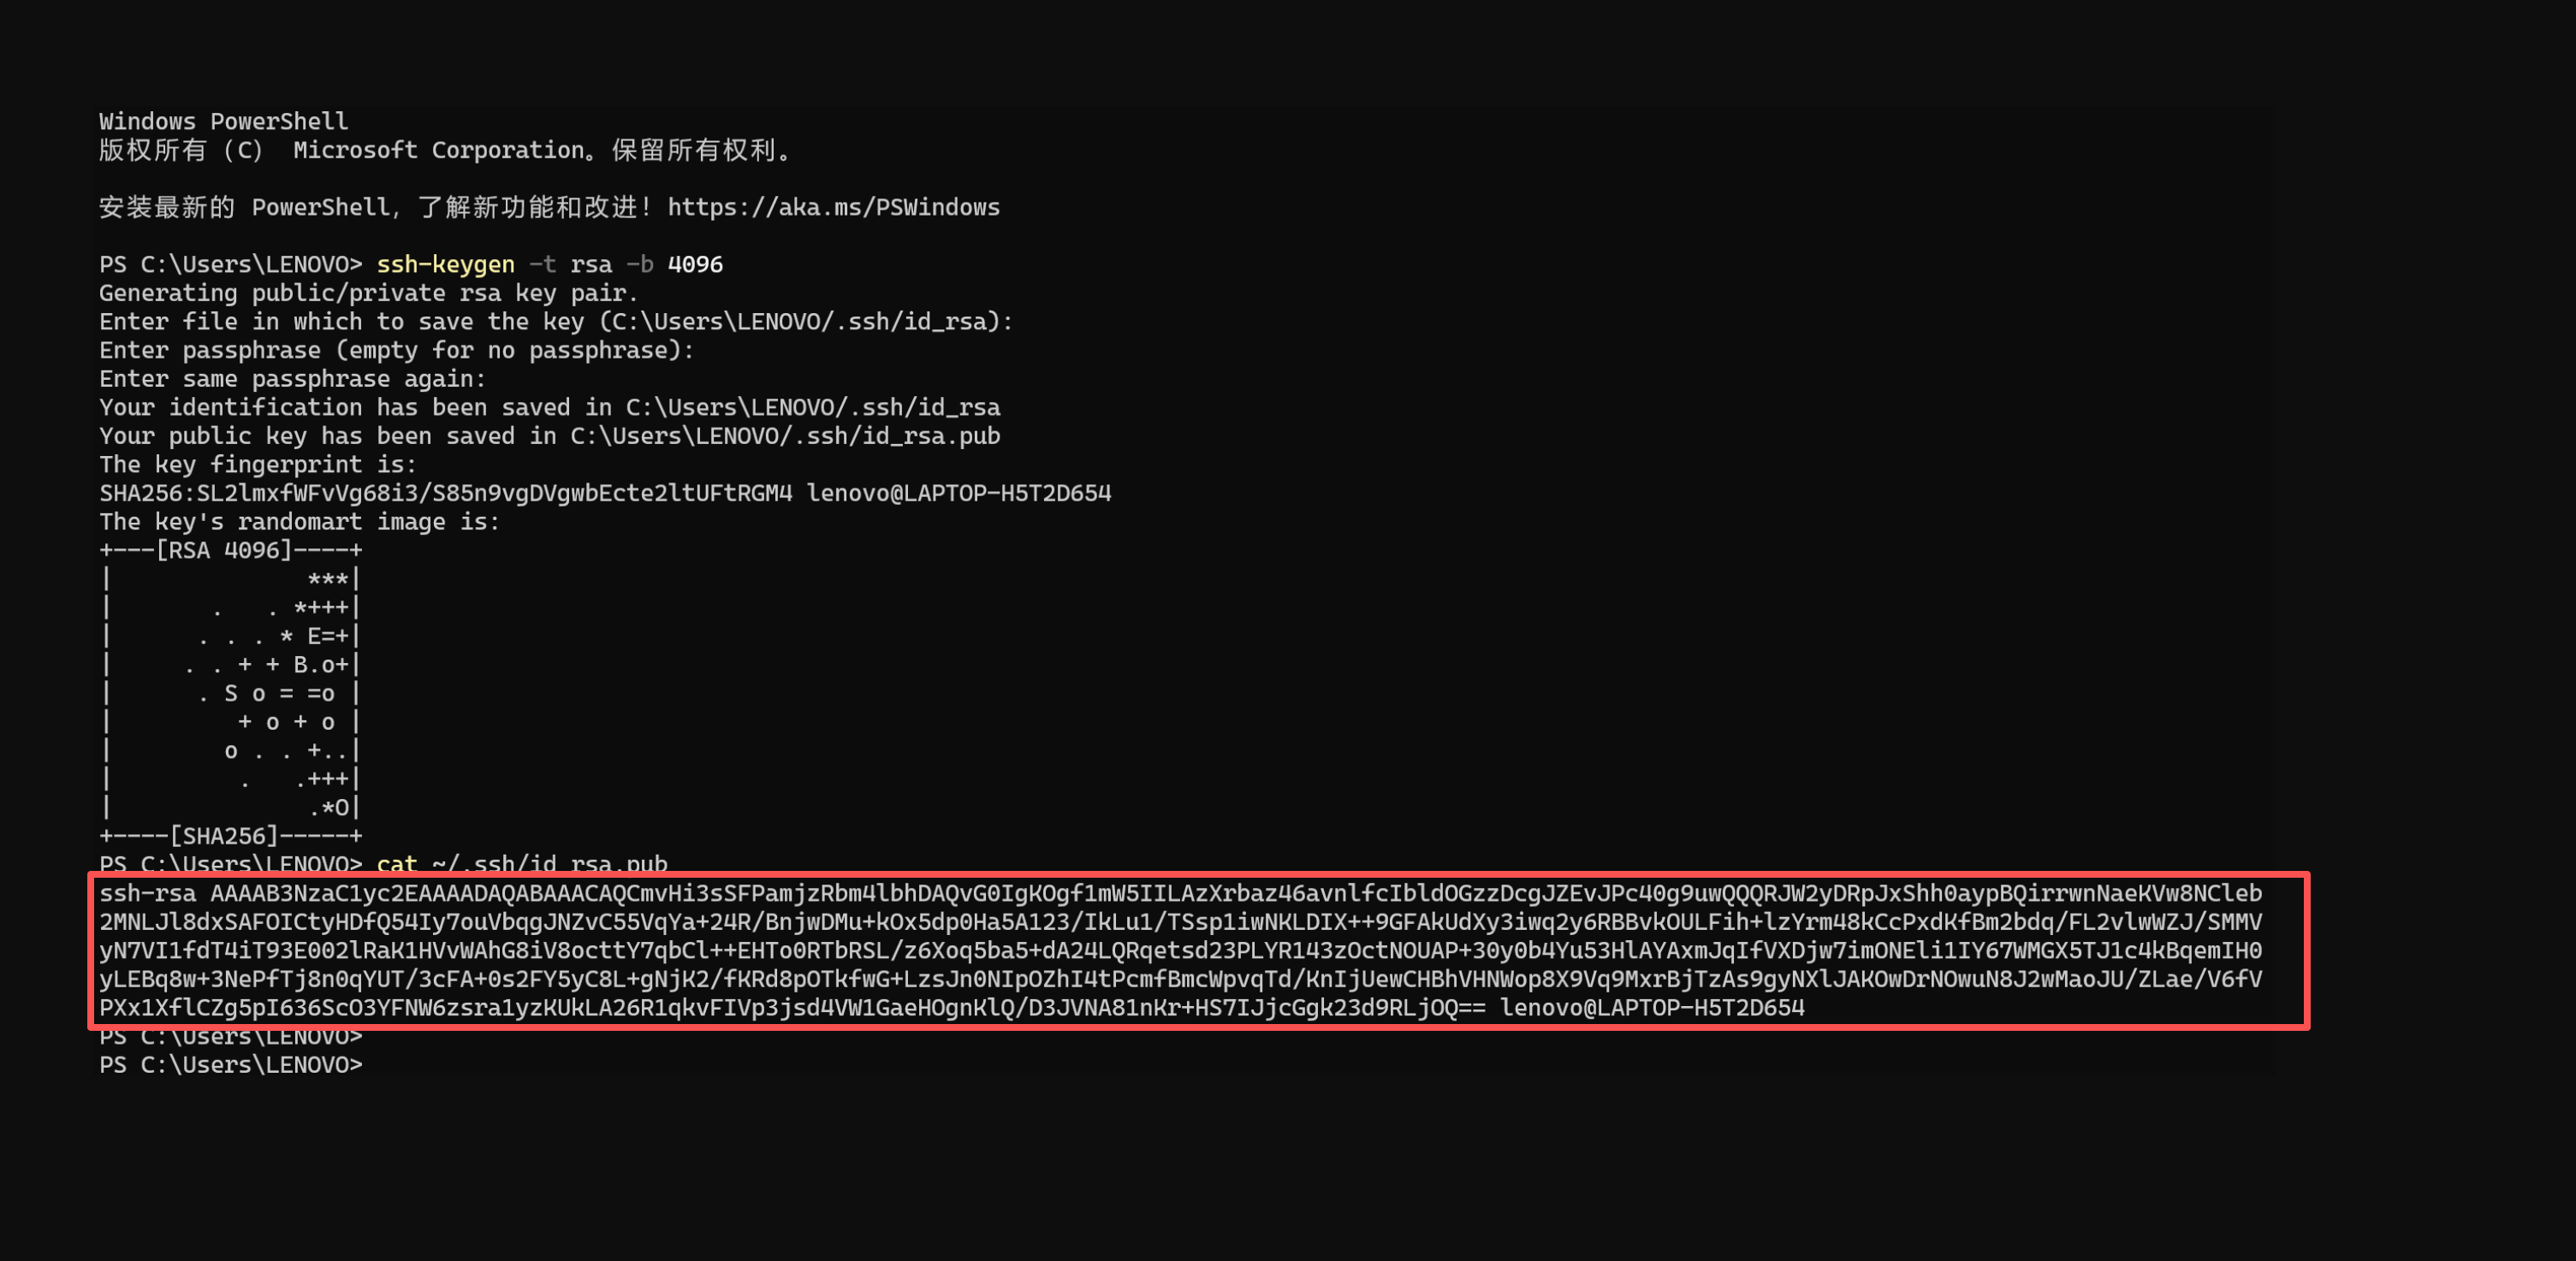
Public key vs. private key
- Public key (
id_rsa.pub) can be shared publicly, uploaded to servers - Private key (
id_rsa) must be kept secure and never leaked. The private key is your "key"—losing it is like losing your house key
Upload Public Key to Server
In 1Panel, navigate to: System → SSH Management
Configure:
| Item | Setting |
|---|---|
| Key Authentication | ✅ Enabled |
| Authorized Keys | Click "Authorized Keys" button, paste the copied public key |
| Password Authentication | ❌ Disabled (only after confirming key login works) |

After saving, don't close your current SSH connection yet. Open a new terminal window and test key login:
ssh -p 24324 root@your-server-ipIf you can log in directly (without entering password), key configuration is successful. Then return to 1Panel to disable "Password Authentication" and click "Restart SSH Service."
Xiao Ming confirms key login works, then disables password authentication. He tests with a new terminal window—key login succeeds, password login is rejected. "Now brute force password attacks are completely useless."
Test before disabling password
Before disabling password login, be absolutely sure key login works. Otherwise, if configuration is wrong, you've locked yourself out and can only fix it through your cloud provider's web terminal.
7.5 Enable WAF (Optional but Strongly Recommended)
If you later bind a domain to your website, you can enable WAF (Web Application Firewall) for free in 1Panel's advanced features. Its main purpose is helping websites automatically block common malicious requests like scanning, brute force, SQL injection, etc.—essentially "adding a default lock."
How to enable:
- In 1Panel, go to:
Advanced Features → WAF - Switch to "Global Settings"
- Enable "Access Frequency Limit" (prevents malicious refresh, CC attacks)
- Save
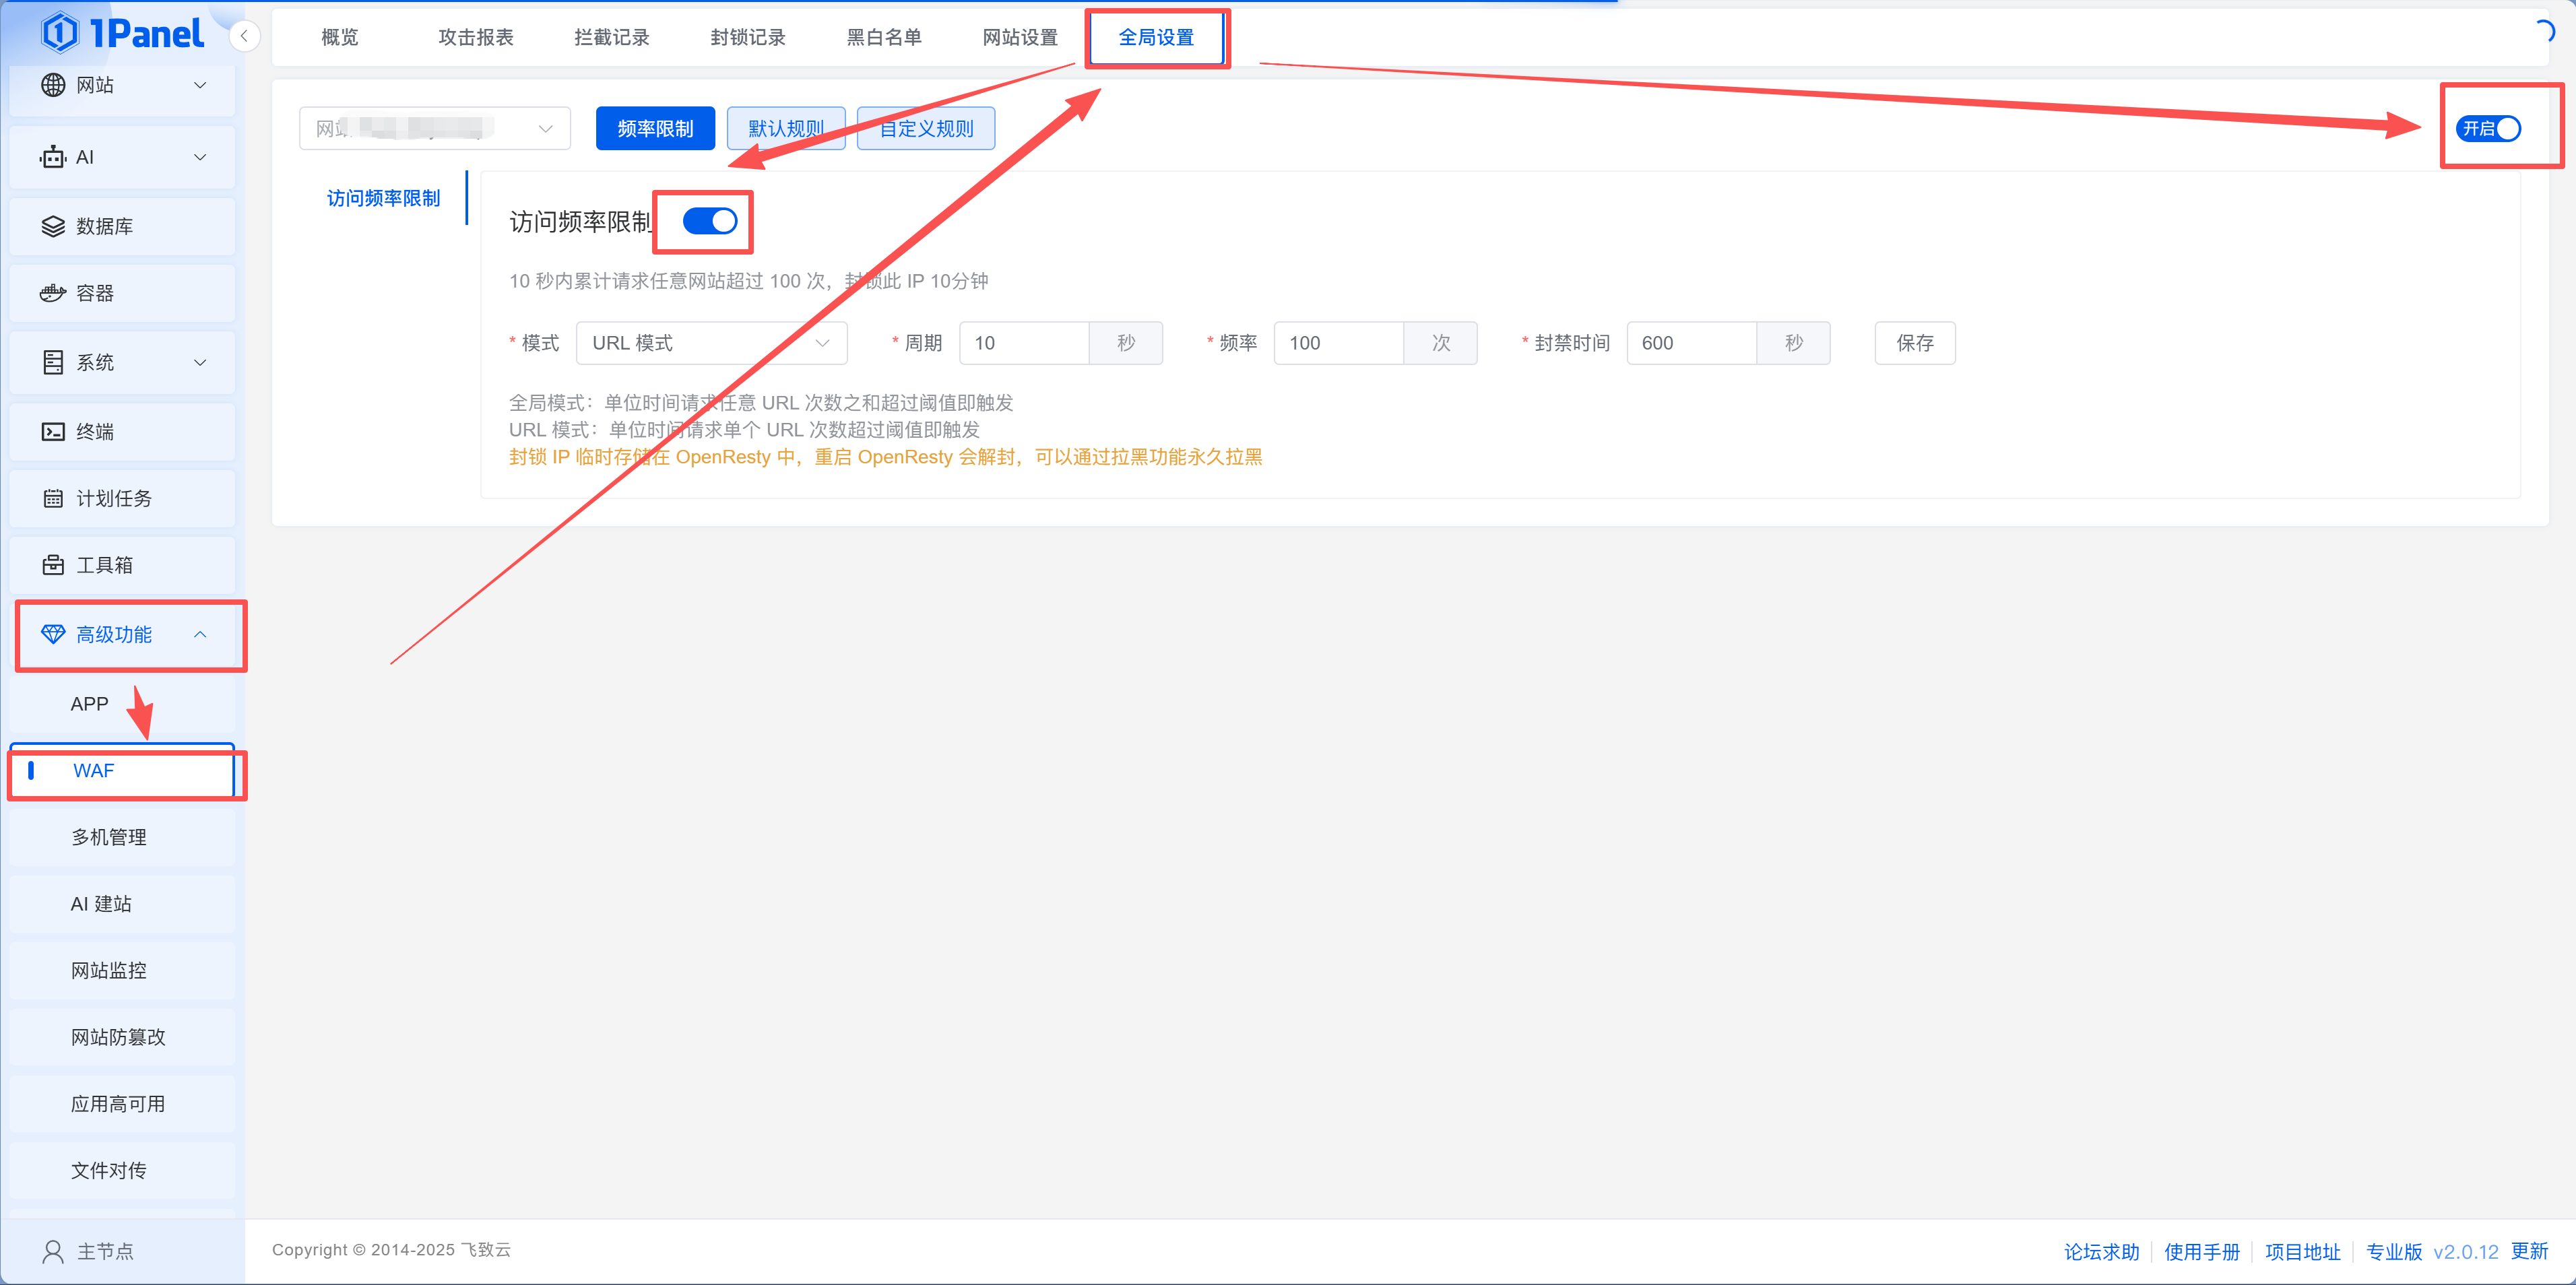
WAF won't affect normal access. Even without additional security configuration, it significantly reduces malicious traffic.
Daily Maintenance Checklist
Servers aren't "set and forget." The good news is most maintenance can be done in the 1Panel interface:
| Operation | How in 1Panel | Command Line Alternative |
|---|---|---|
| View system load | Panel homepage dashboard, or "System > Monitoring" for detailed trend charts | htop |
| Check disk space | Disk usage at bottom of panel homepage | df -h |
| Clean Docker junk | Execute cleanup command in panel terminal | docker system prune -f |
| System updates | Execute in panel terminal | apt update && apt upgrade -y |
Section Summary
| Completed | Significance |
|---|---|
| Connected to server | Can remotely operate server |
| System updates | Higher security and compatibility |
| Installed common tools | Basic development and troubleshooting capabilities |
| Installed 1Panel | Visual server management |
| Configured security groups | Open necessary ports, block other traffic |
| Enabled firewall + Fail2Ban | Block malicious access |
| Changed SSH port | Reduce brute force risk |
| Enabled key login | Eliminate password brute forcing at the root |
| Enabled WAF | Reduce malicious traffic |
Security isn't about complexity—it's about doing the required steps. After this chapter, your server is no longer "running naked."
Next Step
Server ready, security hardened. Now onto the main topic—14.3.1 App Store and Docker Basics, learning how to one-click install various applications with 1Panel.