Just a Browser to Start, and Your Entire Coding Environment Is Ready
Are you tired of:
- Spending days setting up a development environment?
- Your computer not being powerful enough to run Docker?
- Slow GitHub downloads, where cloning a repo takes half an hour?
Stop struggling with it! Just open a browser and start coding—the environment is configured automatically, and all dependencies are preinstalled and ready to use.
In theory, any device that can run a browser can do VibeCoding—even a refrigerator or a smartwatch.
Preinstalled Development Environment
This project is based on the image built and published by Eyre@VibeVibe.cn, and it's ready to use out of the box:
- AI Coding: Claude Code, OpenAI Codex, Gemini Code Assist
- Runtime: Node.js 24.x, Python 3.11+, Docker
- Development Tools: Git, GitHub CLI, VS Code (53 extensions)
- Operations Panel: 1Panel (port 34246, username
cnb, passwordIloveCNB.)
For detailed configuration, see default-dev-env.
Basic Concepts
| Concept | Description |
|---|---|
| Repository | A place to store code, essentially a project's folder |
| Organization | A namespace for managing multiple repositories and team members |
| Fork | Copy someone else's repository to your own account so you can modify it freely without affecting the original |
| Clone | Download a remote repository locally for development |
| Branch | An independent line of code used to develop different features in parallel |
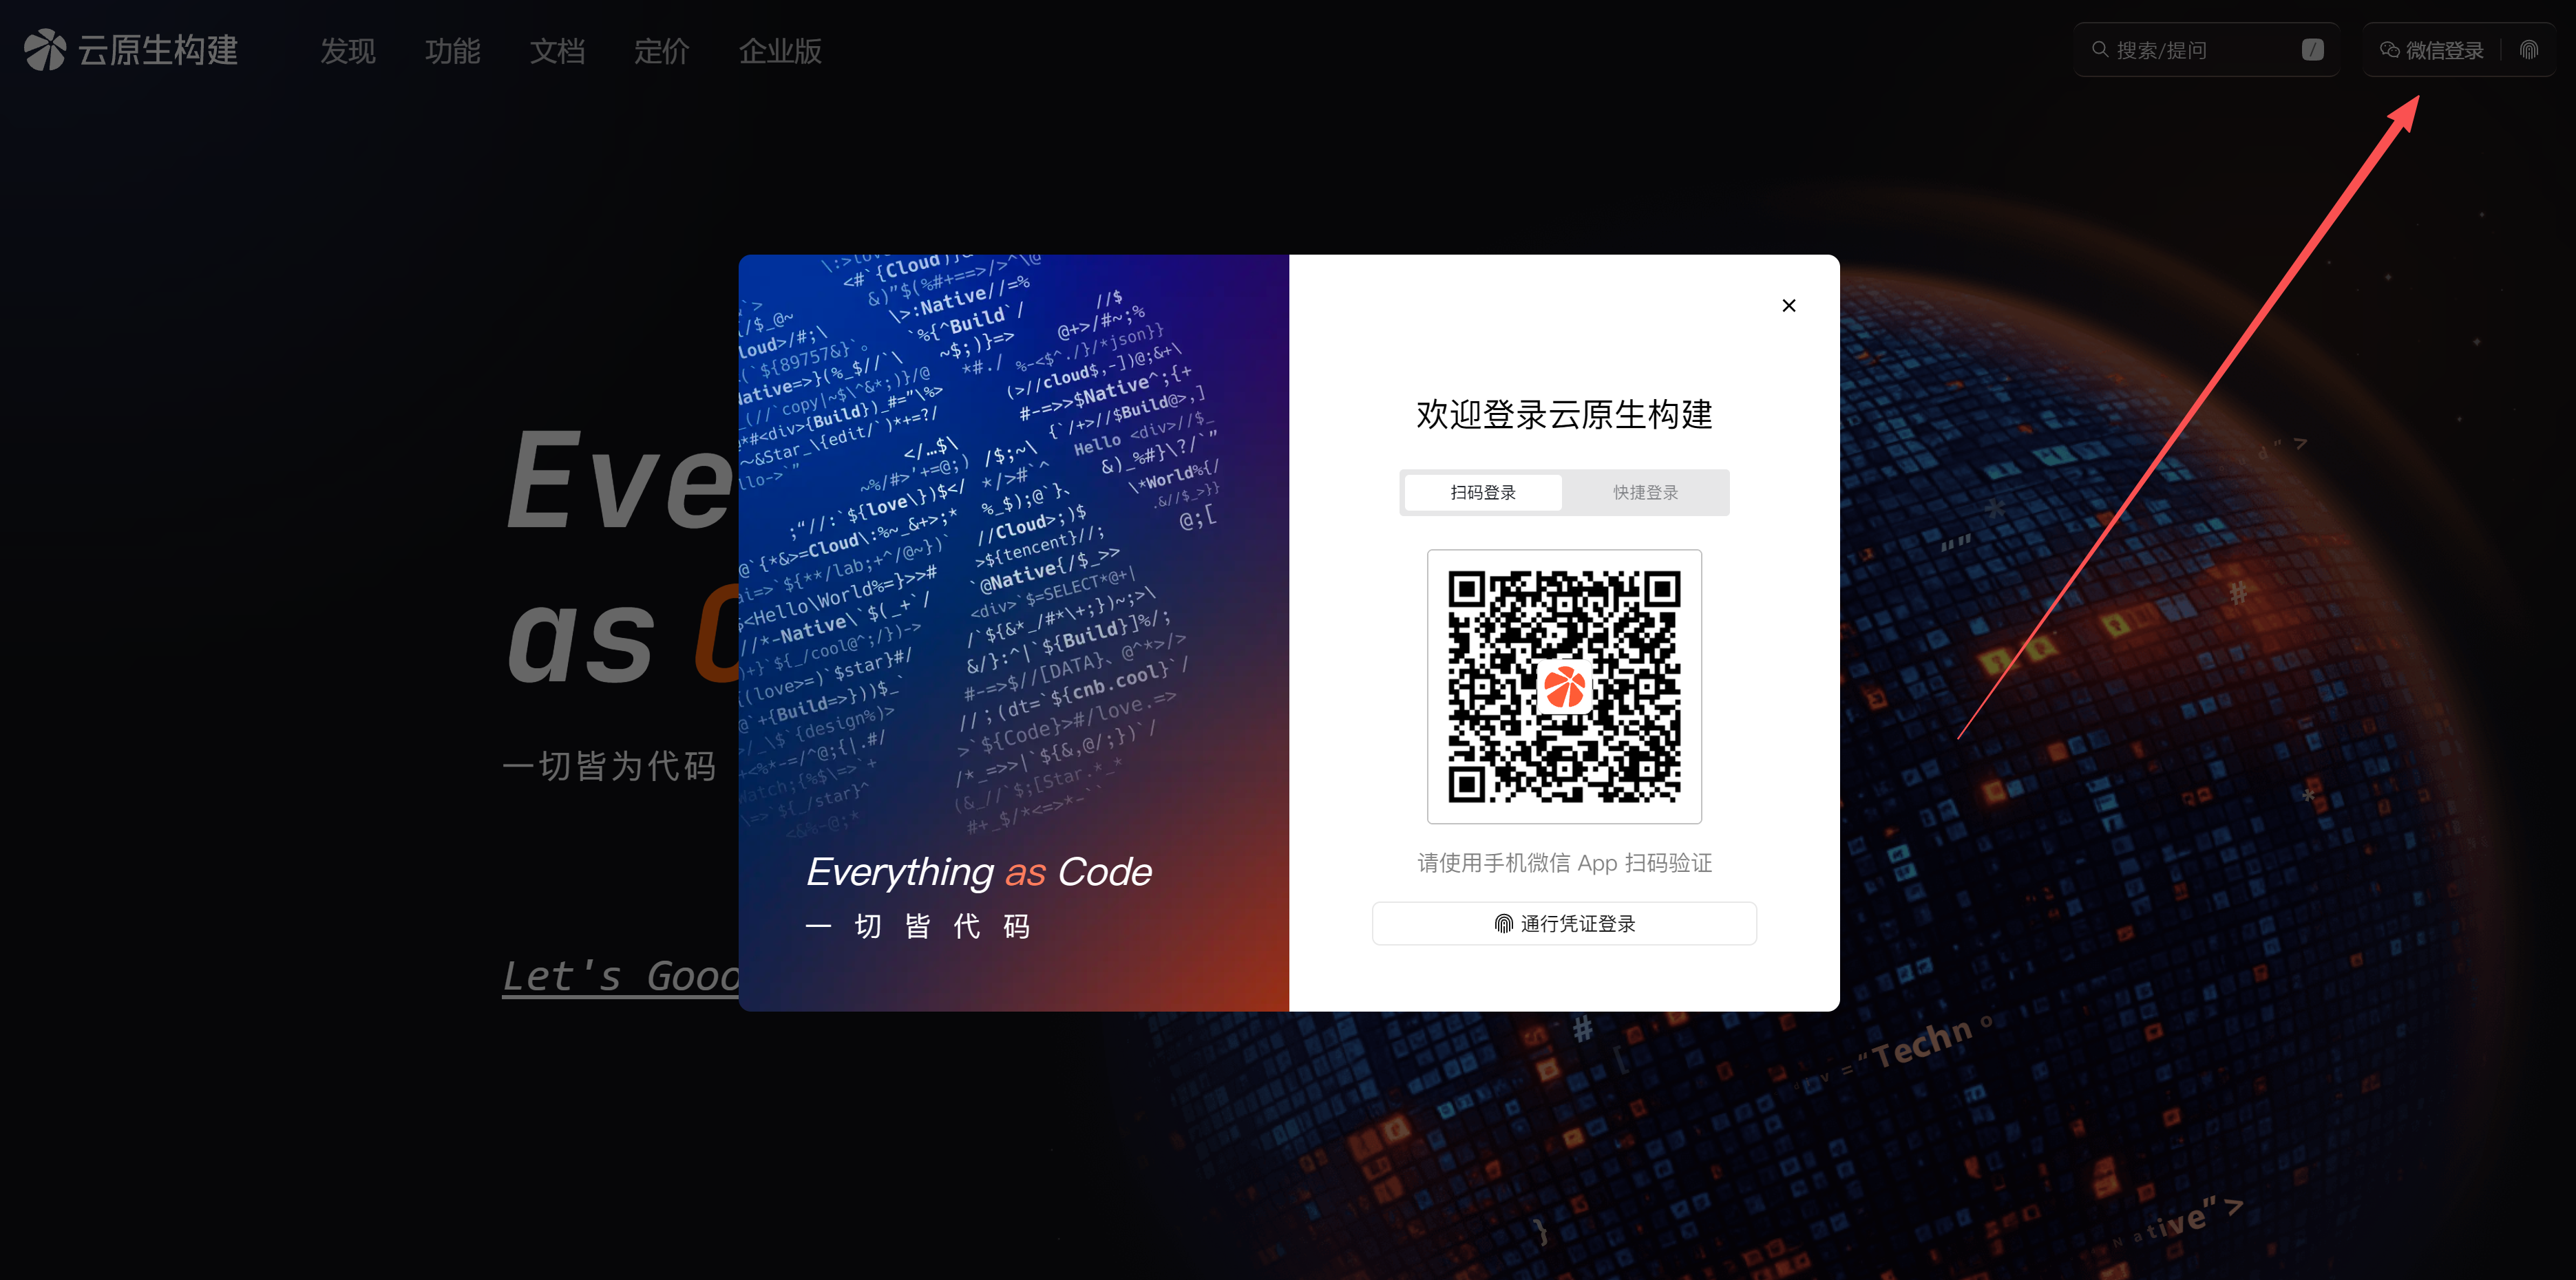
1. Sign Up and Log In
Open Tencent Cloud cnb.cool and use WeChat to scan the QR code in the upper-right corner to sign up or log in.
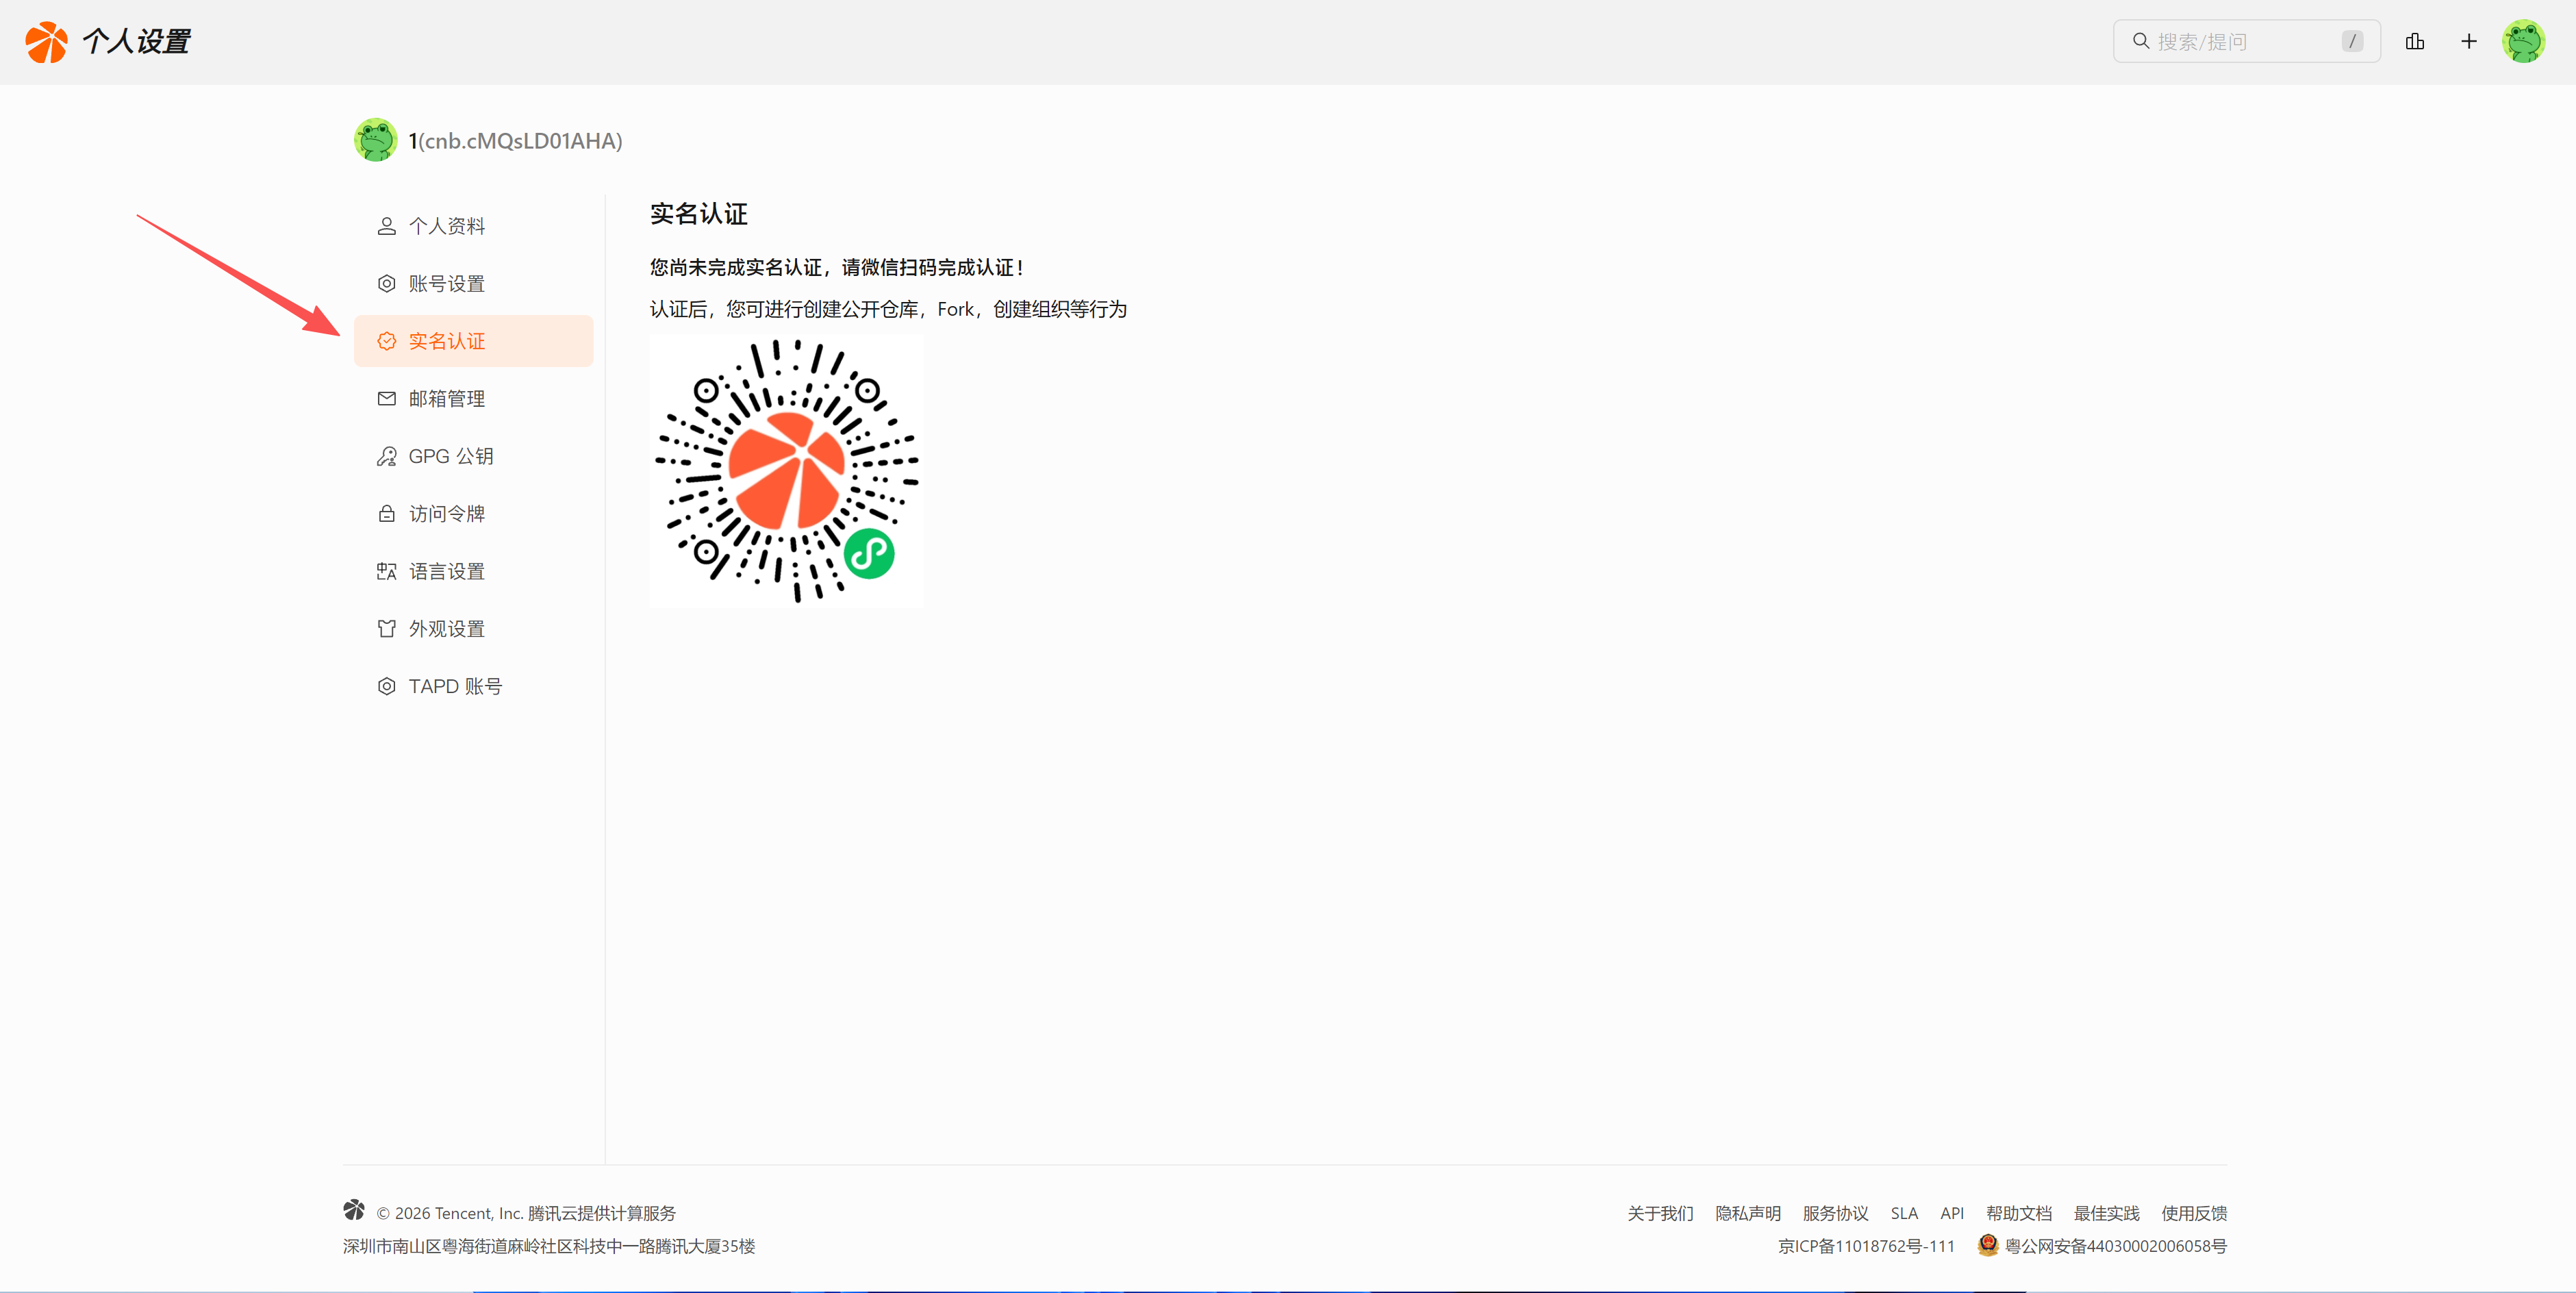
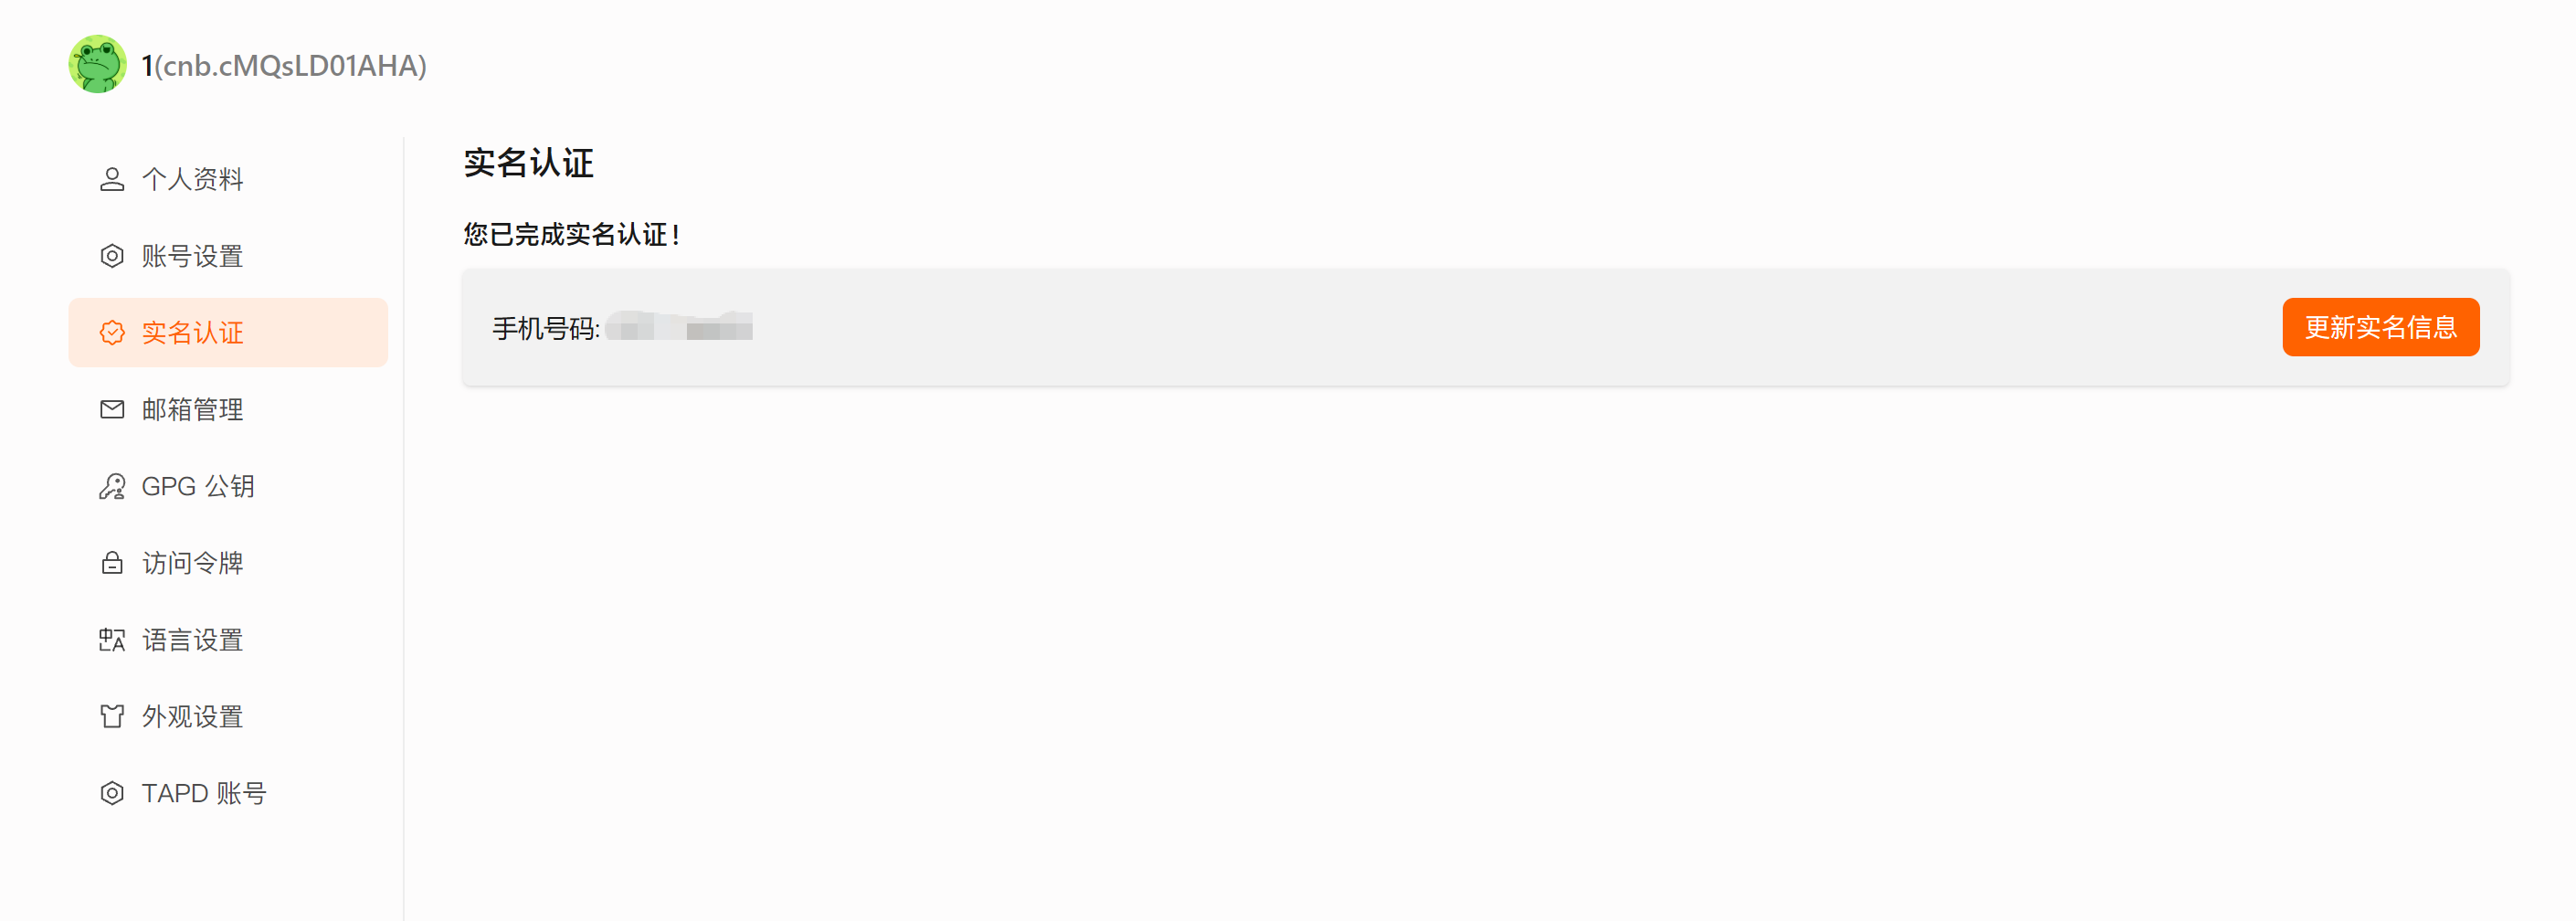
Real-Name Verification (Required)
After registering, you must complete real-name verification before you can use CNB services.
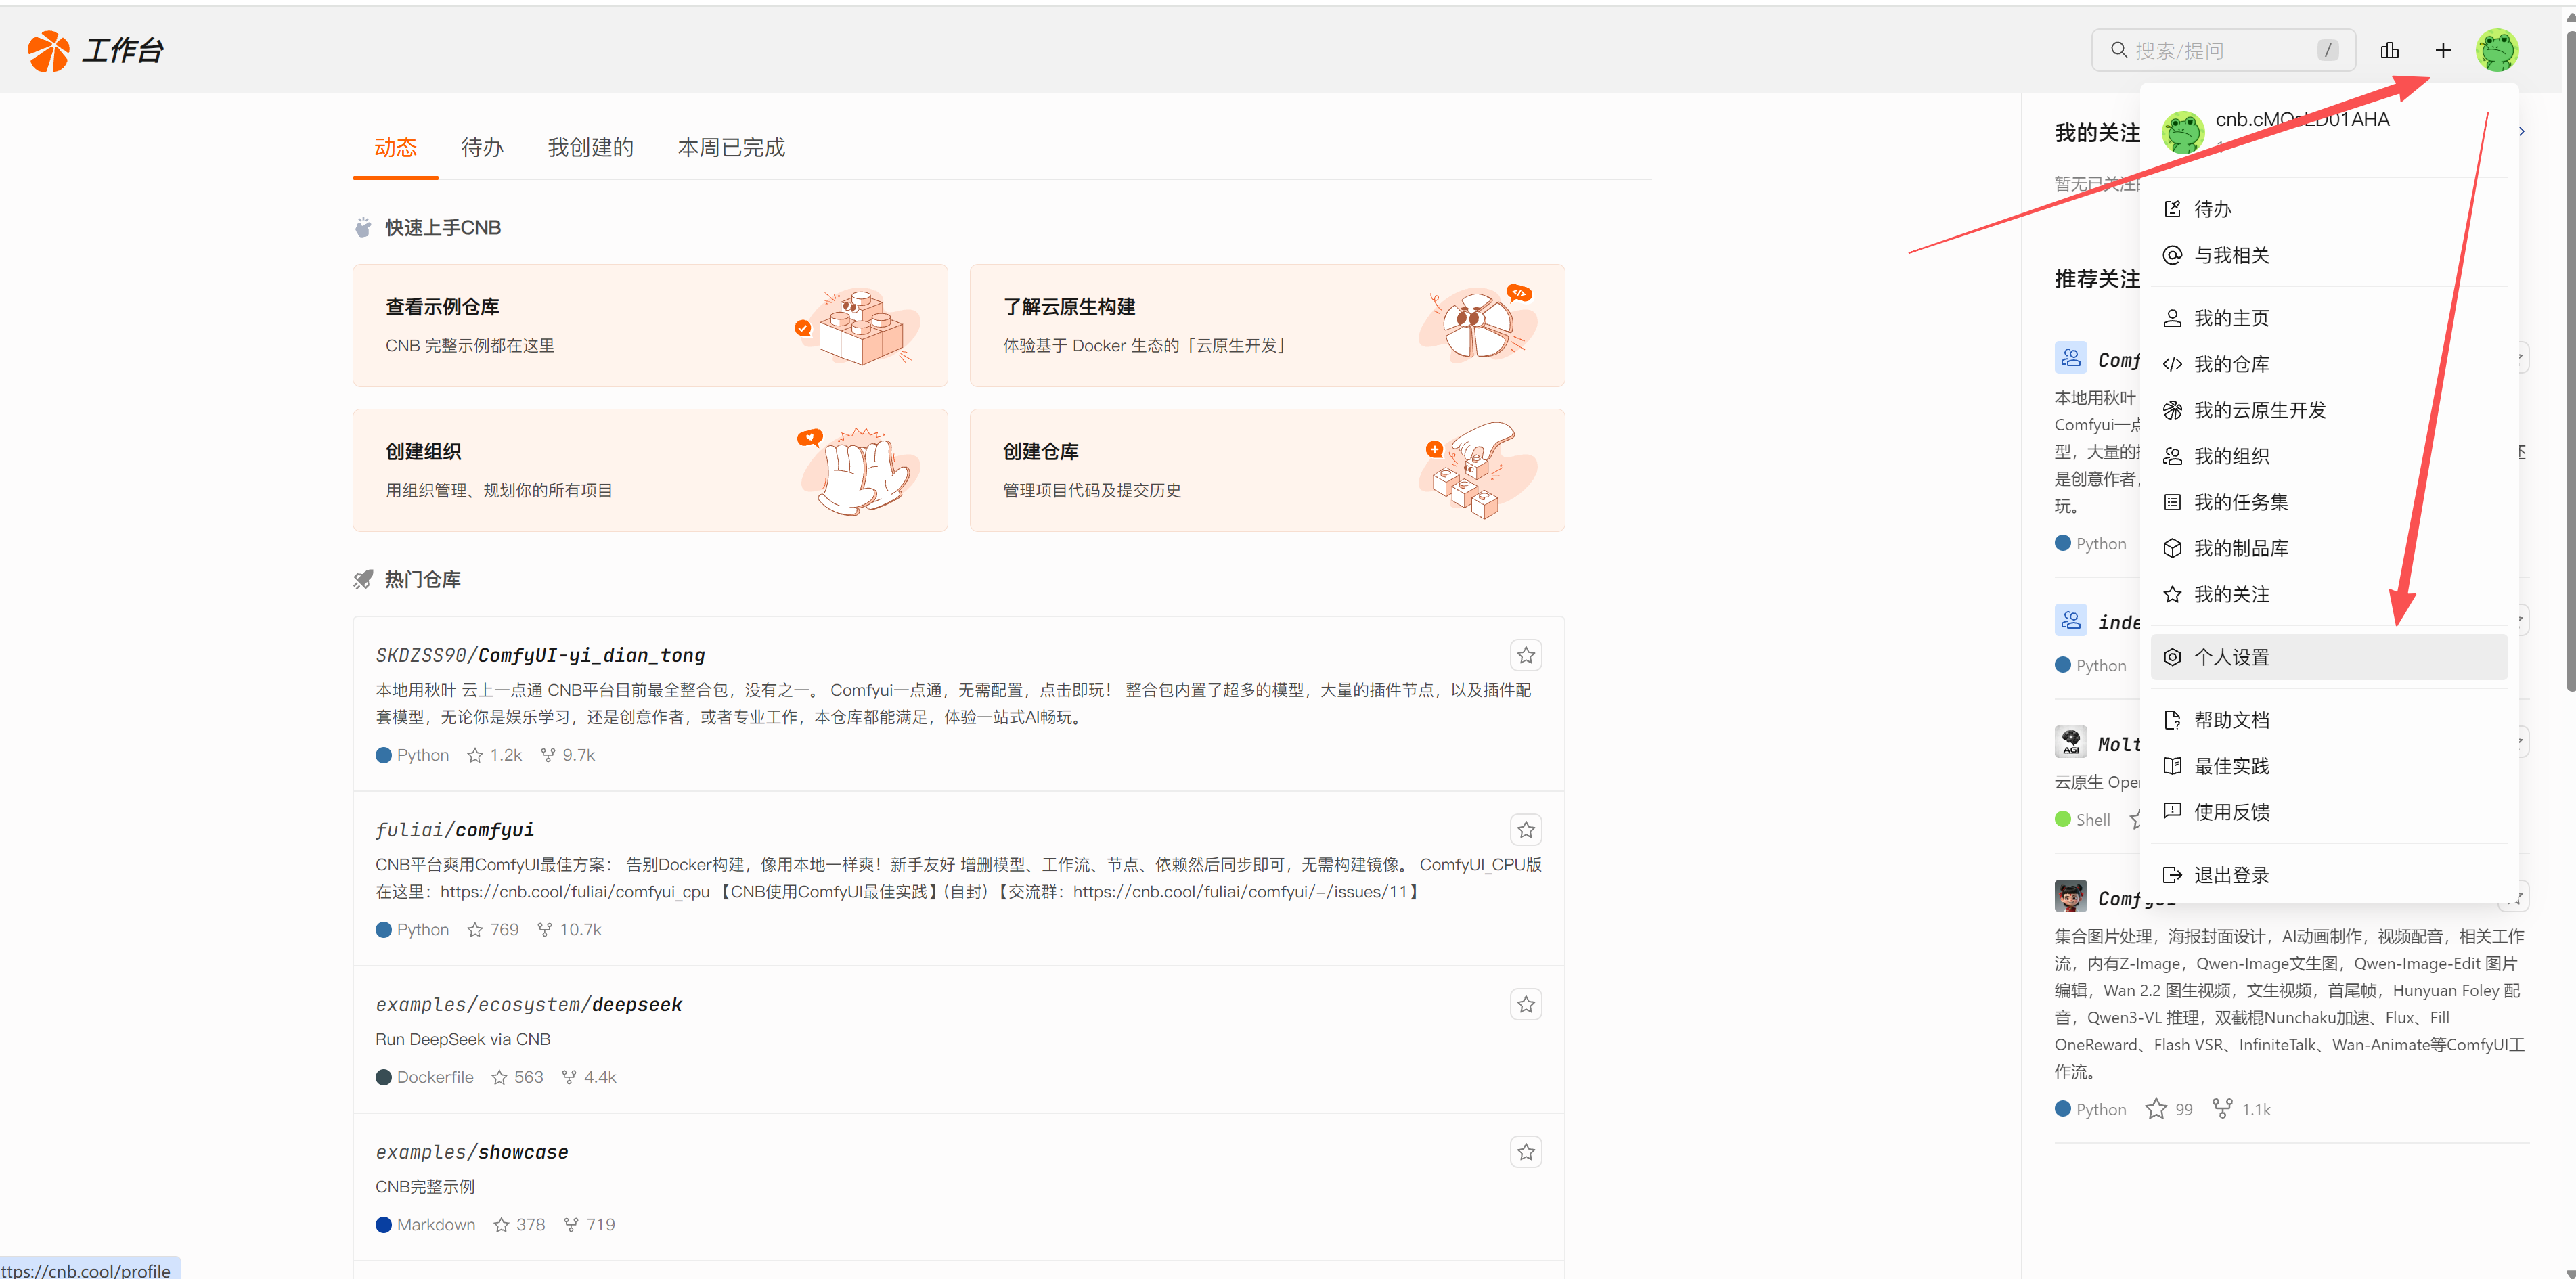
After verification, go to the verification page:
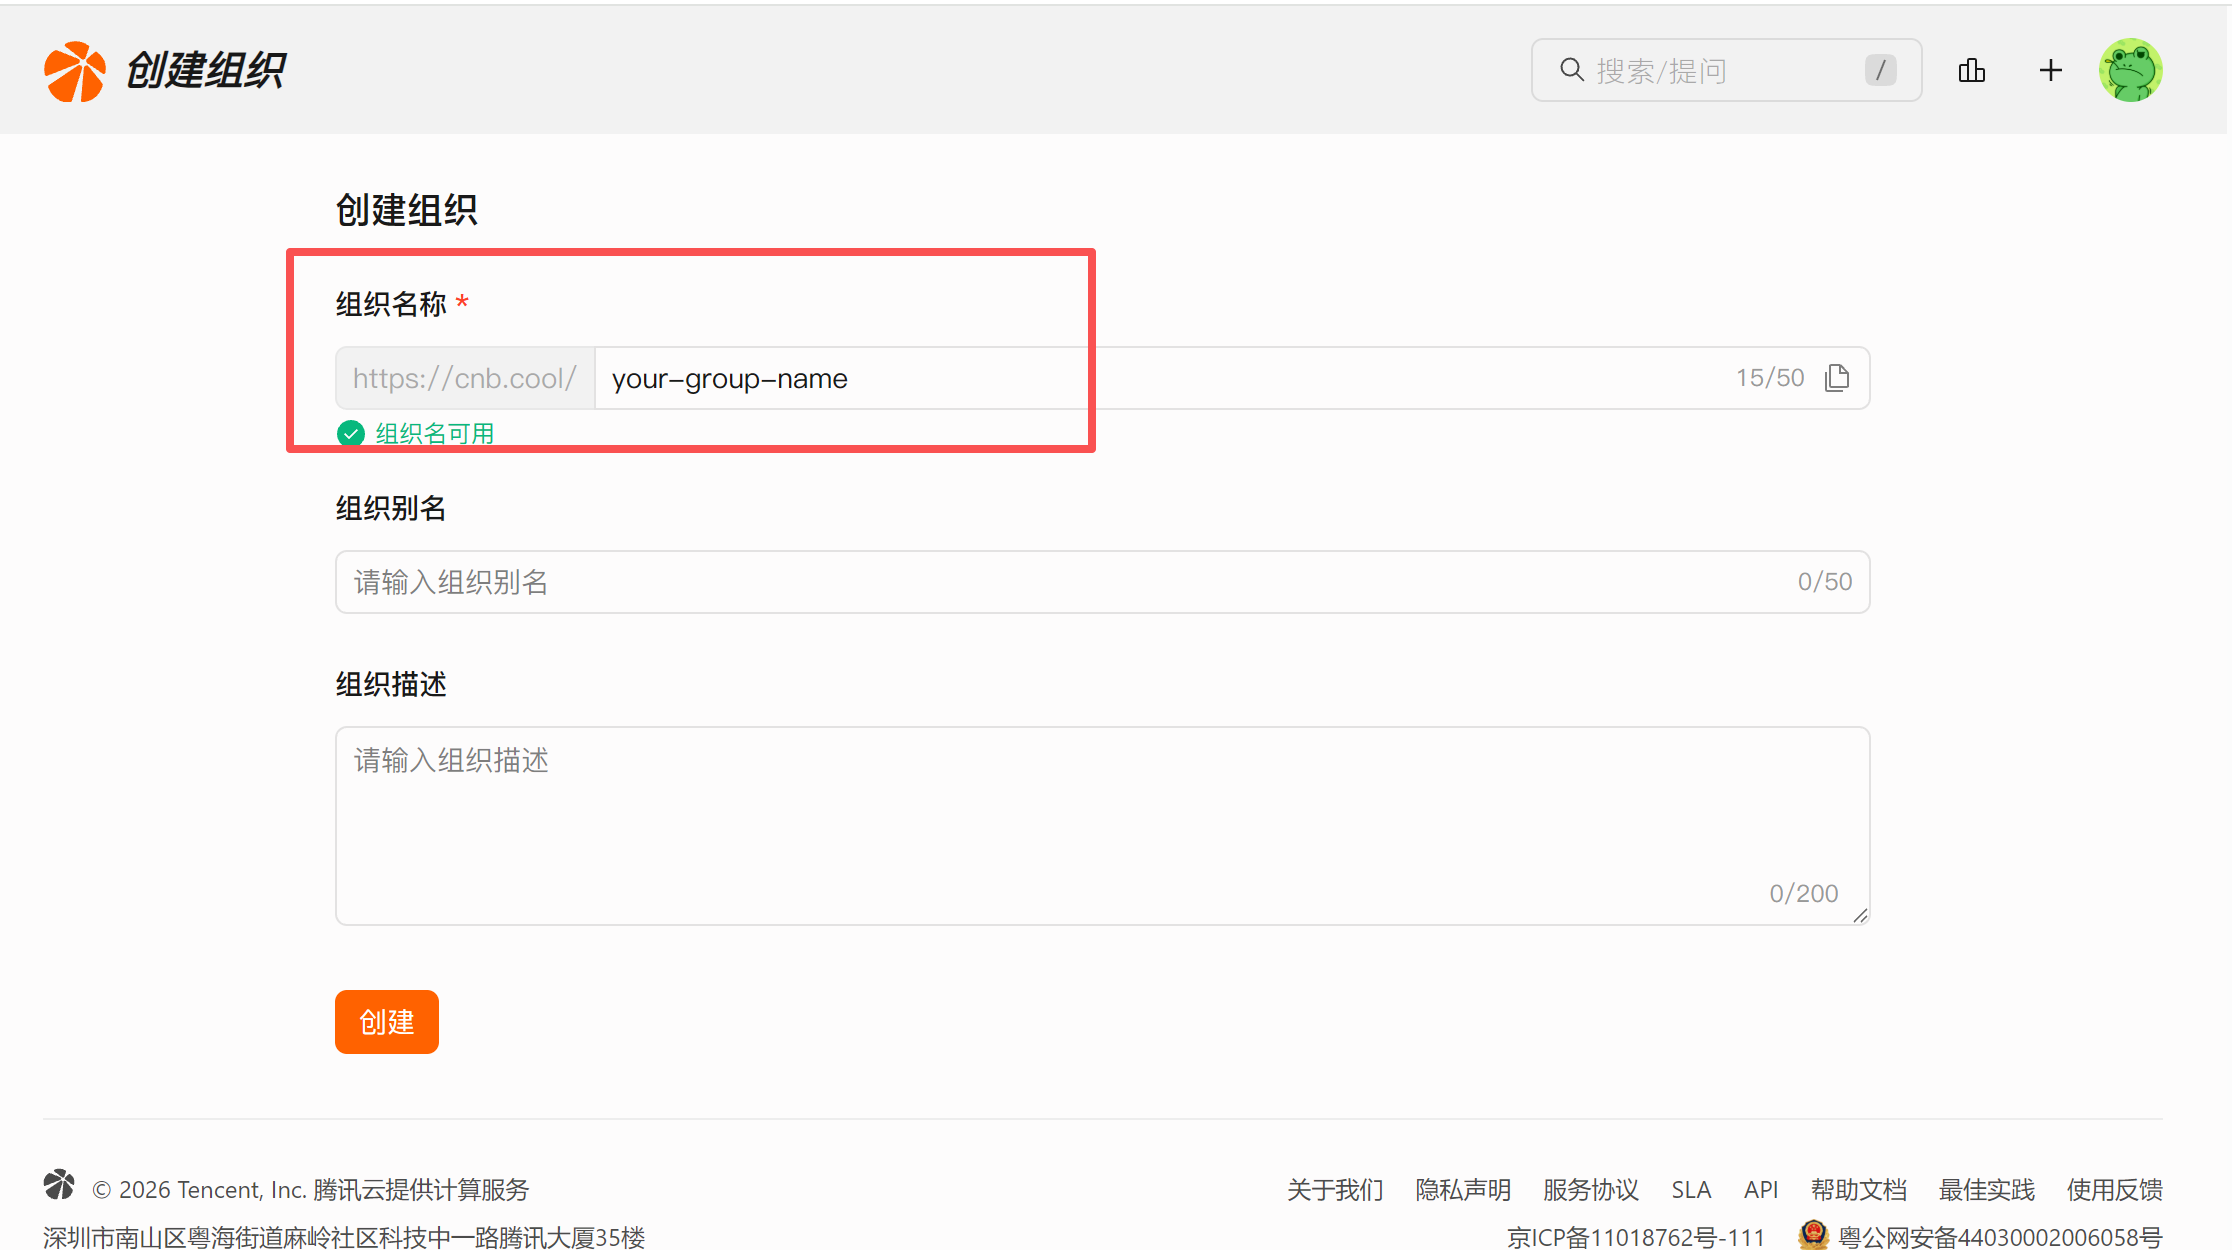
2. Create an Organization
CNB repositories must be managed under an organization. Click the + in the upper-right corner, select Create Organization, fill in the organization name and related description, then click Create to finish creating the organization.
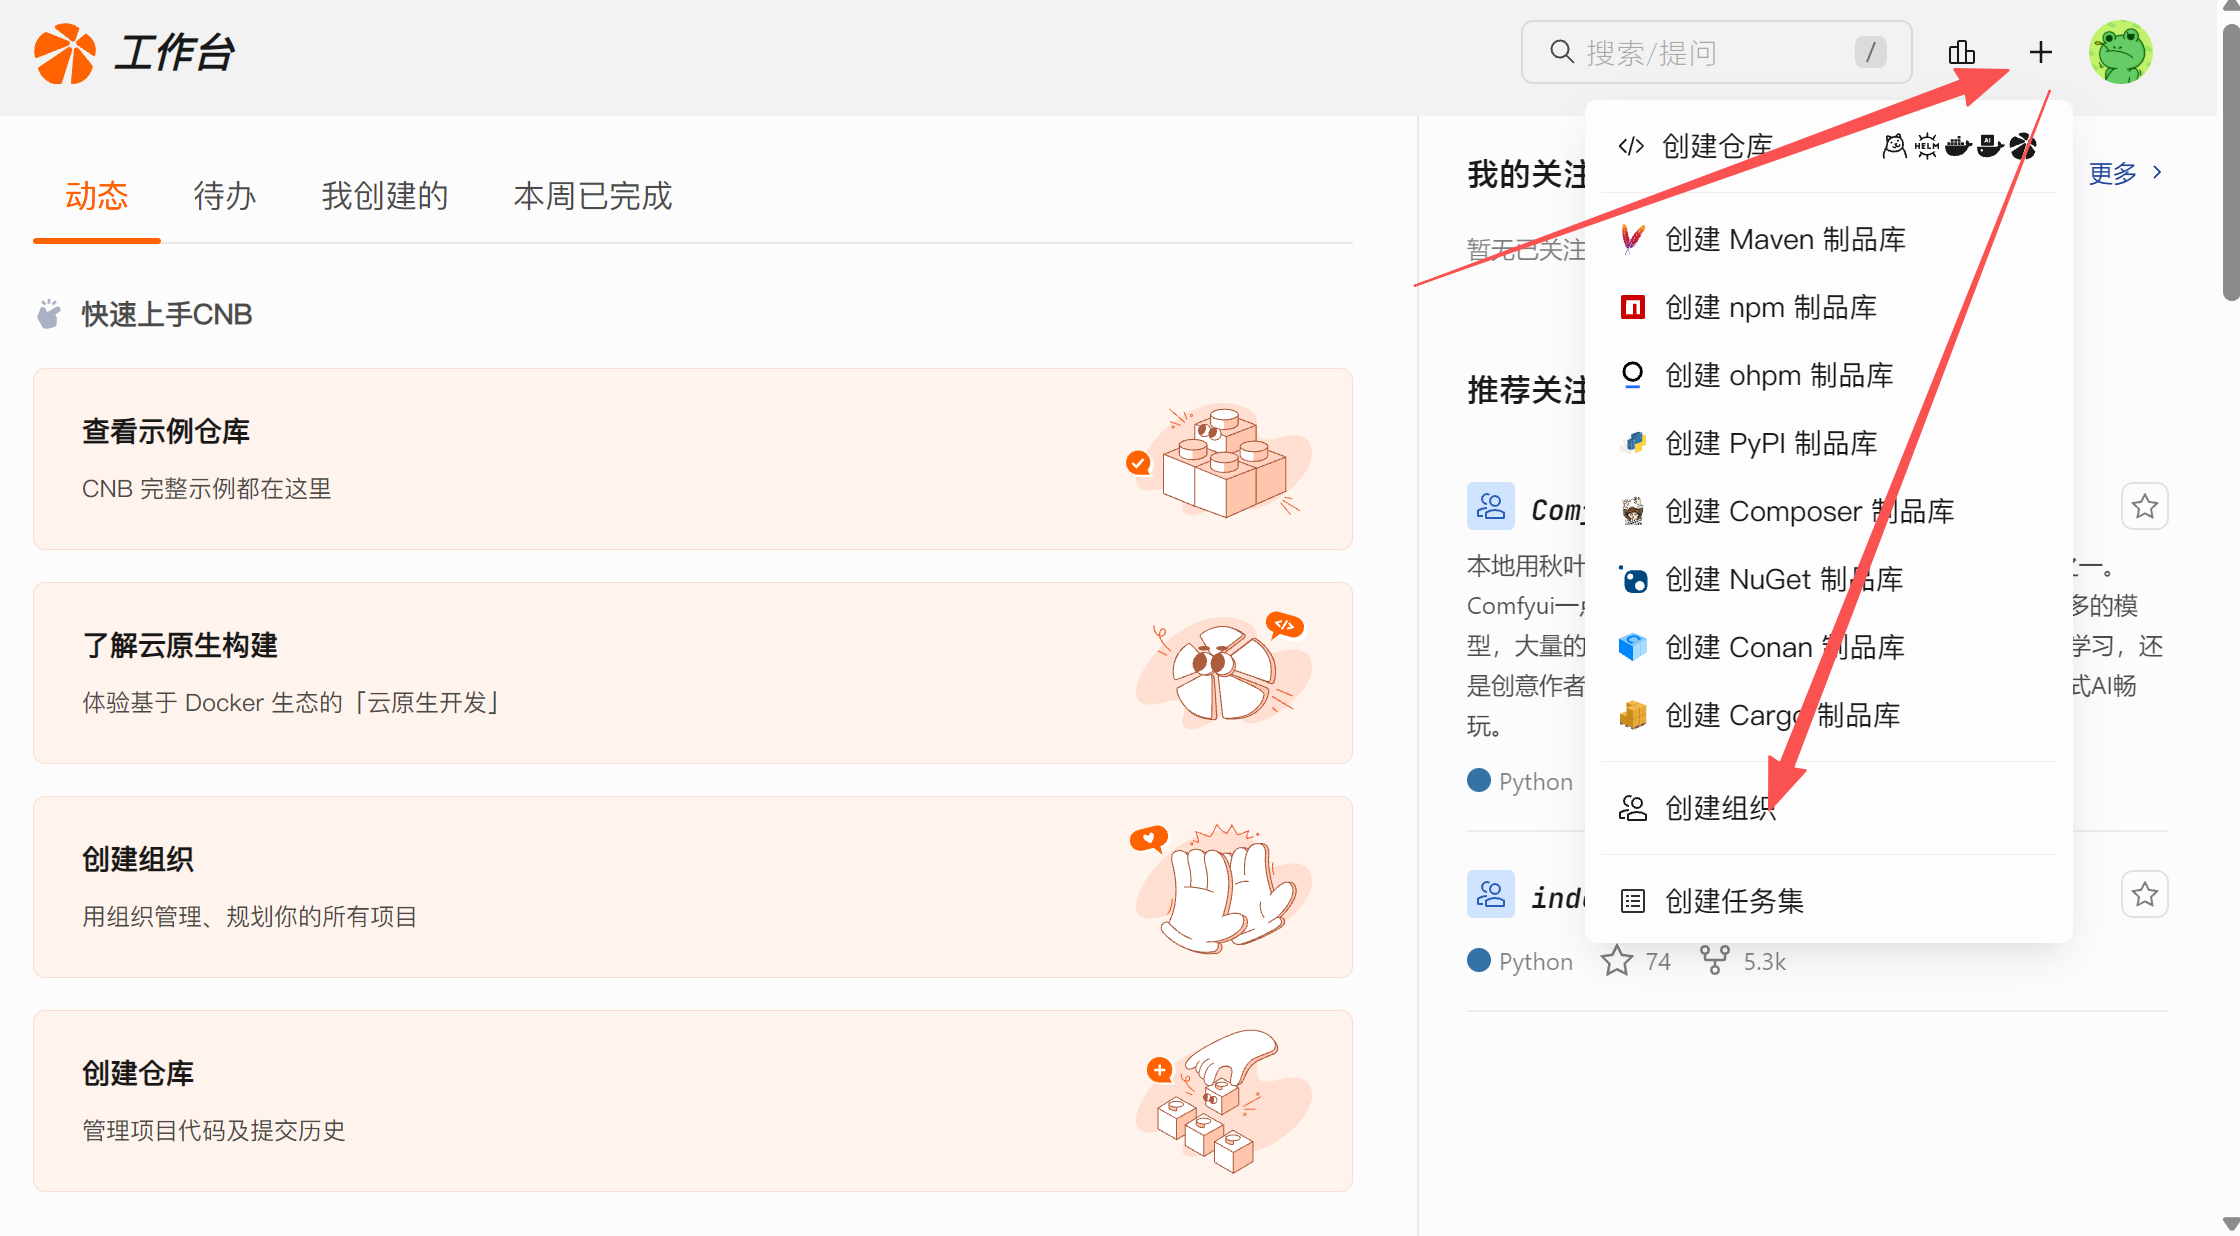
An organization is a namespace for teams to manage members and resources. Before creating repository resources, you need to create an organization to manage members, repositories, and other resources.
3. Create a Development Environment
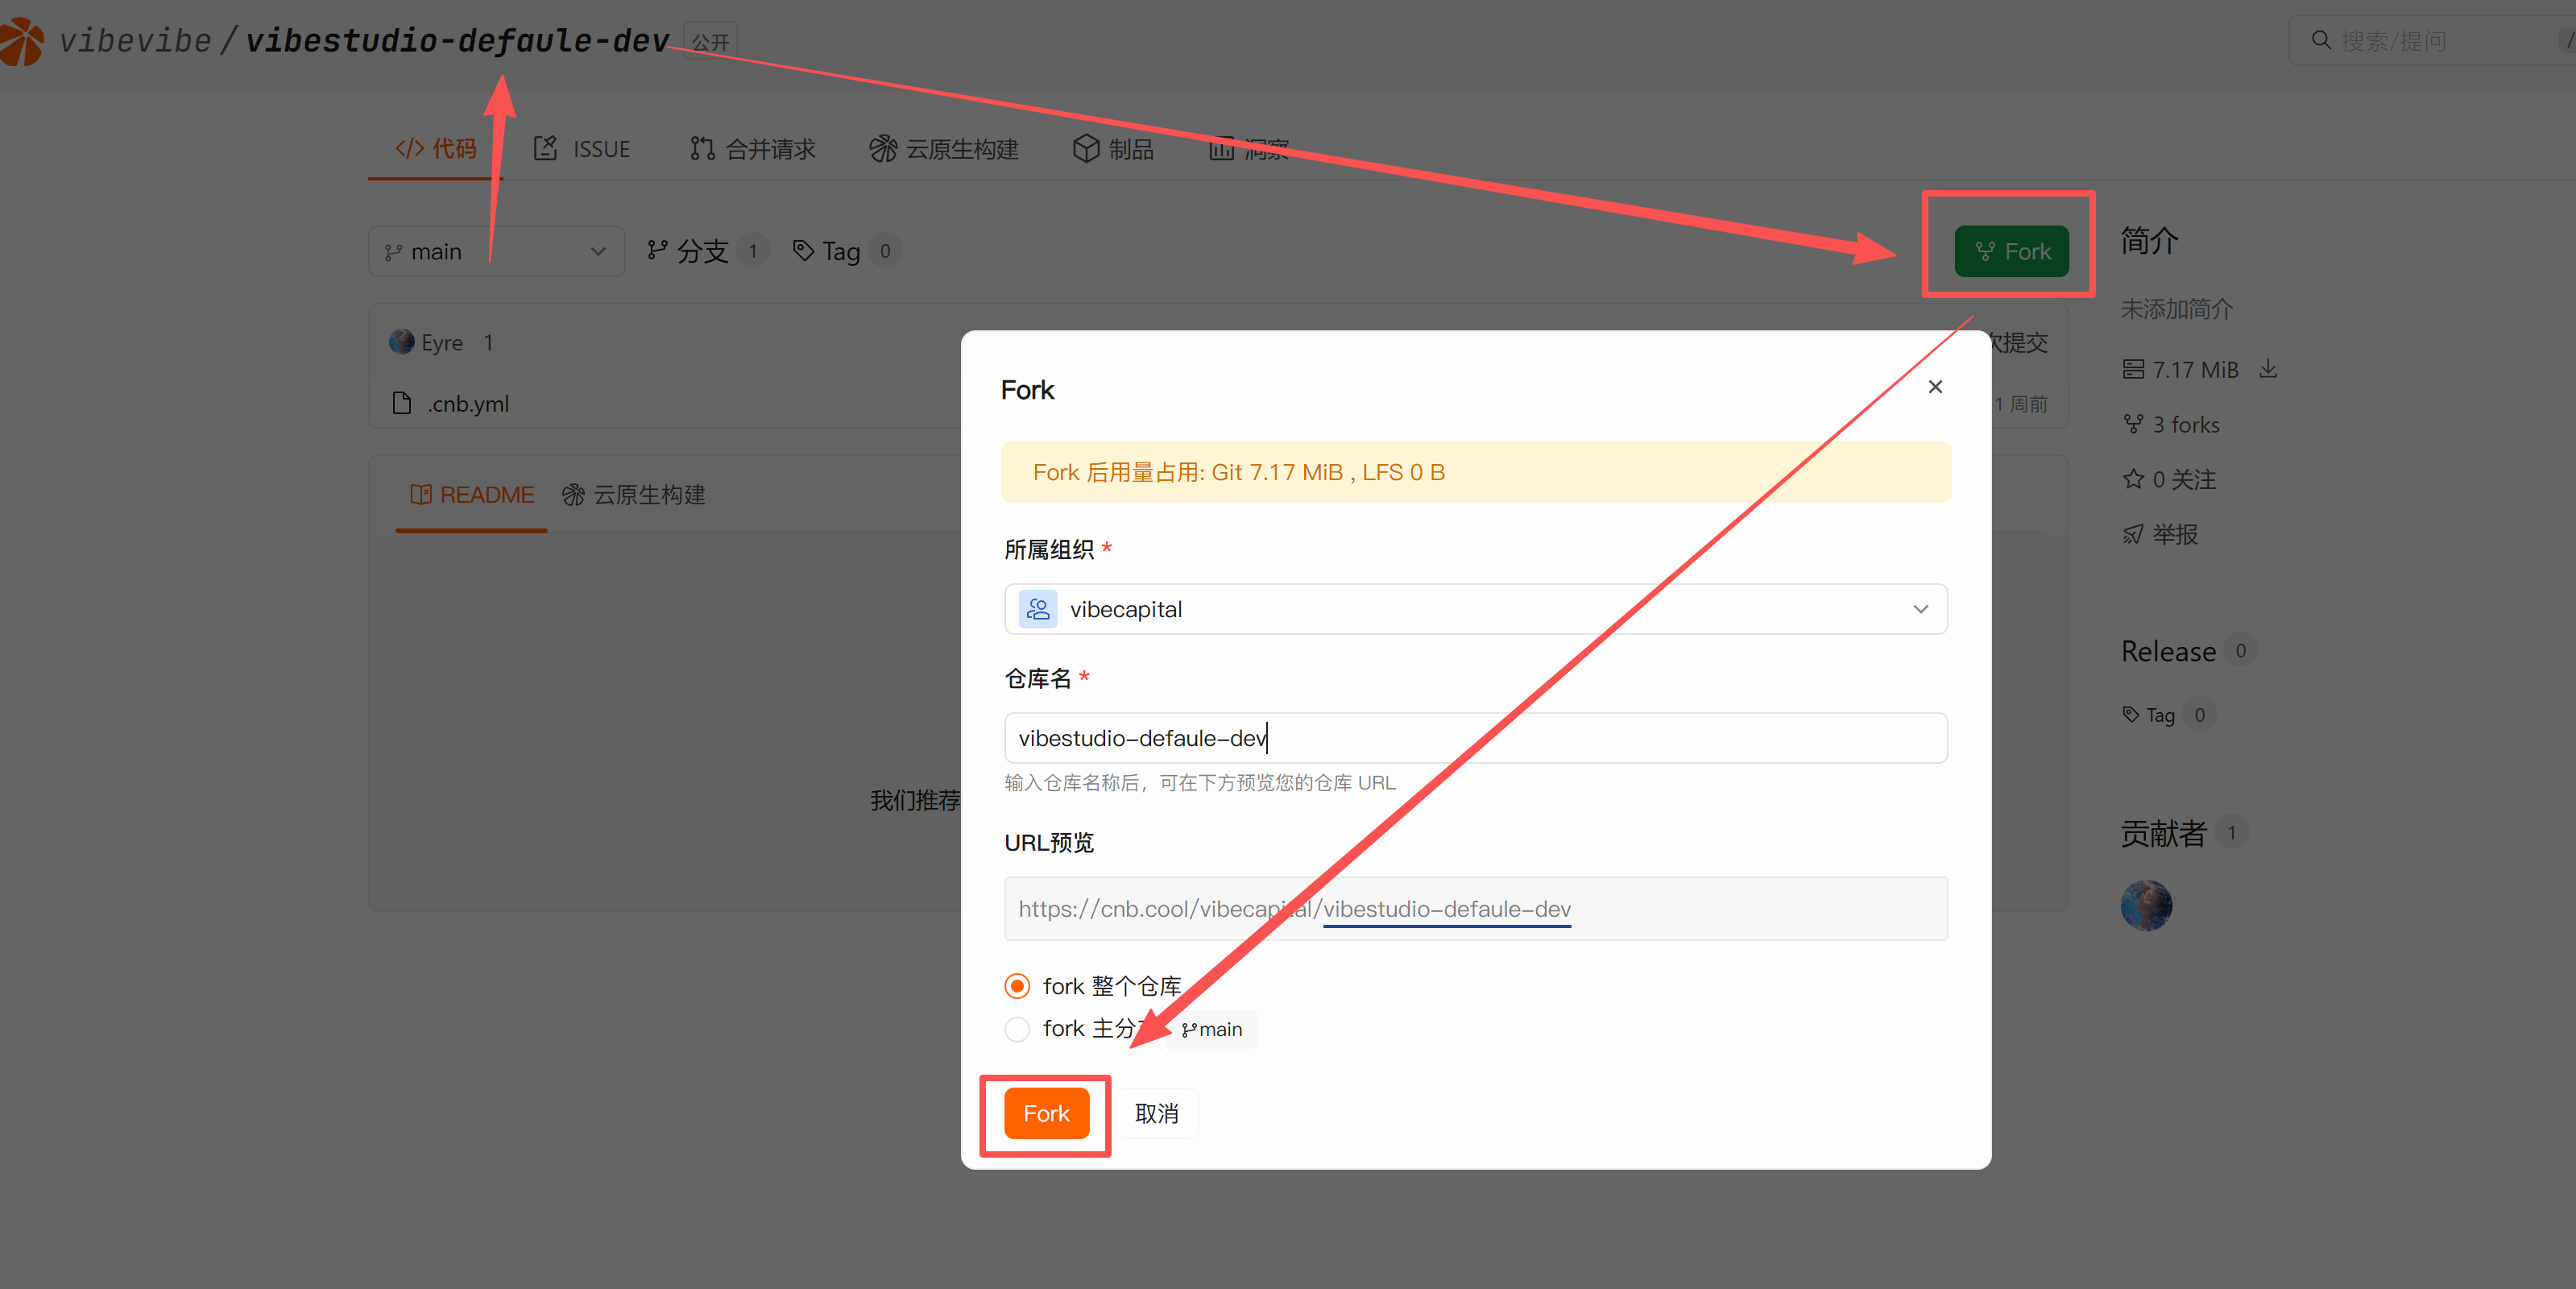
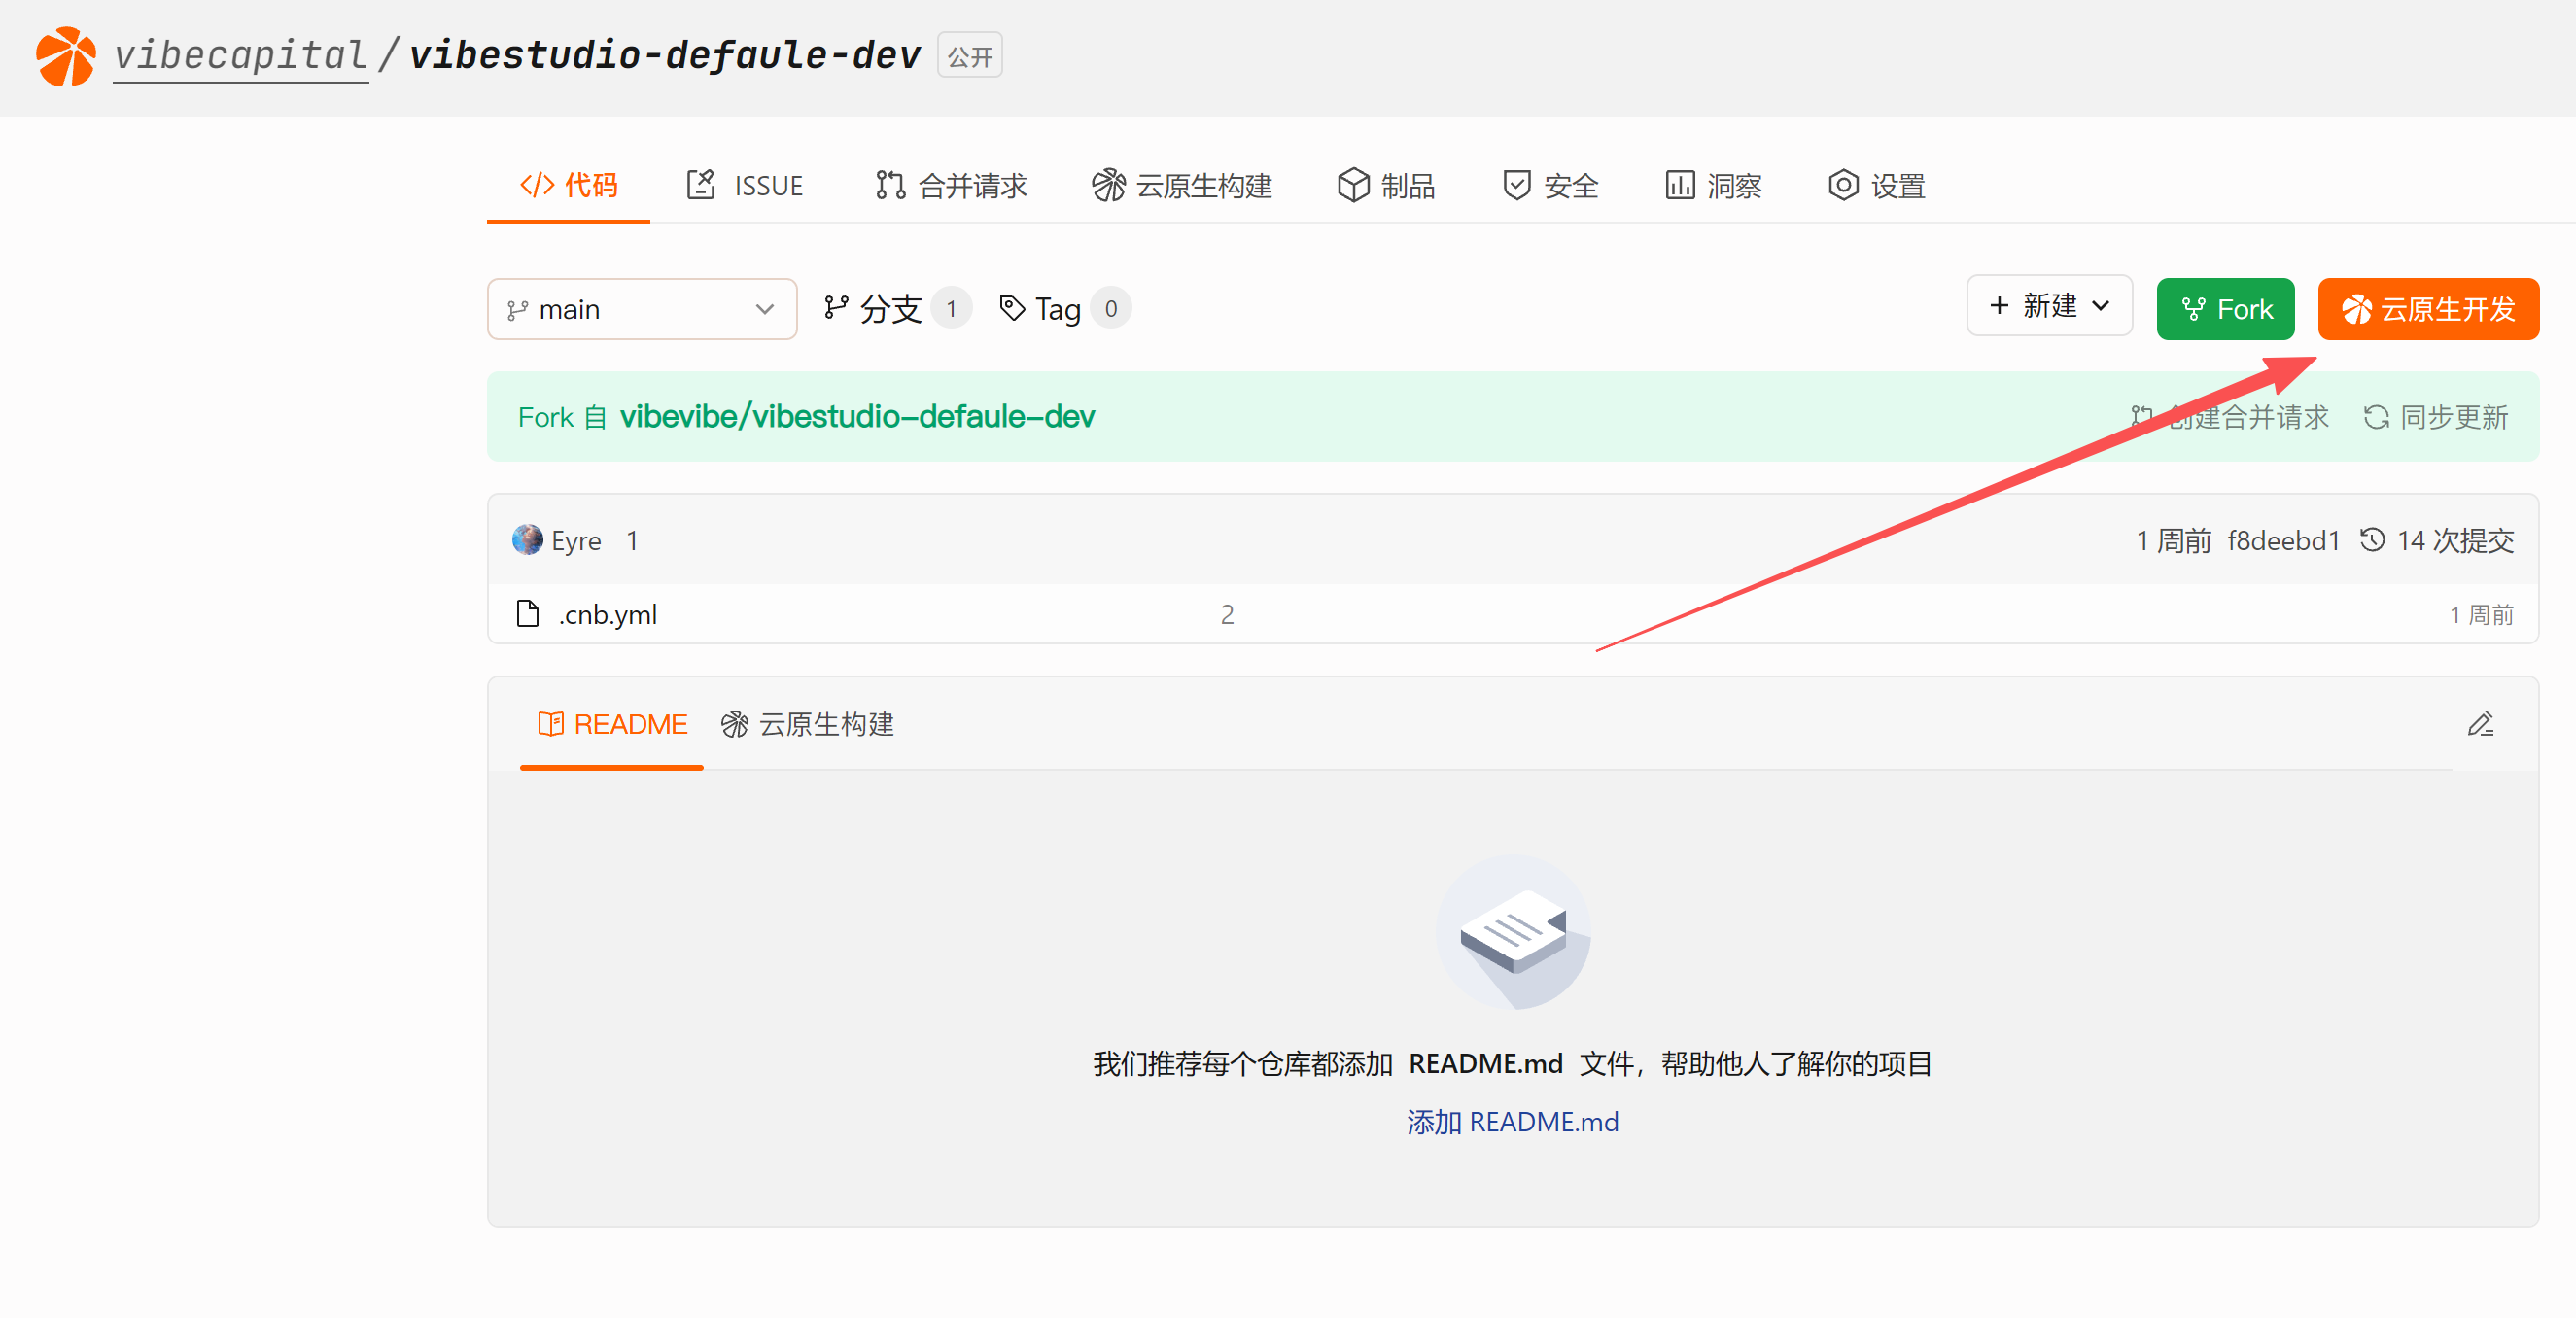
Fork the Repository
Click to open the vibestudio-default-dev repository, then click Fork:
Start Cloud-Native Development
After forking it to your own repository, click the "Cloud-Native Development" button and wait a moment for the development environment to be created:
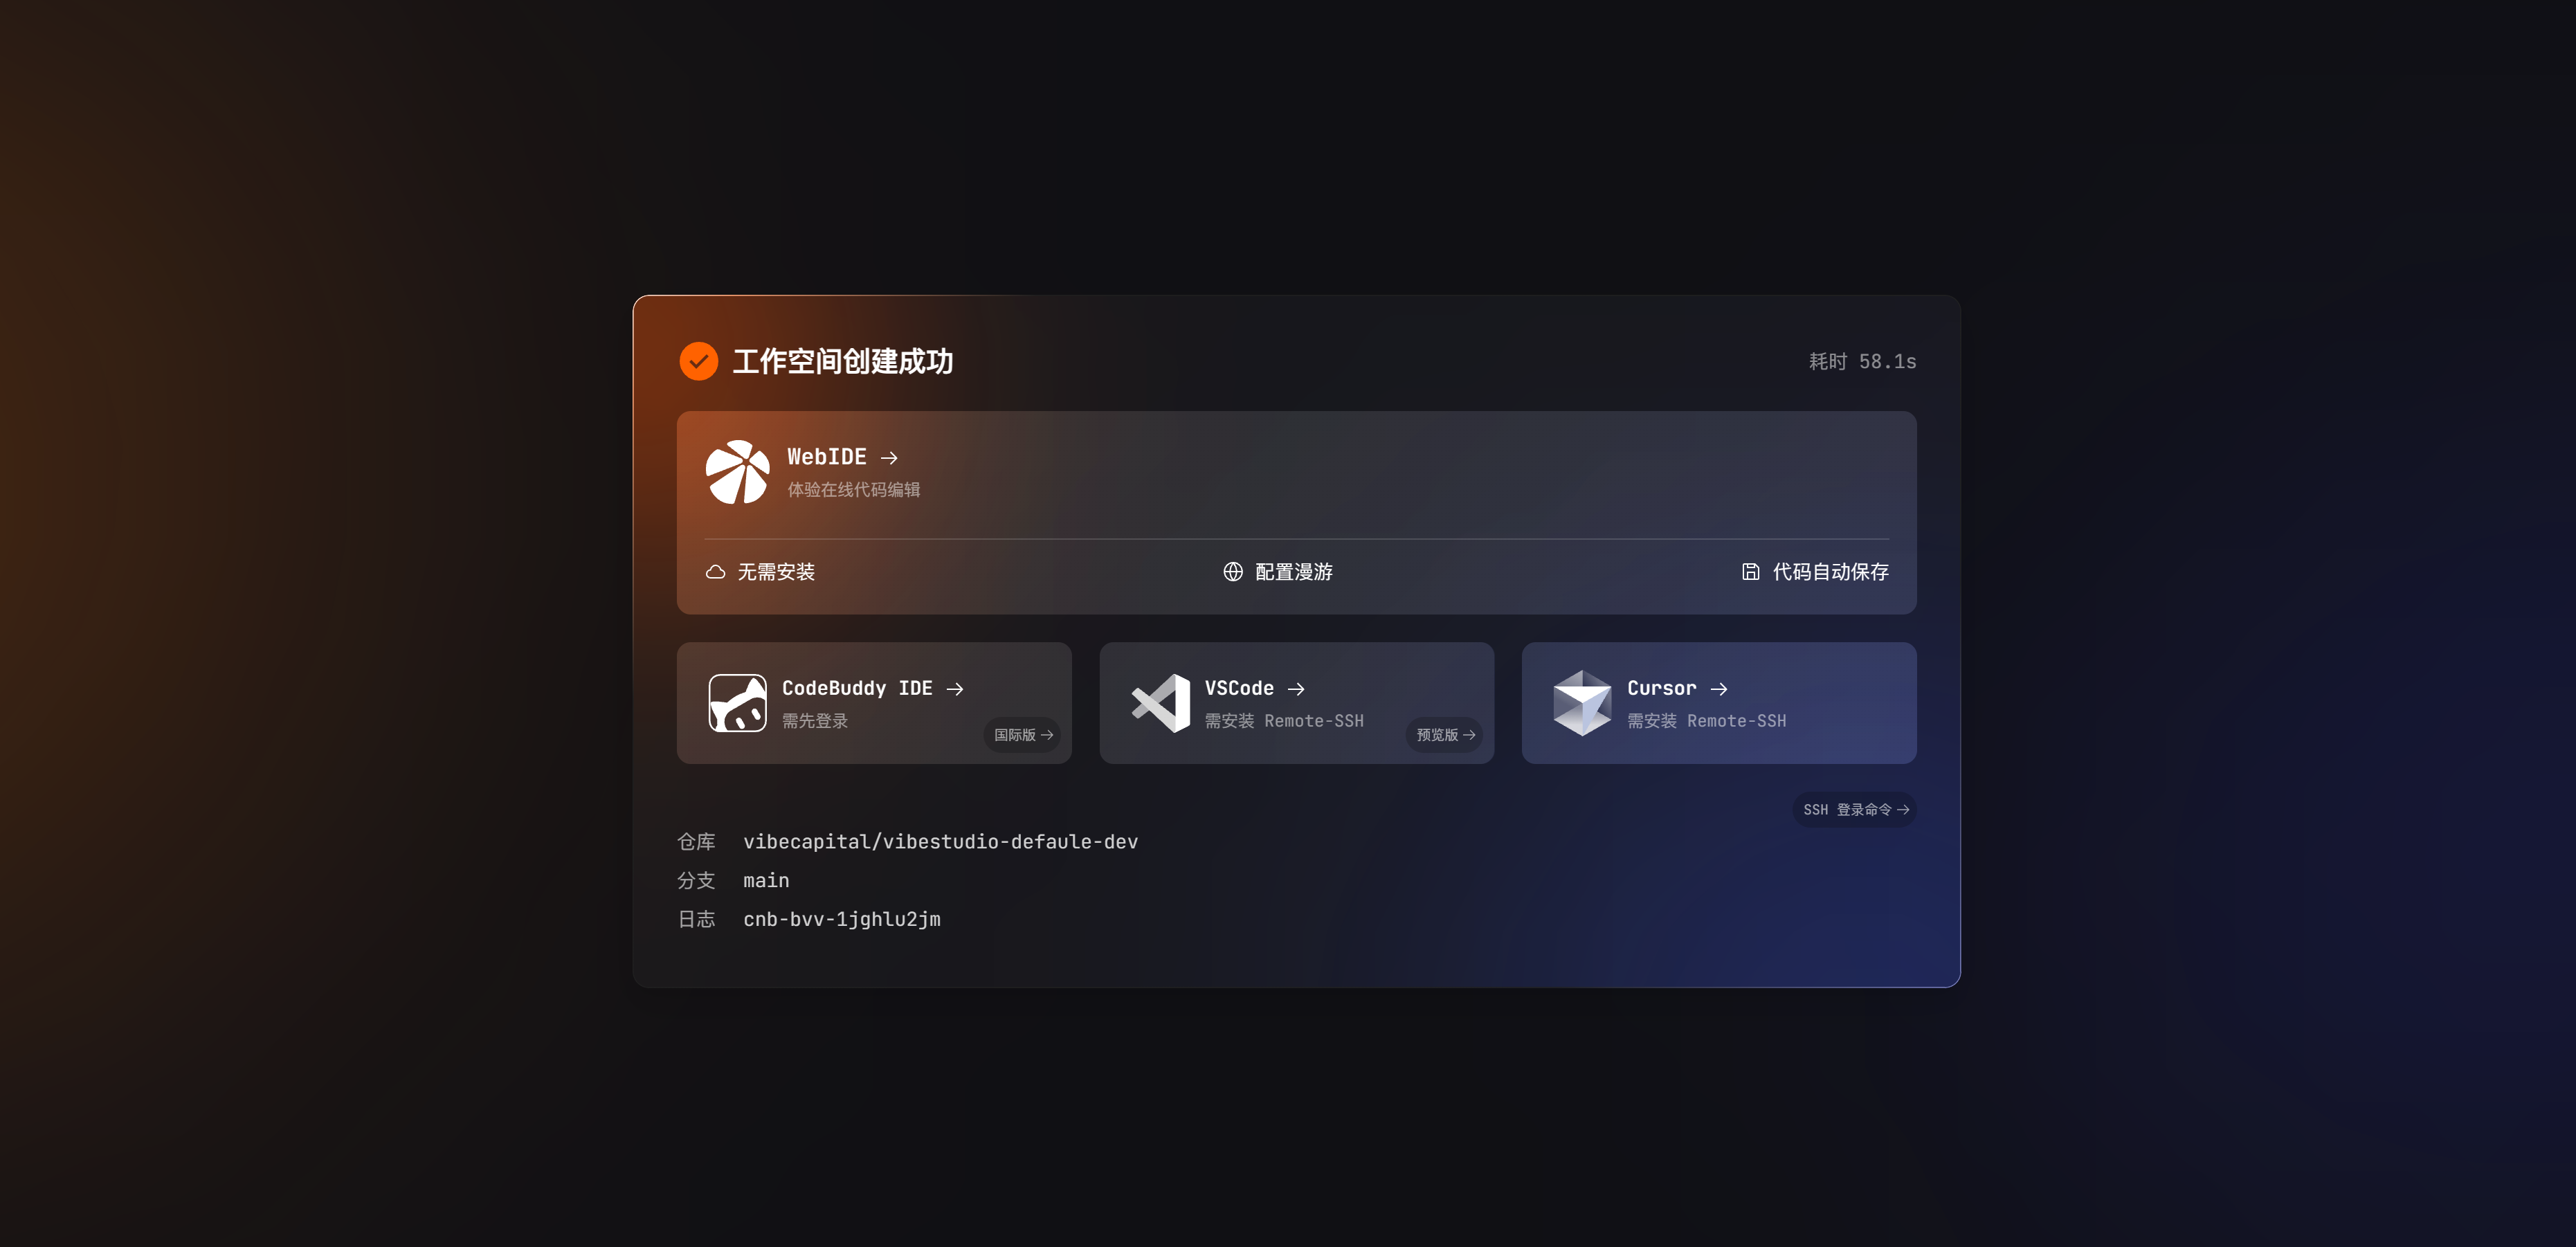
Connect to the Development Environment
After the workspace is created successfully, you can:
- Open WebIDE directly for online editing
- Use the SSH login command to connect with an IDE that has Remote SSH installed
DANGER
Important Reminder:
Any code modified in the cloud IDE must be committed to Git and pushed!
The cloud-native development environment will be automatically reclaimed after being idle. If your code is not pushed to the remote repository, it will be lost once the environment is reclaimed.
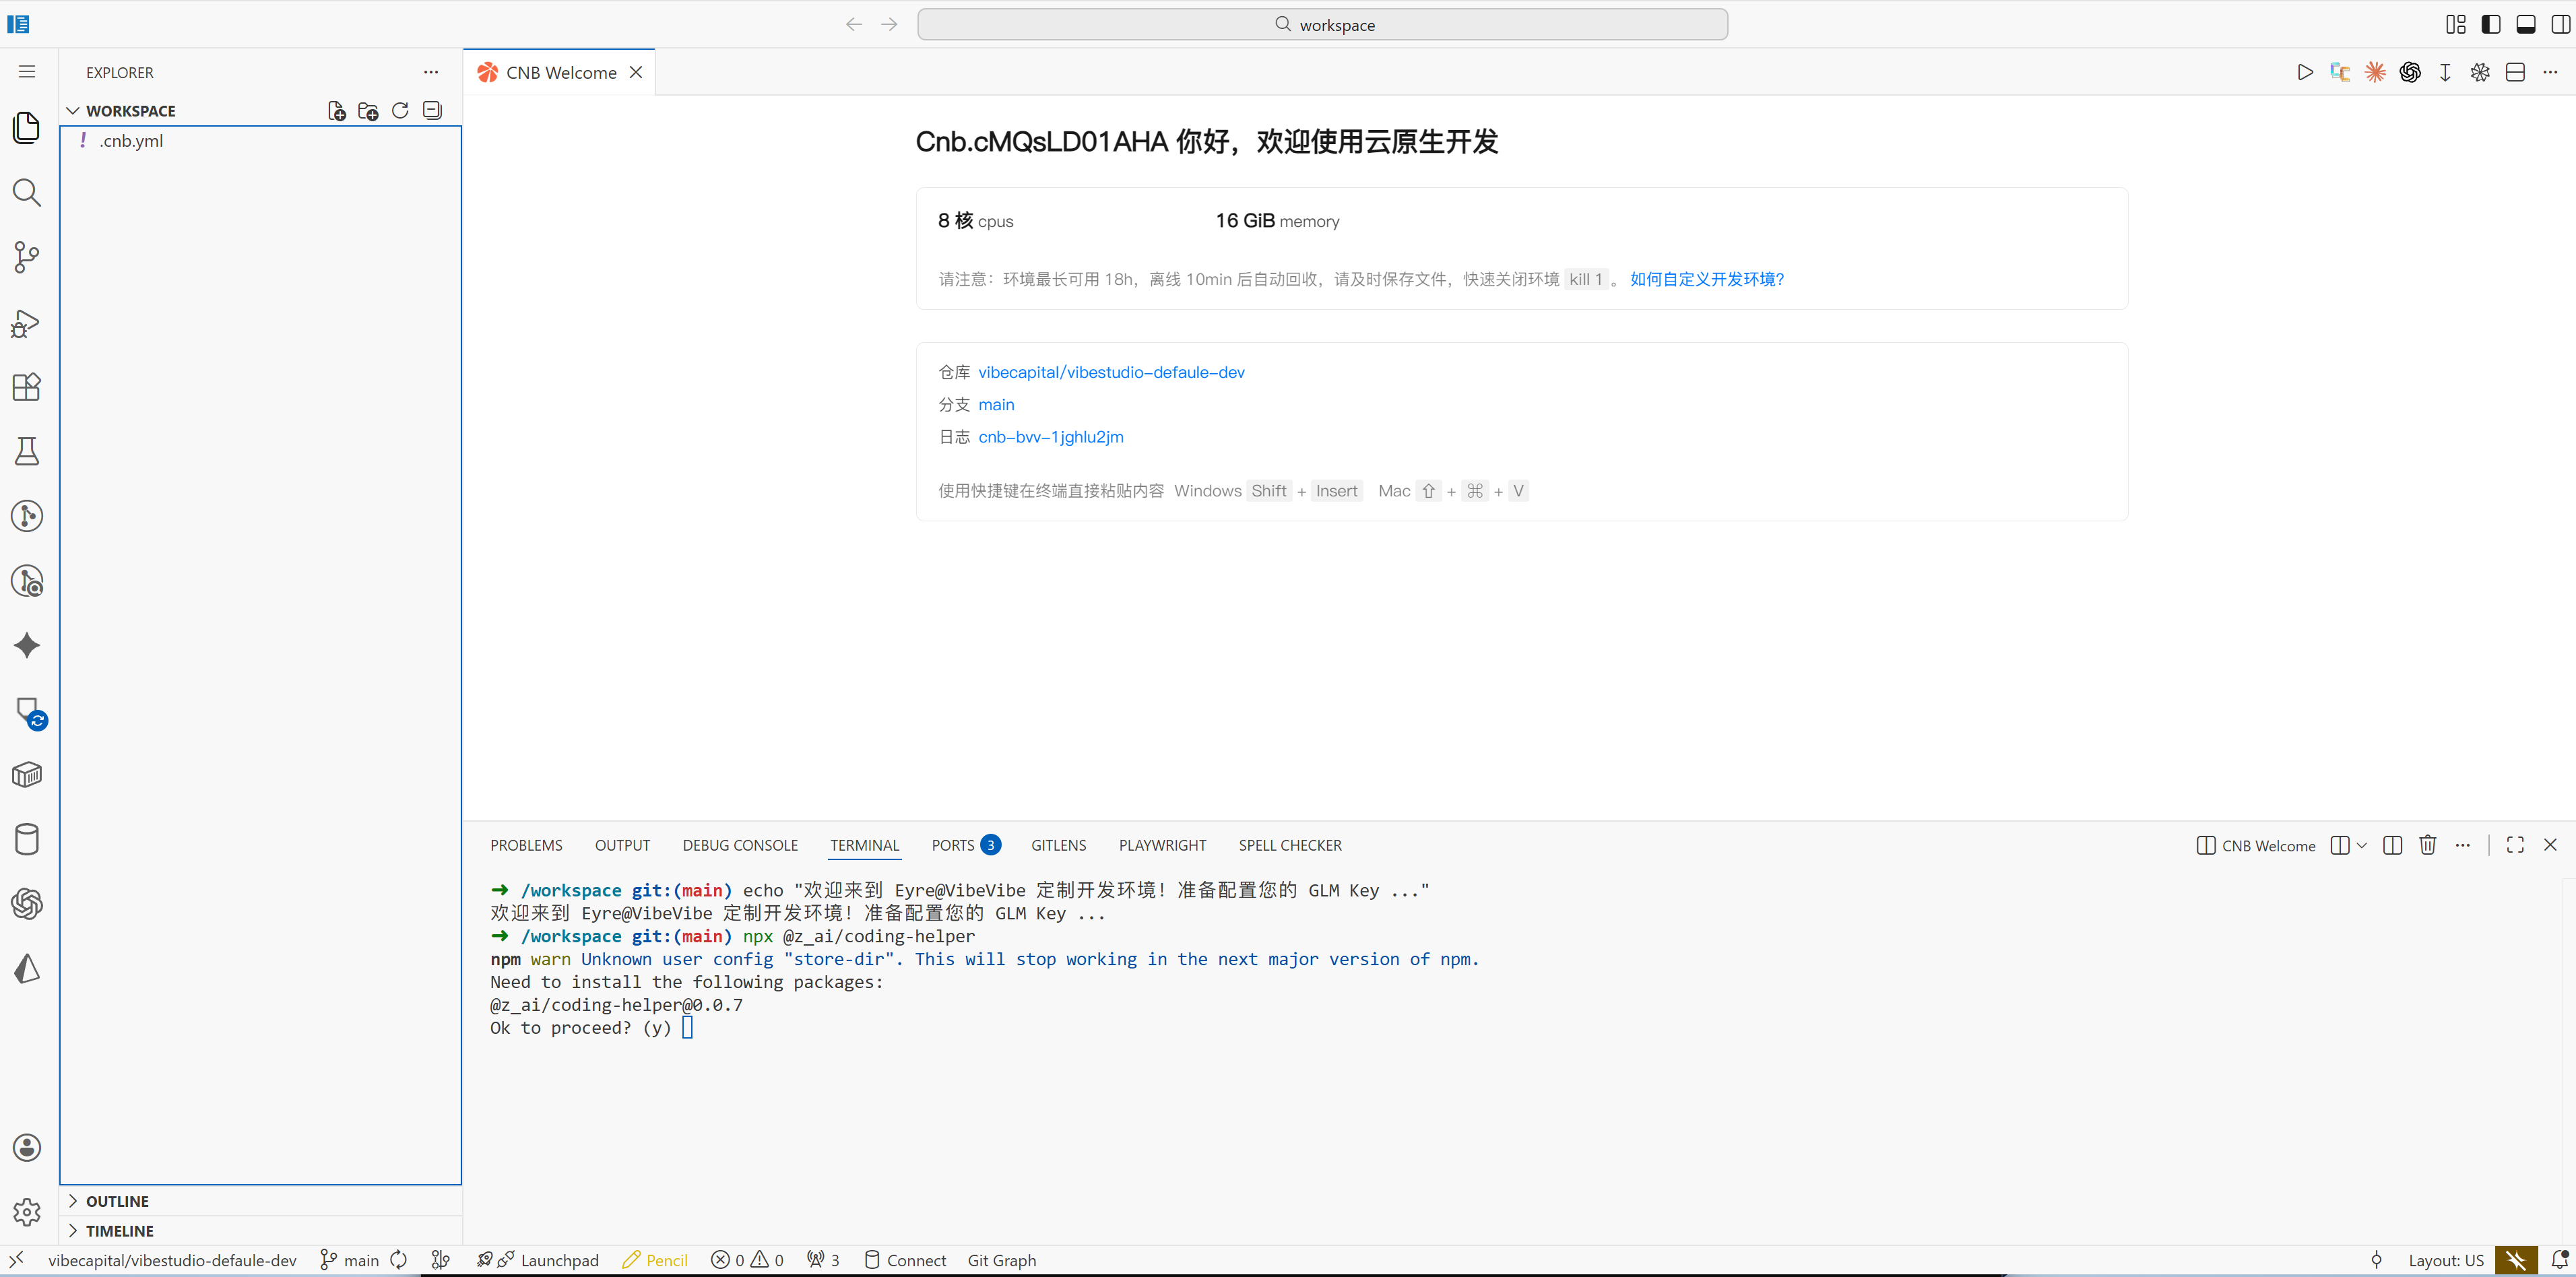
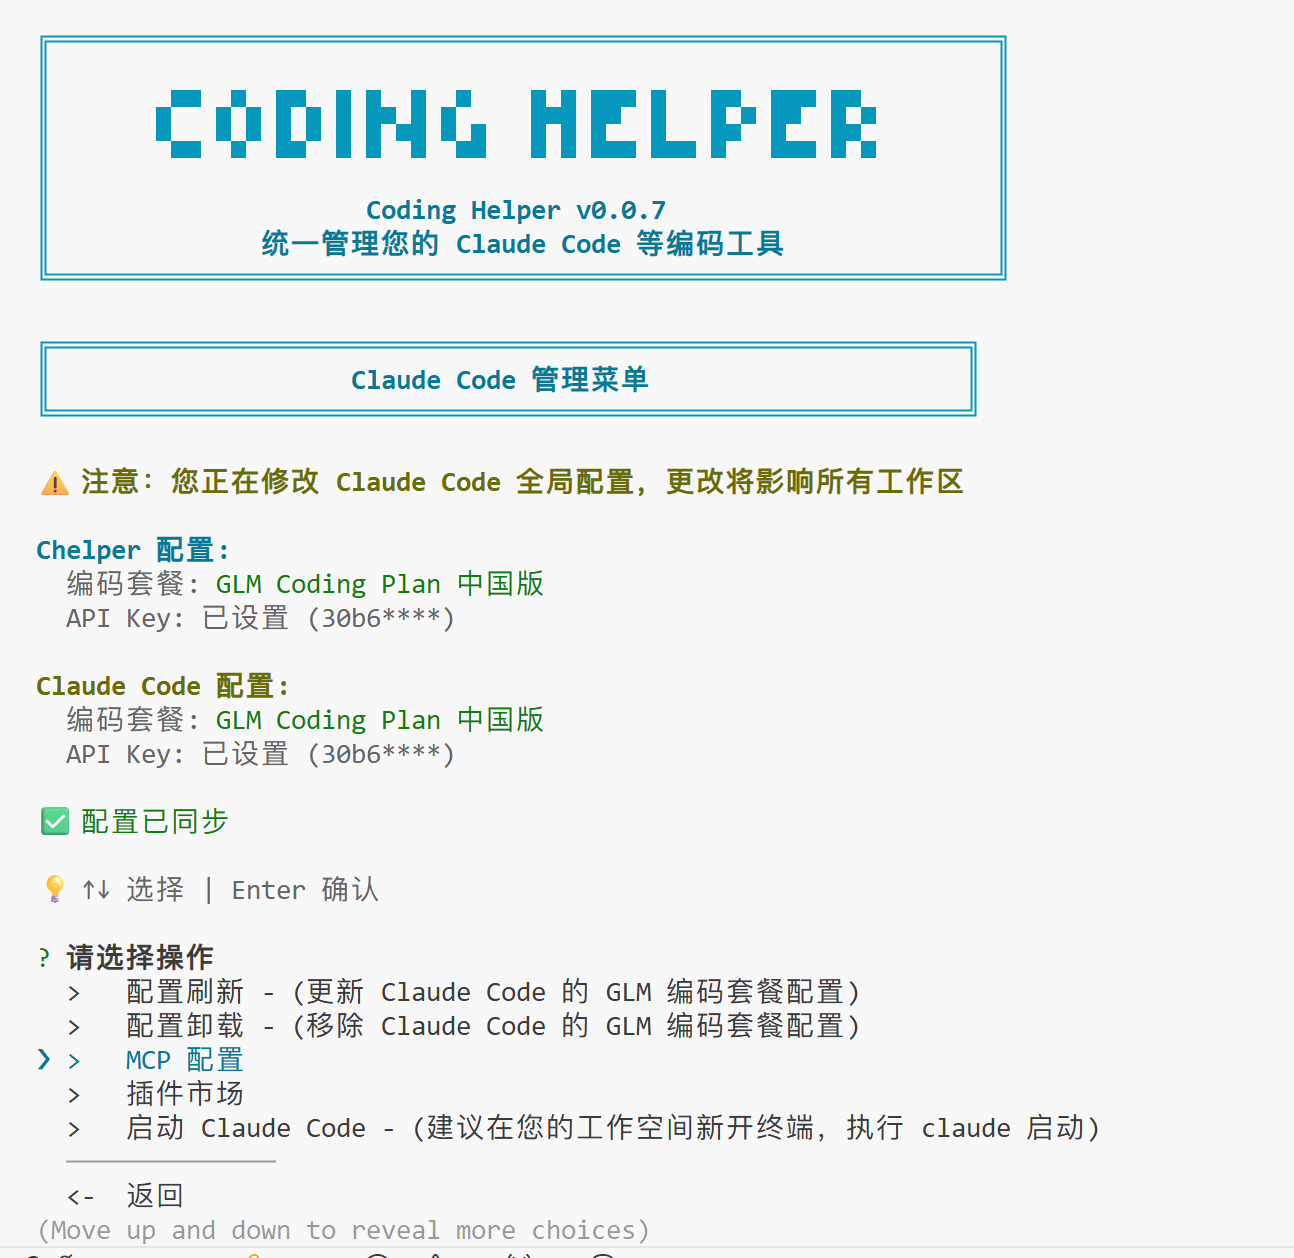
4. Configure Claude Code
The environment automatically installs the dependencies needed for development. When you open it, you'll be prompted to configure the GLM KEY to use Claude Code.
| Configure Key | Clipboard Permission |
|---|---|
 | 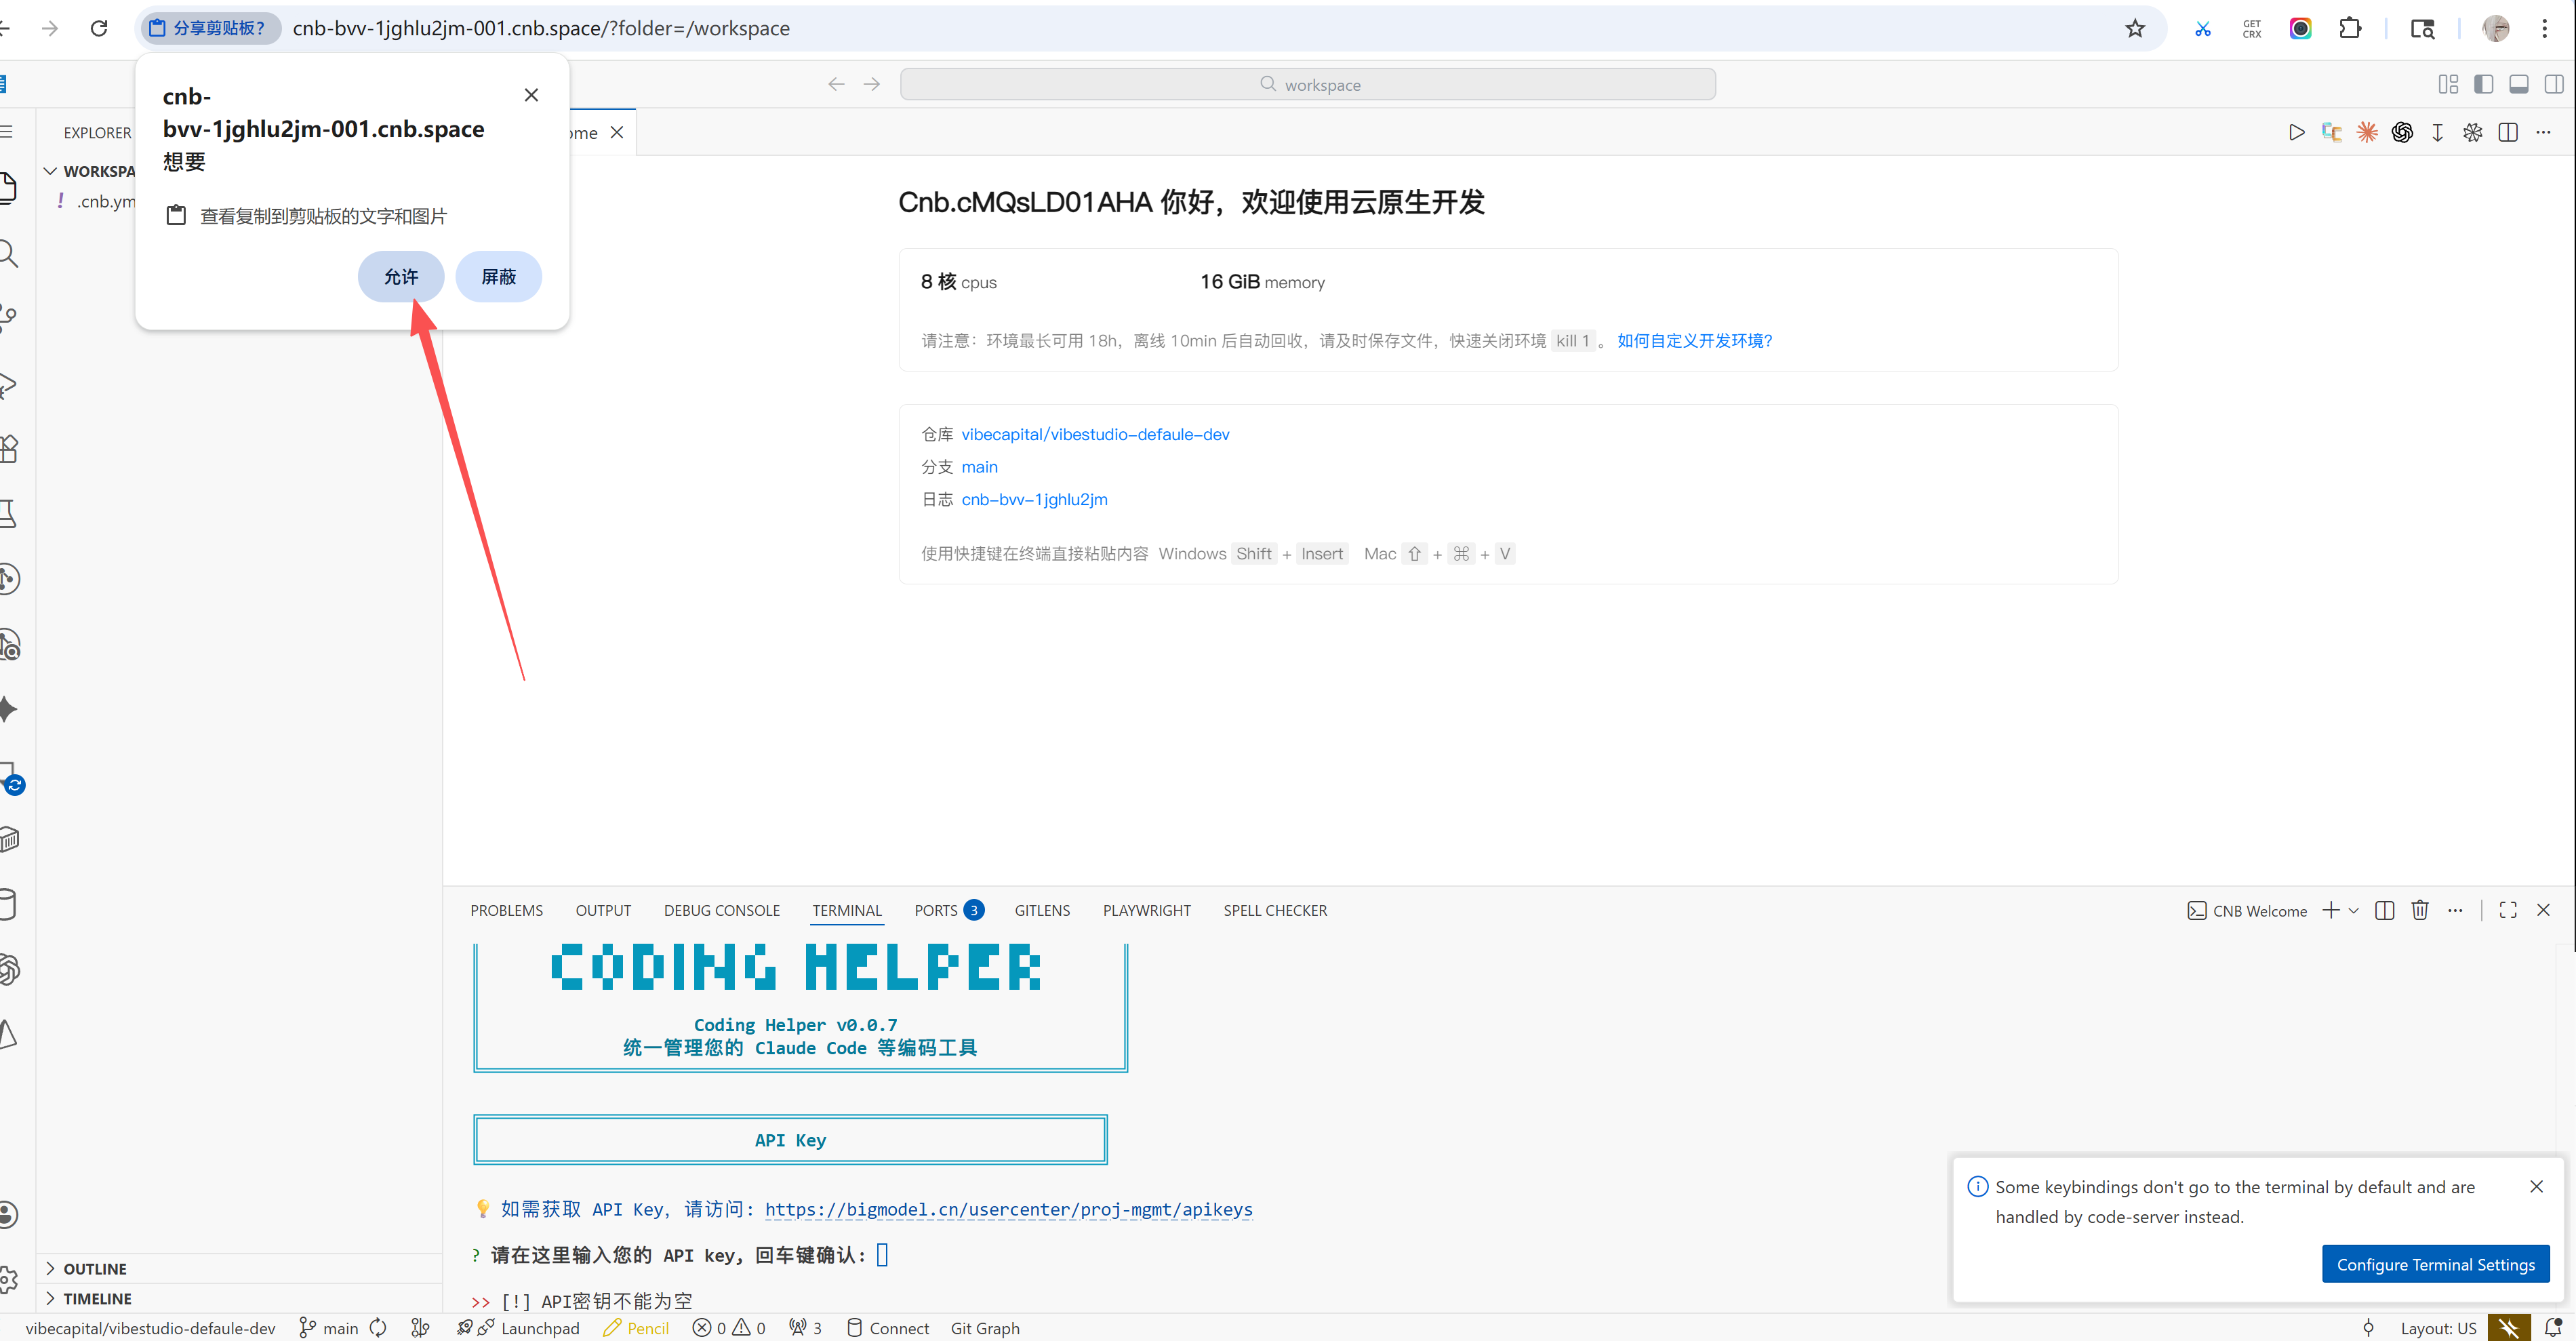 |
When pasting the key, you'll be prompted to access your computer's clipboard—just allow it.
One-click configuration for the MCP dedicated to the GLM coding package:
| Configure MCP | Configuration Complete |
|---|---|
 | 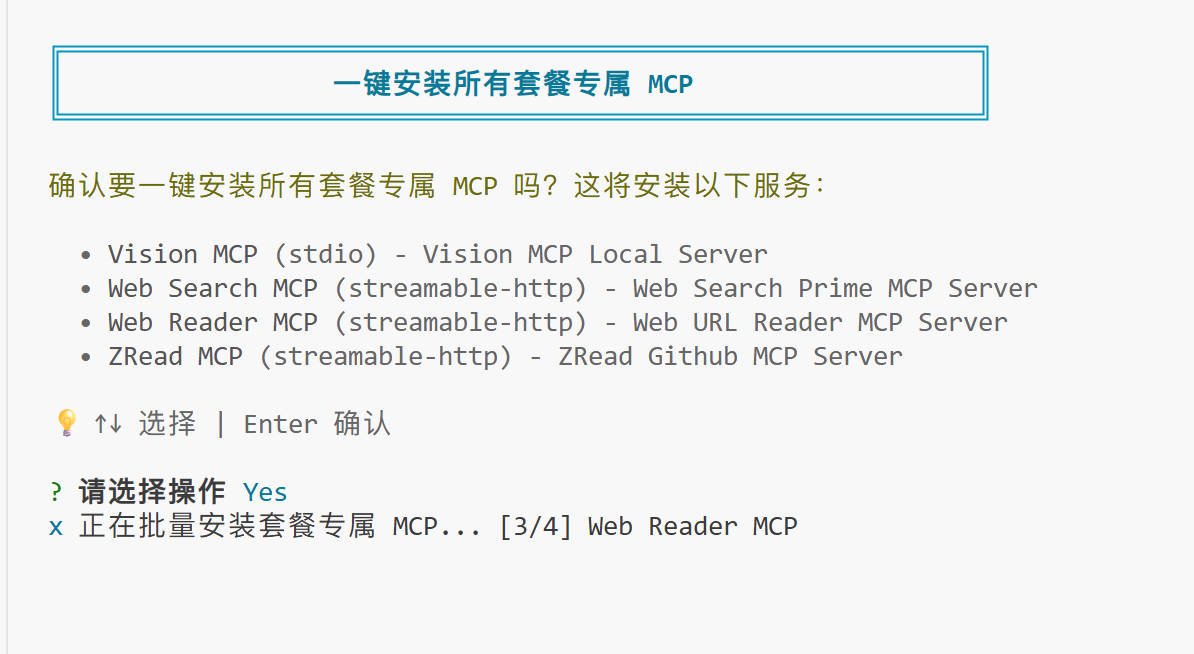 |
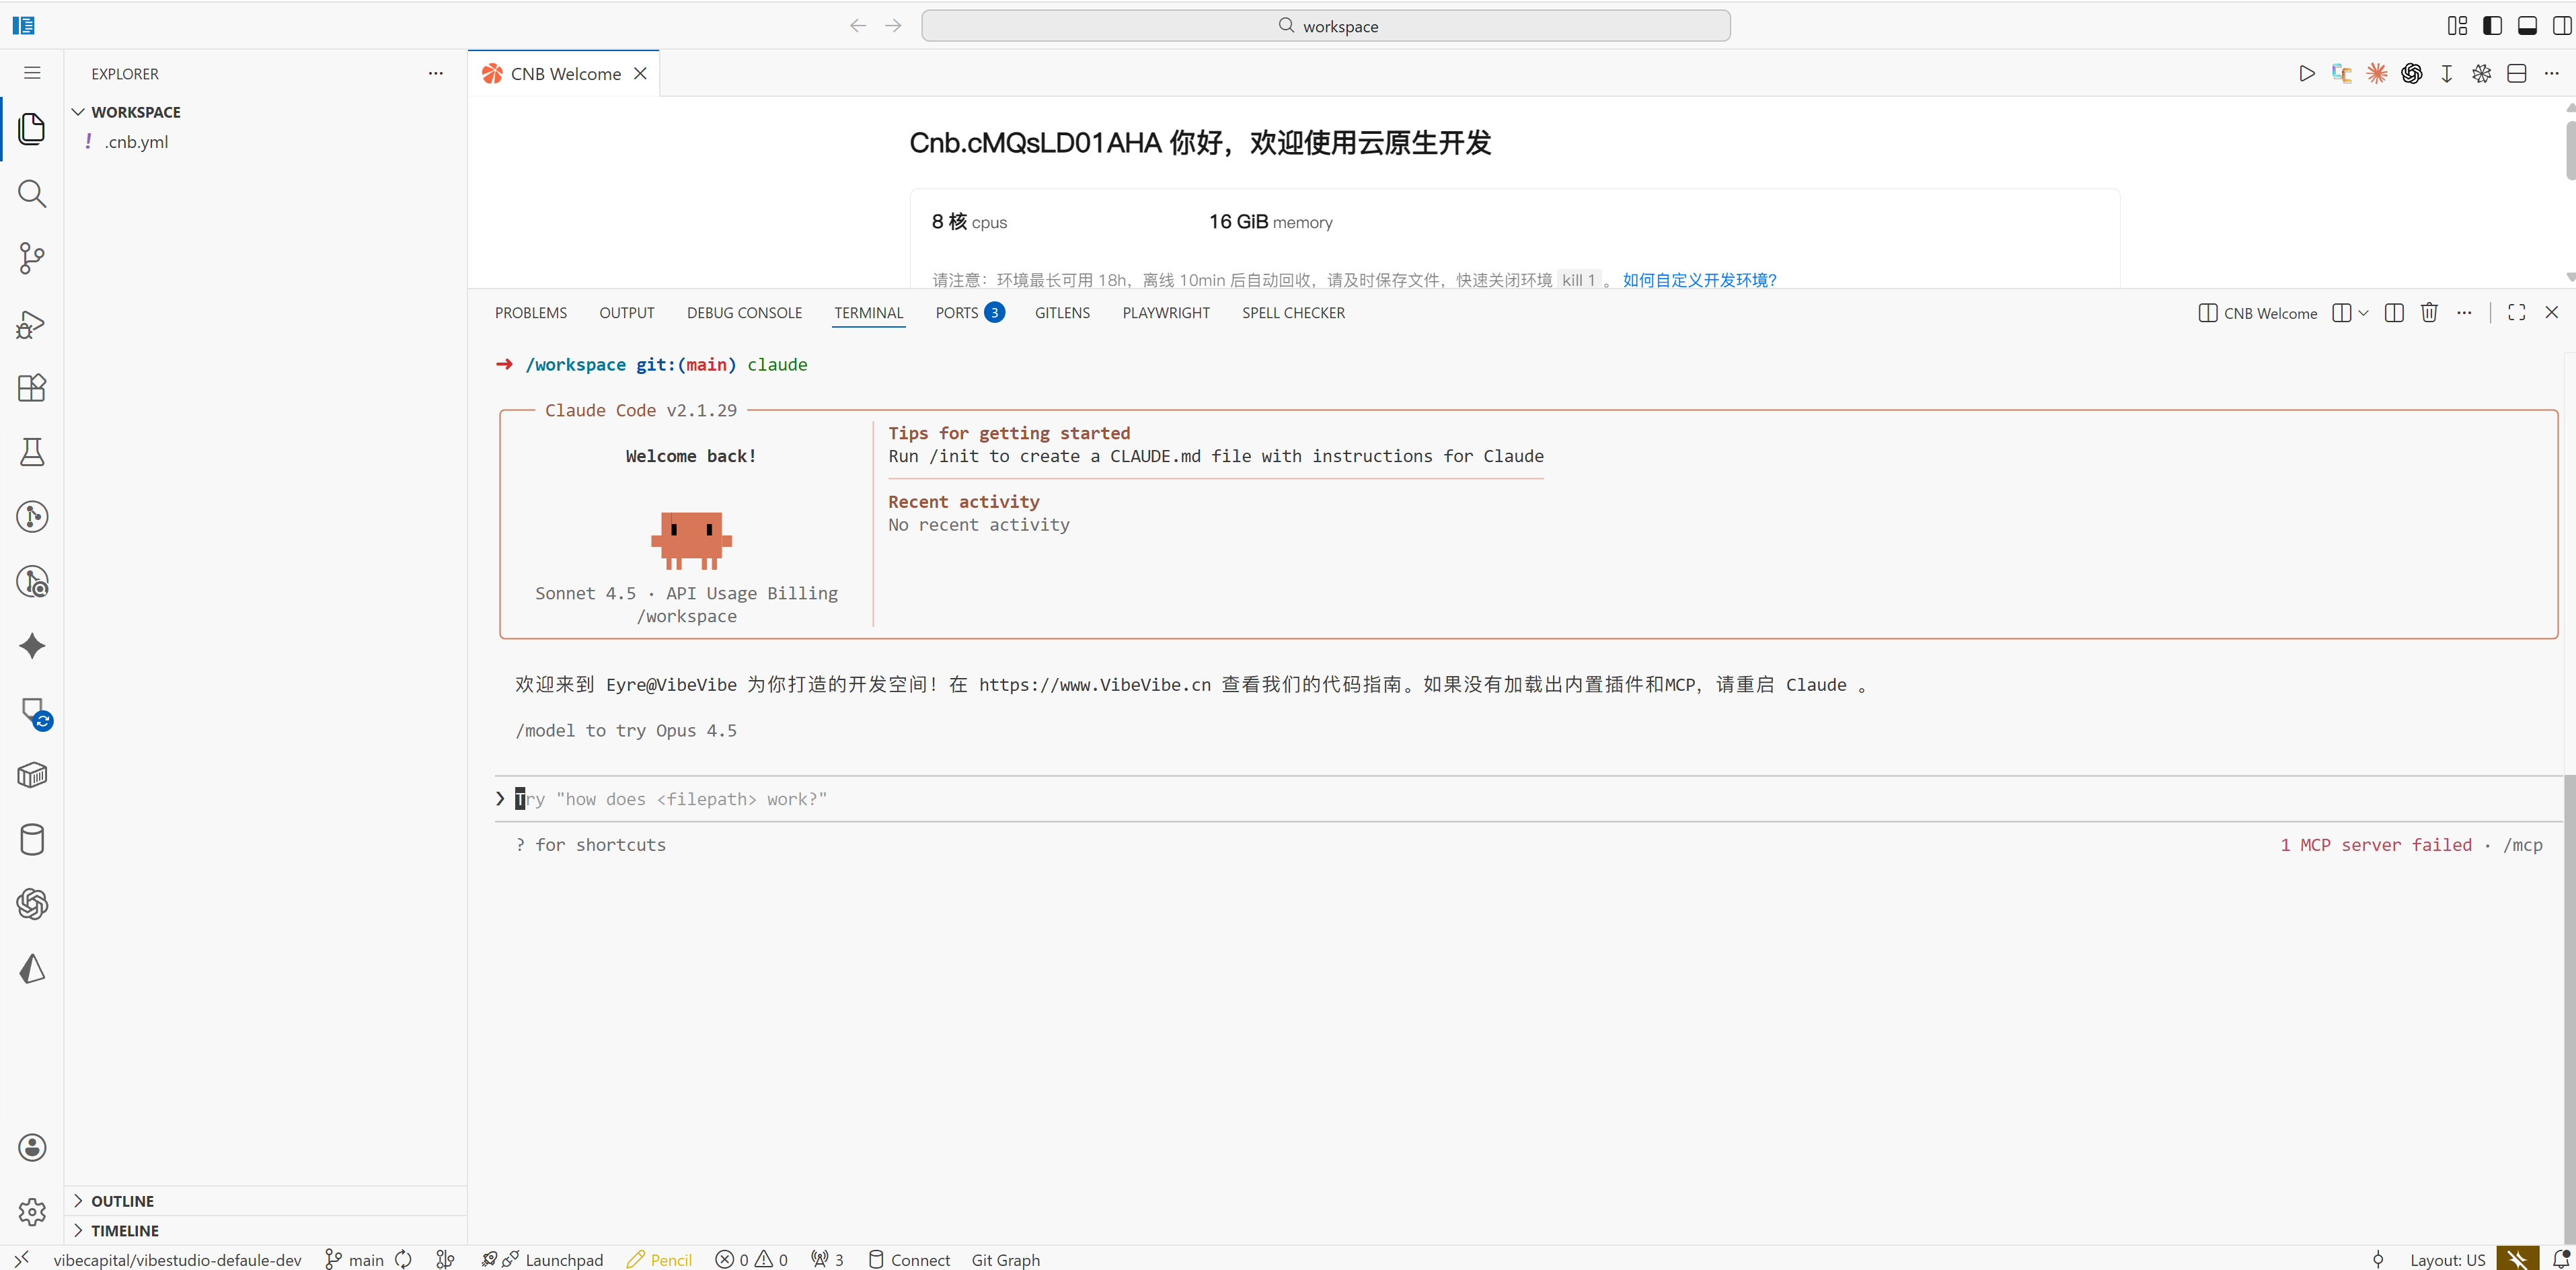
After the configuration is complete, enter claude to begin your coding journey:
5. Connect to a CNB Repository Locally
Get an Access Token
After logging in, go to the Access Token page and create a token.
Clone the Repository
git clone https://cnb.cool/your-org-name/repo-name.git
# Username: cnb
# Password: the access token you created
For more usage details, see CNB Official Documentation - Access Token.
Appendix
1. Set the Interface to Chinese
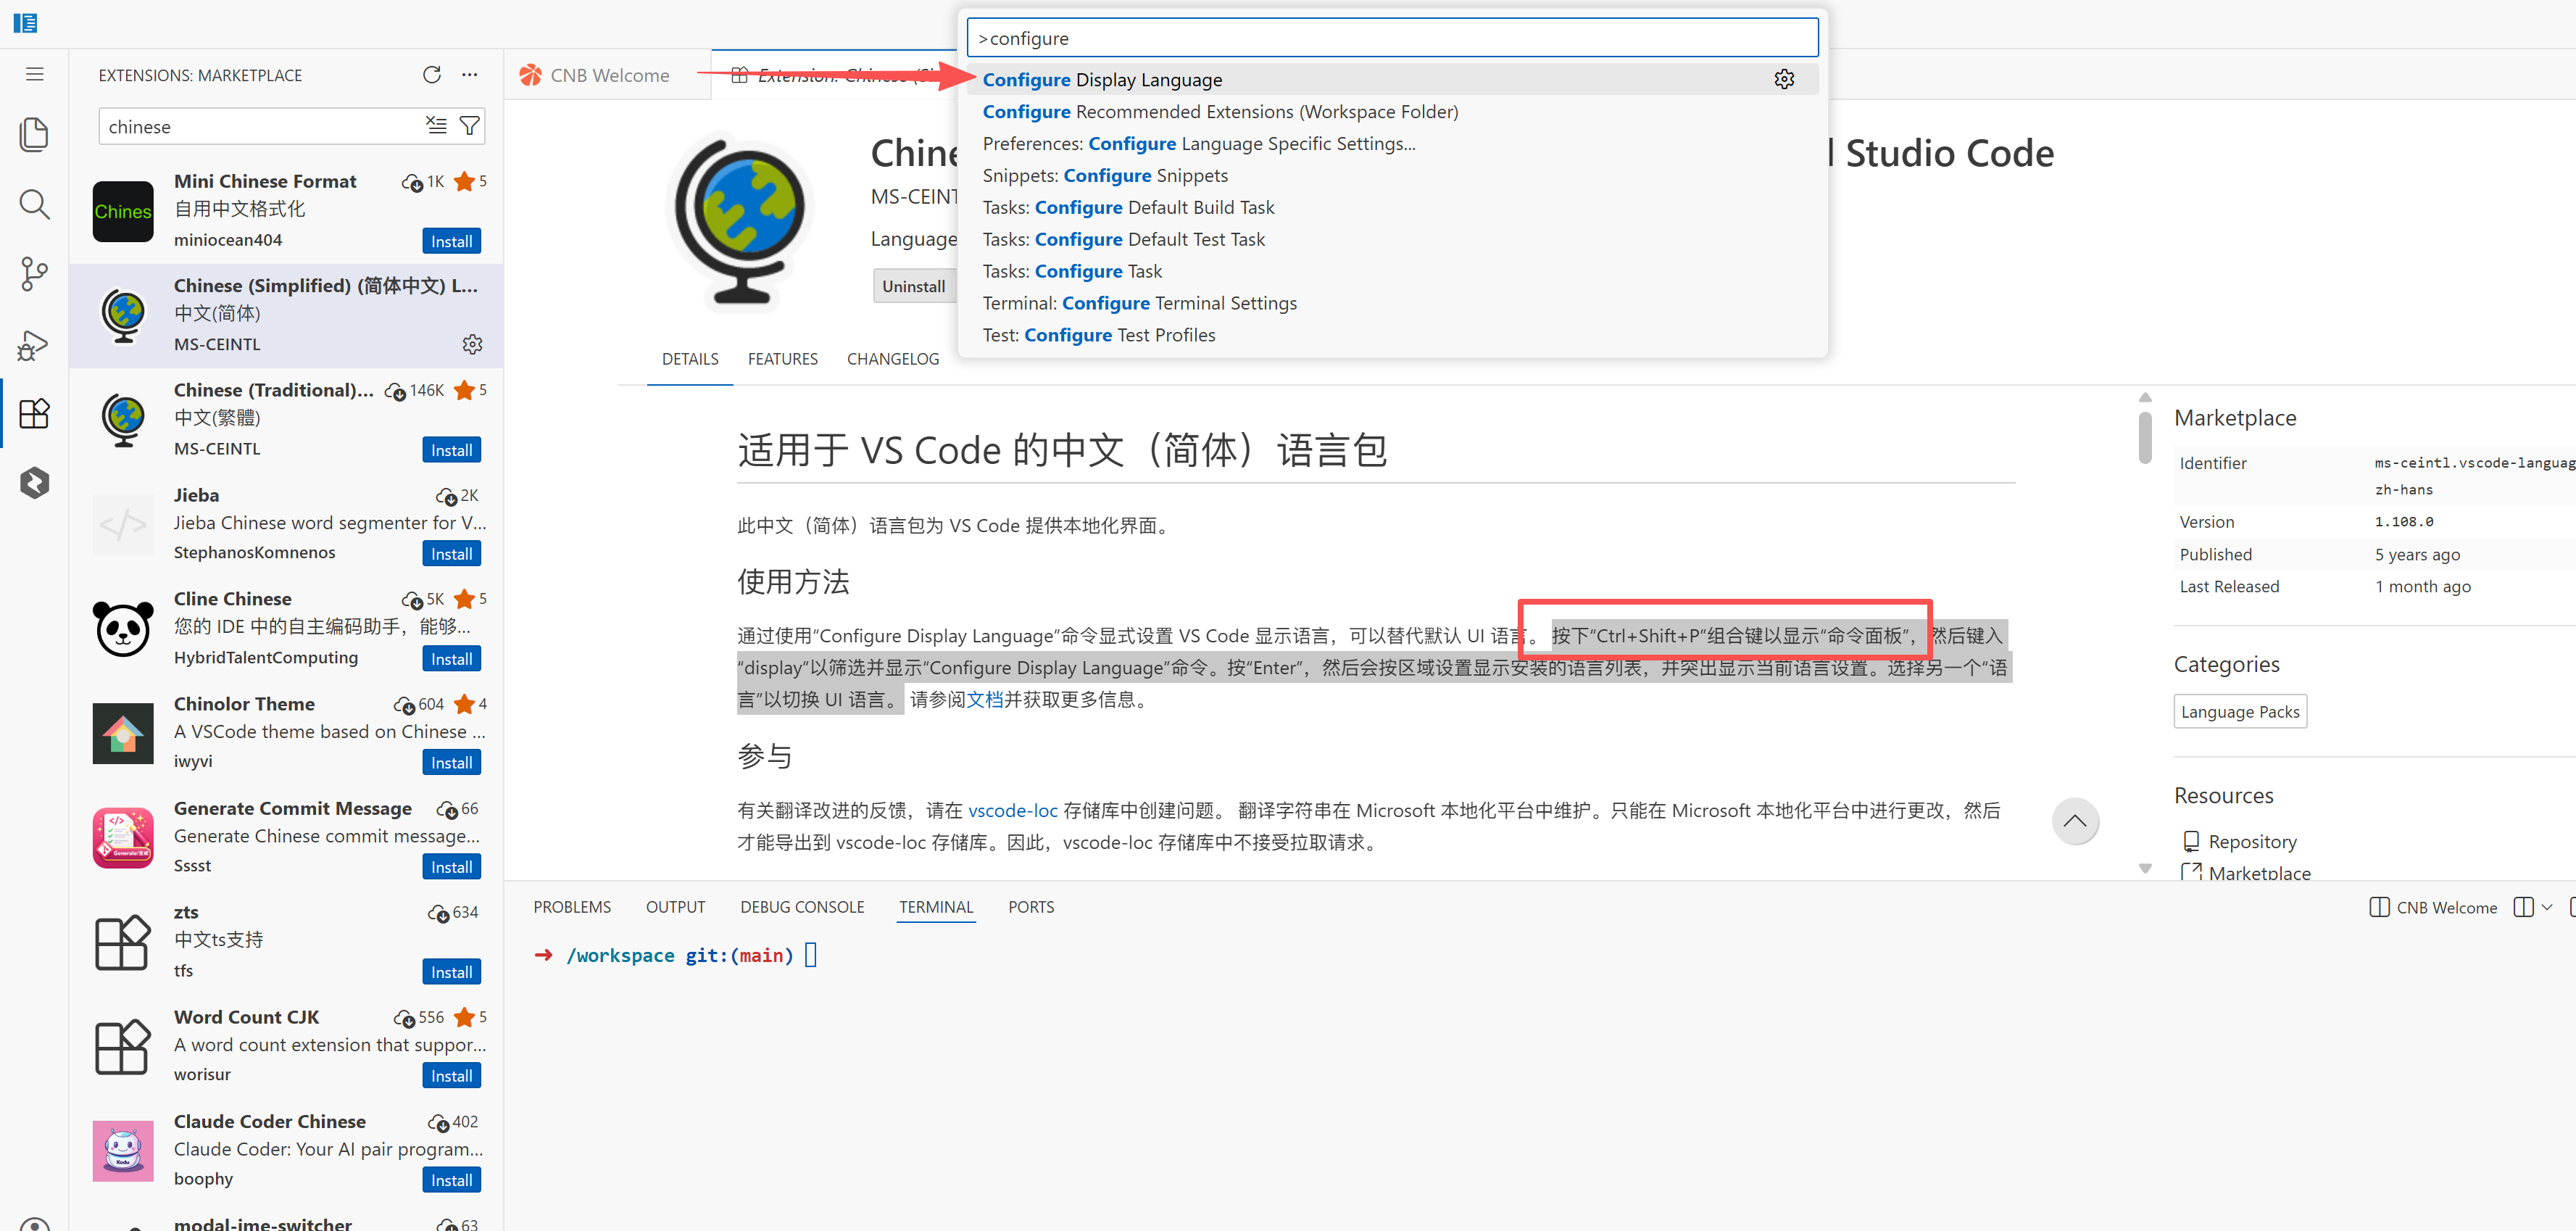
Click the Extensions button in the sidebar and install the Chinese language pack:
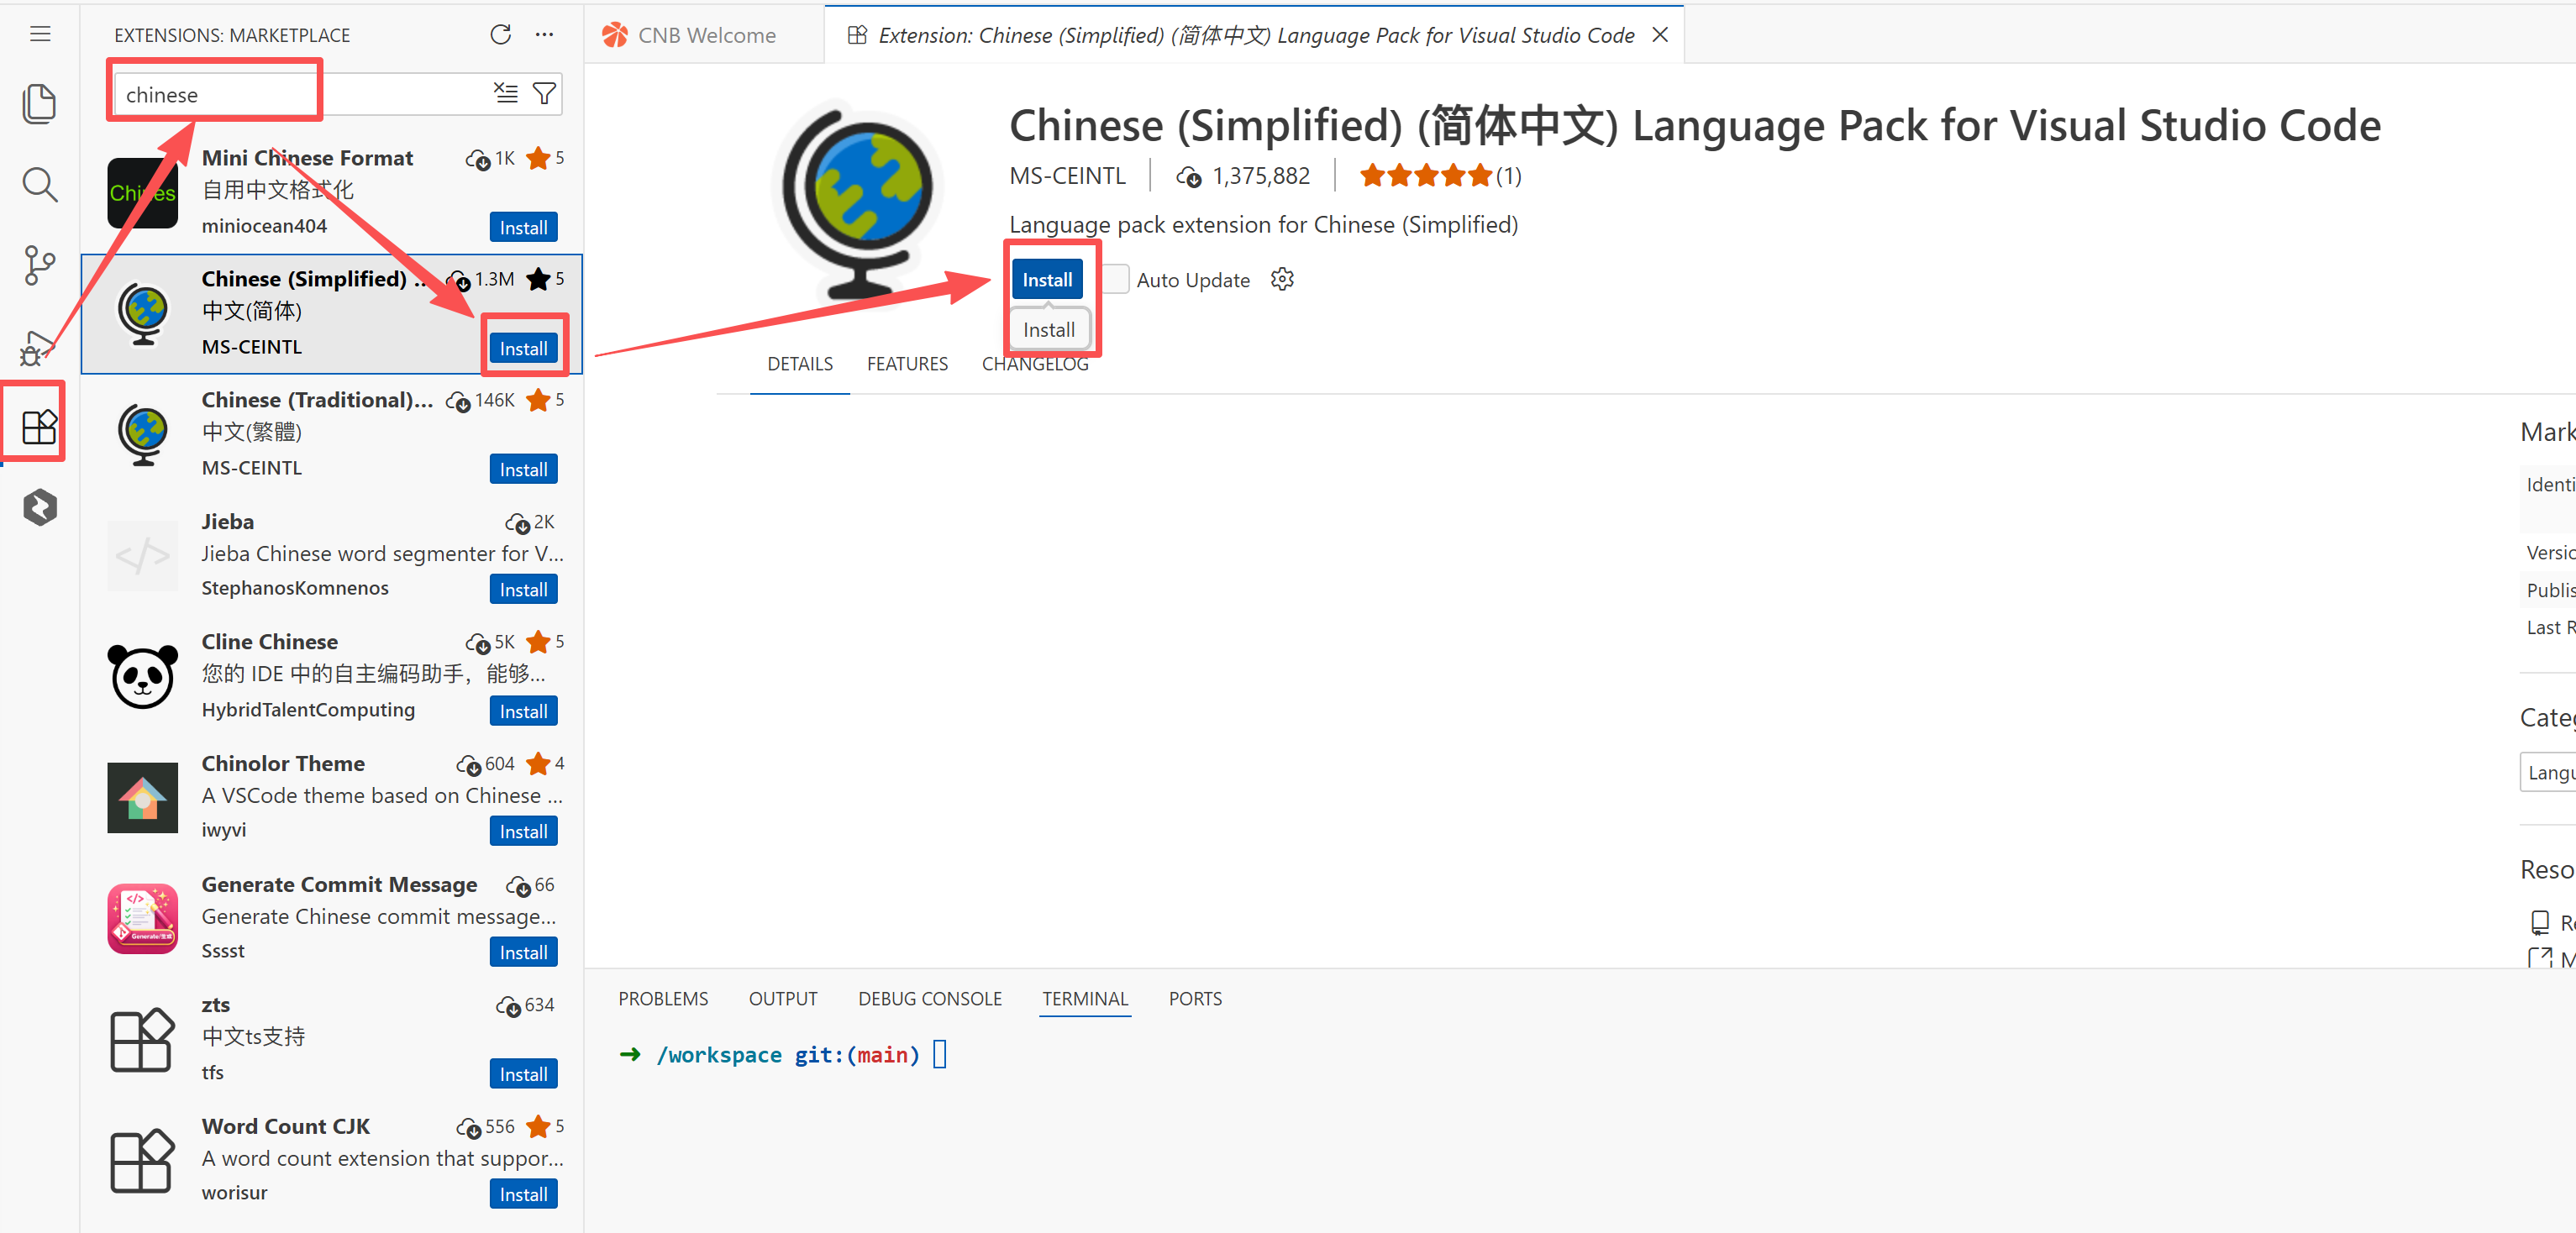
Press Ctrl+Shift+P to open the "Command Palette", then type display to filter and show the "Configure Display Language" command, and press Enter:
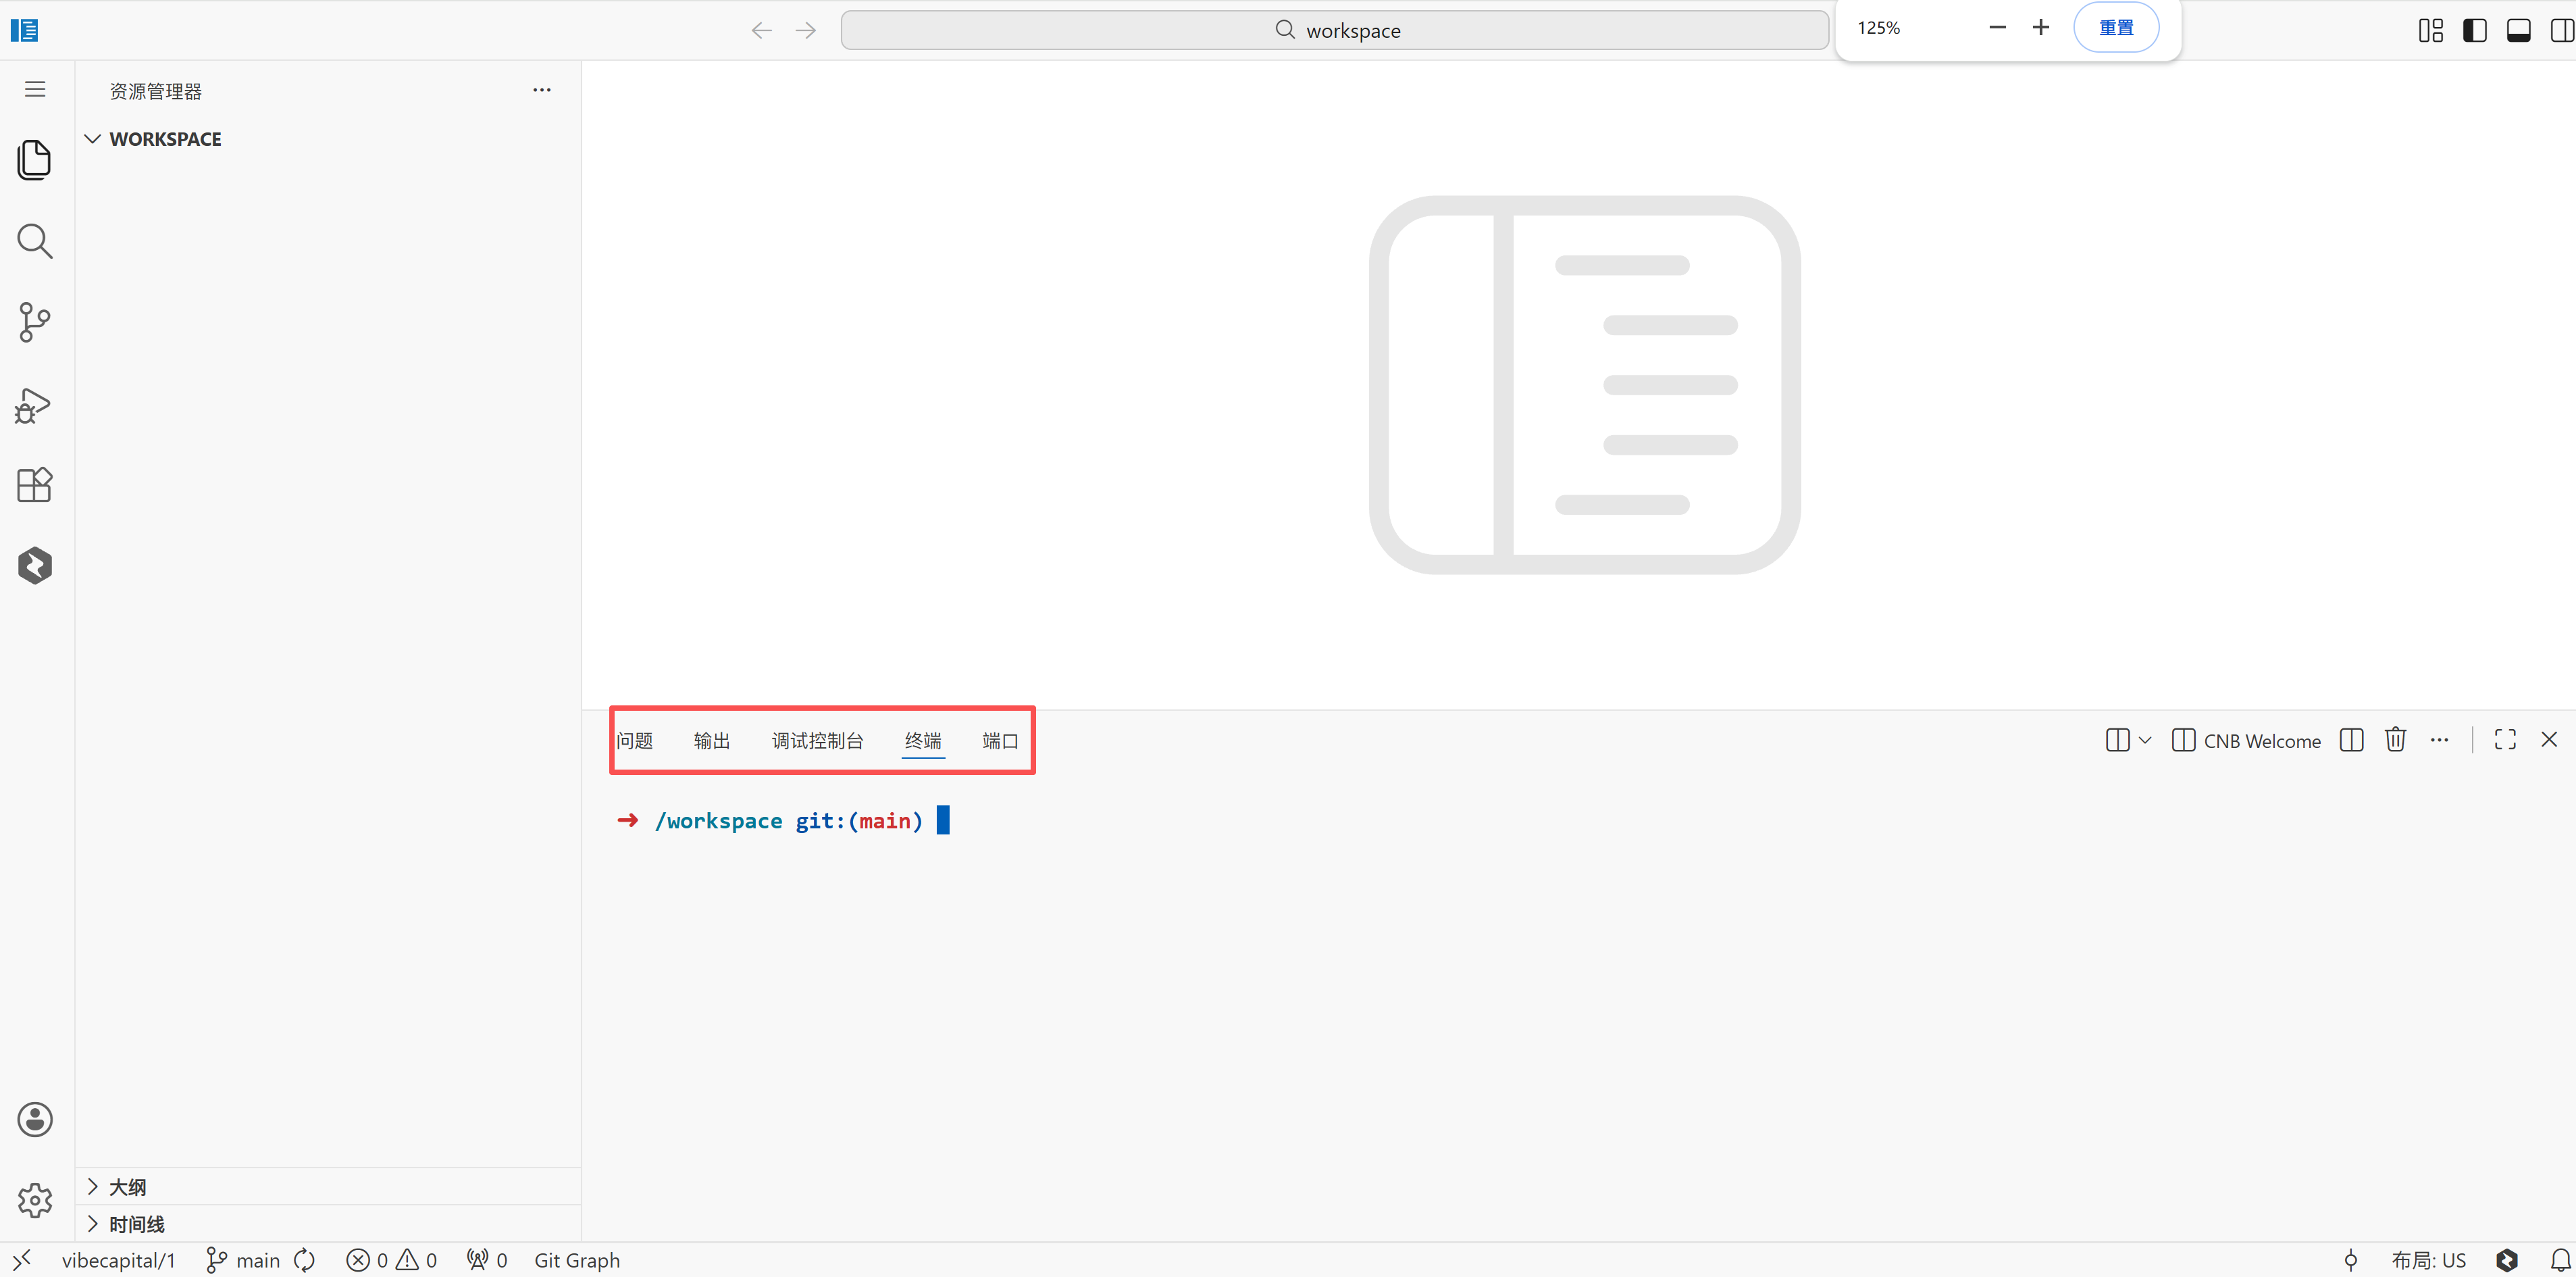
Select "Language" to switch the UI language:

Select Chinese and confirm. After the automatic restart, the interface will switch to Chinese:
2. Migrate an Existing Local Project
If you already have a local project, you can migrate it to CNB in one click:
cnb-init-from https://your-repo-url.git3. What Is an Access Token?
An access token is like your "digital key" and is used for:
- Cloning code from a remote repository
- Pushing code to a repository
- Accessing the artifact repository
How to get it: After logging in, go to the Access Token page and create one.
For more information, see the CNB Official Documentation